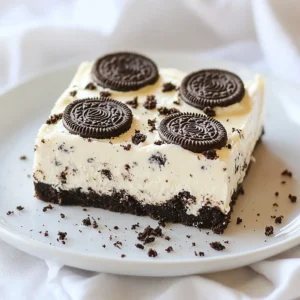
No-Bake Oreo Cheesecake Bars
Delicious and creamy cheesecake bars made with Oreo cookies, perfect for a no-bake dessert.
Ingredients
- 24 cookies Oreo cookies, finely crushed
- 1/4 cup unsalted butter, melted
- 16 oz cream cheese, softened to room temperature
- 1 cup powdered sugar, sifted
- 1 teaspoon pure vanilla extract
- 1 cup heavy whipping cream, cold
- 10 cookies Oreo cookies, roughly chopped
- to taste additional crushed Oreo cookies, for topping
Instructions
- Prepare the crust: In a medium mixing bowl, combine the finely crushed Oreo cookies and melted butter. Mix thoroughly until all cookie crumbs are evenly coated with butter.
- Press into pan: Line a 9x9 inch baking dish with parchment paper, allowing some overhang for easy removal later. Pour the Oreo mixture into the lined pan and firmly press it down using the back of a measuring cup or your hands to ensure an even crust. Place the dish in the refrigerator to set for at least 15 minutes.
- Make the filling: In a large mixing bowl, use an electric mixer to beat the softened cream cheese on medium speed until it becomes smooth and creamy. Gradually add the powdered sugar and vanilla extract, continuing to mix until the mixture is well combined and fluffy.
- Whip the cream: In a separate chilled bowl, whip the heavy cream on high speed until stiff peaks form. Carefully fold the whipped cream into the cream cheese mixture using a spatula, gently incorporating it until fully blended. Then, fold in the roughly chopped Oreo cookies for added texture.
- Assemble the bars: Once the crust has chilled, pour the creamy cheesecake filling over the set Oreo crust. Use a spatula to spread the mixture evenly and smooth the top with gentle strokes. Sprinkle additional crushed Oreo cookies generously over the surface for an appealing finish.
- Chill: Cover the baking dish tightly with plastic wrap and refrigerate for at least 4 hours, or preferably overnight. This allows the cheesecake to firm up optimally for slicing.
- Slice and serve: Once set, lift the cheesecake out of the pan using the parchment overhang for easy access. Use a sharp knife dipped in warm water to slice into neat bars for serving.
Notes
For an eye-catching presentation, arrange the cheesecake bars on a decorative platter and scatter extra crushed Oreo cookies around them as a charming garnish. For an extra indulgence, consider drizzling chocolate syrup or caramel sauce over the top before serving!