Craving a warm, cheesy bite that's easy to whip up? You're in the right place! My Brunch Cheddar and Chive Egg Muffins are the perfect mix of flavor and fun for your weekend spread. With simple ingredients and easy steps, you'll have a delicious treat to share or savor solo. Let’s dive into this delightful recipe that will brighten your brunch table and maybe even start a new tradition!
Why I Love This Recipe
- Quick and Easy: This recipe comes together in just 30 minutes, making it perfect for busy mornings or last-minute brunch plans.
- Customizable: Add your favorite vegetables or swap out the cheese to suit your taste, ensuring every batch is unique!
- Meal Prep Friendly: These muffins can be made ahead of time and stored in the fridge or freezer for a quick breakfast option throughout the week.
- Deliciously Savory: The combination of sharp cheddar and fresh chives creates a delightful flavor that’s sure to please everyone at the table.
Ingredients
List of Ingredients Required
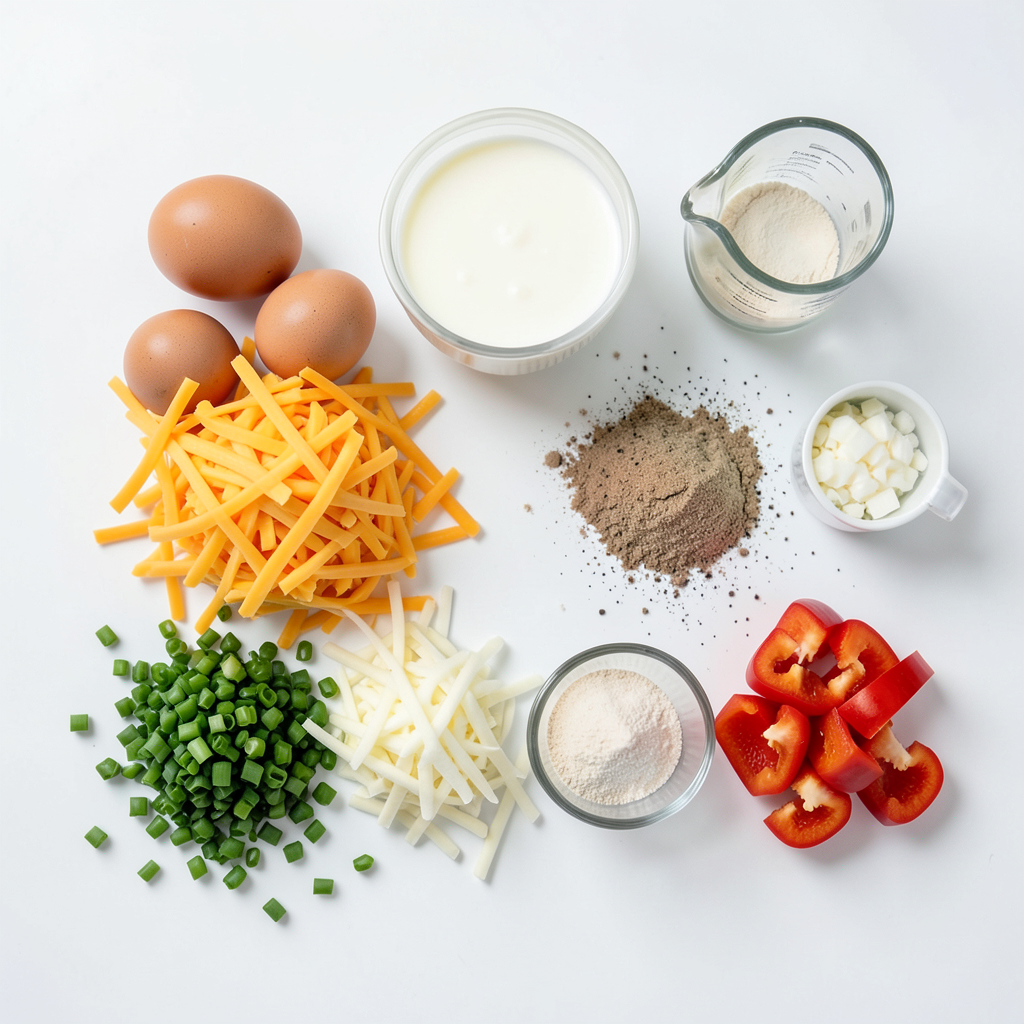
To make Brunch Cheddar and Chive Egg Muffins, you will need:
- 6 large eggs
- 1 cup sharp cheddar cheese, freshly shredded
- 1/2 cup milk (whole or low-fat)
- 1/4 cup fresh chives, finely chopped
- 1/2 teaspoon garlic powder
- 1/2 teaspoon onion powder
- Salt and freshly cracked black pepper, to taste
- 1/2 cup bell peppers, diced small (optional for extra flavor)
- Cooking spray or a light drizzle of oil for greasing
Optional Add-ins for Flavor
You can enhance these muffins with various add-ins. Here are some tasty options:
- Spinach or kale for a green boost
- Cooked bacon or sausage for a hearty touch
- Diced tomatoes for added color and taste
- Feta cheese for a tangy twist
Feel free to mix and match! The goal is to create flavors you love.
Tips for Selecting Fresh Ingredients
Fresh ingredients make a big difference in taste. Here are some tips:
- Eggs: Look for eggs with a clean shell and a recent sell-by date.
- Cheddar Cheese: Choose cheese that is sharp and smells fresh. Avoid pre-shredded cheese if possible.
- Chives: Pick chives that are bright green and firm. Avoid any wilted or yellowing herbs.
- Bell Peppers: Select vibrant peppers with smooth skin. They should feel firm and heavy for their size.
Using fresh ingredients will elevate your muffins and make them even more delicious!
Step-by-Step Instructions
Prepping the Oven and Muffin Tin
First, set your oven to 375°F (190°C). This temperature makes sure the muffins cook just right. Next, take a standard muffin tin and grease it well. You can use cooking spray or a small amount of oil. This step keeps the muffins from sticking.
Whisking Eggs and Mixing Ingredients
In a large mixing bowl, crack all 6 eggs. Whisk them until they are fluffy and well combined. This part is fun! Next, add in the milk, garlic powder, onion powder, salt, and black pepper. Mix until everything is smooth. Now, gently fold in the shredded cheddar cheese and chopped chives. If you want a pop of flavor, add diced bell peppers too. Make sure all the ingredients mix evenly.
Filling and Baking the Muffins
Carefully pour the egg mixture into each muffin cup. Fill them about three-quarters full. This way, they have room to rise. Place the muffin tin in your preheated oven. Bake for 18-20 minutes. You’ll know they are ready when they look lightly golden on top.
- Testing for Doneness: To check if they are done, insert a toothpick into the center of a muffin. If it comes out clean, they are perfect!
Let the muffins cool in the pan for a few minutes. Then, gently pry them out and serve them warm or at room temperature. Enjoy your tasty creations!
Tips & Tricks
Best Practices for Fluffy Muffins
To get the fluffiest muffins, start with fresh eggs. Whisk them well until they are light and airy. This step is key. Use a large mixing bowl to give you space to mix. When you fold in the cheese and chives, do it gently. Overmixing will make the muffins dense. Also, don’t skip greasing the muffin tin well; this helps them pop out easily.
Making Ahead of Time
You can make these muffins ahead of time. Bake them, let them cool, and store them in the fridge. They stay good for about 3 days. You can also freeze them. Just wrap each muffin in plastic wrap and put them in a freezer bag. They will keep for a month. When you are ready to eat, just reheat them in the oven or microwave. This makes brunch easy!
Serving Suggestions and Garnishing Ideas
Serve your muffins warm for the best taste. You can place them on a rustic wooden platter for a nice look. Garnish with extra chopped chives on top. This adds color and flavor. Pair them with fresh fruit or a light salad for a fun brunch spread. You can also serve them with a side of salsa or hot sauce for a kick. Enjoy your tasty creation!
Pro Tips
- Use Fresh Ingredients: Always opt for fresh eggs and herbs to enhance the flavor of your muffins. Fresh chives can make a significant difference in taste.
- Experiment with Add-ins: Feel free to add other vegetables like spinach or mushrooms. This not only adds flavor but also increases the nutritional value.
- Storage Tips: These muffins can be stored in an airtight container in the refrigerator for up to 4 days. Reheat in the microwave for a quick breakfast!
- Perfect Portion Control: Using a muffin tin allows for easy portioning. This makes it convenient for meal prepping and controlling serving sizes.
Variations
Cheddar and Chive Combination Ideas
You can change up this recipe easily. Try mixing different cheeses with the chives. For a creamier taste, use gouda or creamy feta. You can also blend in some crumbled bacon or ham for a savory twist. If you want a kick, add some diced jalapeños or a dash of hot sauce.
Herb and Vegetable Options
Fresh herbs can brighten your muffins. Try adding parsley, basil, or dill for new flavors. You can also toss in chopped spinach or kale for extra nutrients. Diced tomatoes or zucchini can add moisture and taste. Just make sure to chop them small, so they mix well with the eggs.
Dietary Modifications (e.g., Gluten-Free)
This recipe is simple to modify for different diets. To make it gluten-free, ensure all ingredients are certified gluten-free. The muffins are already gluten-free since they use no flour. For a dairy-free version, swap the milk with almond or oat milk and use dairy-free cheese. You can even try flax eggs for an egg-free option.
Storage Info
Storing Leftover Muffins
To store leftover muffins, let them cool completely. Place them in an airtight container. You can keep them in the fridge for up to five days. If you want them to last longer, consider freezing them.
Reheating Instructions
To reheat your muffins, preheat the oven to 350°F (175°C). Place the muffins on a baking sheet. Heat them for about 10 minutes, or until warm. You can also use a microwave. Heat them for 30 seconds to 1 minute, checking often to avoid overheating.
Freezing for Future Use
Freezing muffins is simple. Wrap each muffin tightly in plastic wrap. Then, place them in a freezer bag. You can freeze them for up to three months. When you're ready to eat, thaw them overnight in the fridge. Reheat them as described above for a fresh taste.
FAQs
Can I use different types of cheese?
Yes, you can use other cheeses. Try mozzarella, feta, or pepper jack. Each cheese gives a new taste. Mixing cheeses adds fun flavors. Just keep the same amount as the sharp cheddar.
What can I substitute for eggs?
If you need an egg substitute, use flaxseed meal or applesauce. For every egg, mix 1 tablespoon of flaxseed with 2.5 tablespoons of water. Let it sit for 5 minutes before using. You can also use 1/4 cup of applesauce for each egg.
How long do these muffins last in the fridge?
These muffins stay fresh in the fridge for up to 5 days. Store them in a sealed container. To reheat, pop them in the microwave for 20-30 seconds. Enjoy them warm for a tasty bite!
You learned the key ingredients and steps to make great muffins. I covered optional add-ins for extra flavor and tips for choosing fresh ingredients. We explored best practices for fluffy treats and variations for different diets. Remember, proper storage helps keep your muffins fresh for longer. Use this guide to create delicious recipes you can share and enjoy! Happy baking!