Welcome to a delicious brunch treat that will impress your guests! These Brunch Cream Cheese and Herb Stuffed Crepes are rich, savory, and easy to make. You'll learn how to whip up soft crepes filled with creamy cheese and fresh herbs. Whether you’re hosting or enjoying a quiet morning, this recipe adds flair to your meal. Let’s dive into the delightful world of crepes and discover how to make this tasty dish together!
Why I Love This Recipe
- Delicious Flavor Combination: The creamy herb filling perfectly complements the light and delicate crepes, making each bite a burst of freshness.
- Versatile Dish: These stuffed crepes can be served for brunch, lunch, or even as a light dinner, adapting to any occasion.
- Easy to Customize: Feel free to mix in your favorite herbs or add additional fillings, such as smoked salmon or sautéed vegetables, for a personal touch.
- Impressive Presentation: The vibrant colors of the fresh herbs and the elegant shape of the crepes make for a stunning dish that’s sure to impress guests.
Ingredients
Crepe Batter Ingredients
- 1 cup all-purpose flour
- 2 large eggs
- 1 ½ cups milk
- 2 tablespoons melted butter
- Pinch of salt
Cream Cheese Herb Filling Ingredients
- 8 oz cream cheese, softened
- ¼ cup fresh chives, finely chopped
- ¼ cup fresh parsley, finely chopped
- 1 tablespoon fresh dill, finely chopped
- 1 tablespoon freshly squeezed lemon juice
- Salt and black pepper to taste
Cooking Essentials
- Olive oil or cooking spray (for greasing the skillet)
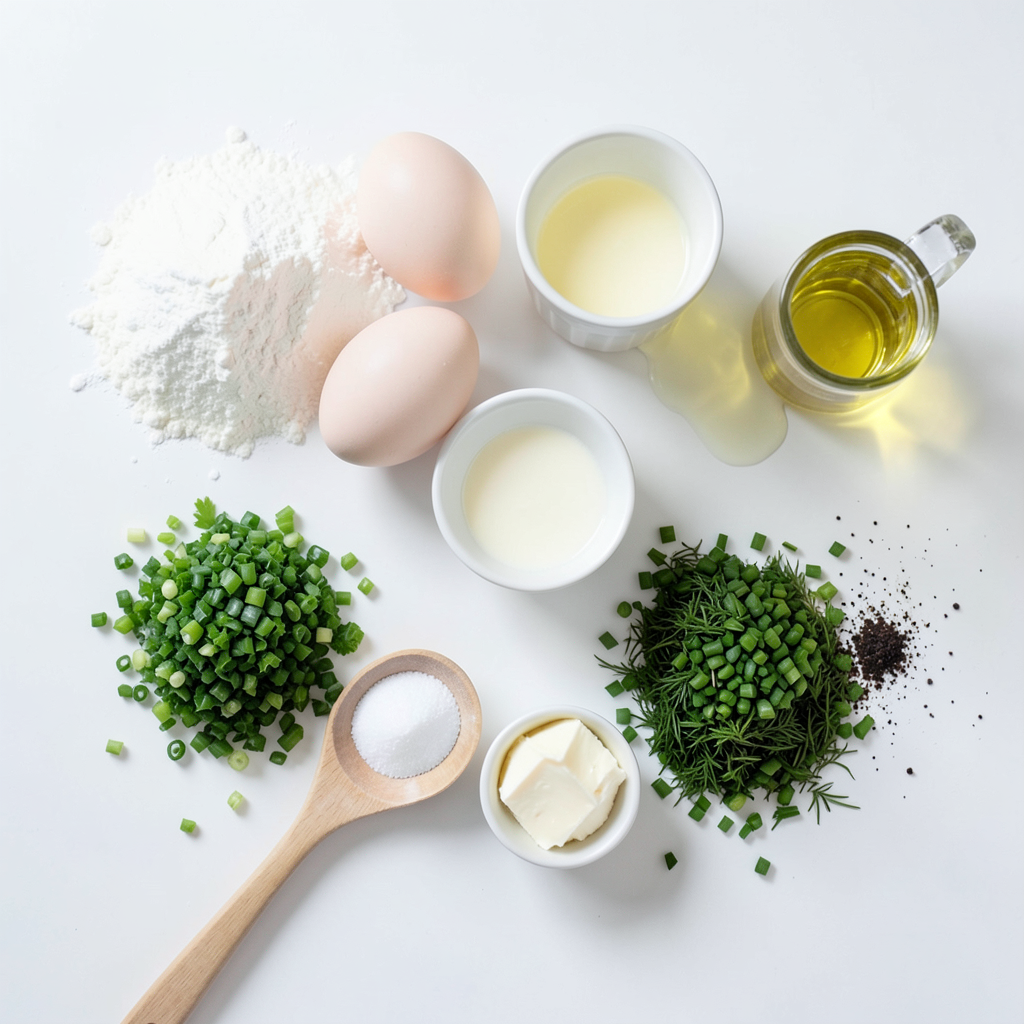
When making these brunch cream cheese and herb stuffed crepes, it is vital to gather all your ingredients first. This ensures a smooth cooking process. The crepe batter starts with simple ingredients: flour, eggs, milk, melted butter, and a pinch of salt. This mix creates a light and thin pancake that will cradle your filling.
Next, the filling brings flavor. You need cream cheese, fresh herbs like chives, parsley, and dill, plus a splash of lemon juice. This mix gives your crepes a bright and creamy taste. Season it with salt and black pepper to get it just right.
Lastly, you will need a little olive oil or cooking spray to grease your skillet. This step keeps the crepes from sticking and helps them brown nicely. By preparing these ingredients, you set up for a delightful brunch experience.
Step-by-Step Instructions
Preparing the Crepe Batter
First, we need to prepare the crepe batter. Start by sifting 1 cup of all-purpose flour into a large mixing bowl. Add a pinch of salt for flavor. Next, create a well in the center of the flour. Crack 2 large eggs into the well. Gradually mix in 1 ½ cups of milk and 2 tablespoons of melted butter using a whisk. Keep mixing until the batter is smooth and free of lumps. This step is crucial for a light texture. Cover the bowl with a kitchen towel or plastic wrap and let it rest for 30 minutes. Resting helps the batter develop the best texture.
Making the Herb Filling
While the batter rests, let’s make the herb filling. Take 8 oz of softened cream cheese and place it in a separate bowl. Add ¼ cup of finely chopped chives, ¼ cup of finely chopped parsley, 1 tablespoon of finely chopped dill, and 1 tablespoon of freshly squeezed lemon juice. Season this mixture with salt and black pepper to taste. Use a fork or spatula to mix everything well. You want a smooth and creamy filling that’s easy to stuff into the crepes.
Cooking the Crepes
Now it’s time to cook the crepes. Preheat a non-stick skillet over medium heat. Lightly grease the skillet with olive oil or cooking spray to prevent sticking. Pour about ¼ cup of crepe batter into the skillet. Immediately tilt the pan in different directions to spread the batter evenly. Cook the crepe for 1-2 minutes until the edges lift and the bottom turns a light golden color. Carefully flip the crepe and cook the other side for another minute. Once done, remove the crepe from the skillet and keep it warm. Repeat this with the remaining batter, greasing the skillet as needed.
Stuffing the Crepes
Once all the crepes are cooked, it’s time to stuff them. Take one crepe and place a generous spoonful of the herb filling in the center. Fold the crepe in half or roll it up tightly around the filling. This way, the filling stays inside while you enjoy your meal. Repeat this process with the rest of the crepes and filling.
Serving and Garnishing
Now that your crepes are stuffed and ready, it’s time to serve them. Arrange the crepes neatly on a plate. For a beautiful touch, sprinkle extra fresh herbs on top. A drizzle of olive oil can also add flavor and a nice shine. You can serve the crepes warm for the best taste.
Tips & Tricks
Making Perfect Crepes
To make great crepes, resting the batter is key. Letting it rest for 30 minutes helps the flour absorb the liquid. This gives the crepes a smooth, light texture. If you skip this step, your crepes may turn out tough.
Adjusting the cooking temperature is also important. Start with medium heat to get a nice golden color. If your crepes brown too quickly, lower the heat. This way, you can cook them evenly without burning.
Enhancing Flavor
You can boost the flavor of your crepes by trying different herbs or spices. For example, mix in basil for a fresh twist or add garlic powder for a savory kick.
Garnishes can also elevate your dish. Sprinkle more fresh herbs on top for color. You can drizzle olive oil or even a touch of balsamic glaze for extra flavor. These small changes can make your crepes stand out.
Cooking FAQs
How do you prevent crepes from sticking? Use a well-greased skillet. A non-stick pan works best, but you can also use olive oil or cooking spray. Make sure to grease the pan before each crepe.
What are the best practices for reheating crepes? Use a skillet over low heat. This method warms them gently without making them chewy. Cover the crepes with a lid to keep them moist while reheating.
Pro Tips
- Resting the Batter: Allowing the crepe batter to rest for at least 30 minutes helps to relax the gluten, resulting in more tender and delicate crepes.
- Perfectly Thin Crepes: Use a non-stick skillet and pour just enough batter to cover the bottom in a thin layer. Tilt the pan quickly to spread the batter evenly.
- Customize Your Filling: Feel free to add your favorite herbs or spices to the cream cheese filling for a personalized touch. Try adding garlic powder or a hint of nutmeg for extra flavor.
- Keep Crepes Warm: As you cook the crepes, keep them stacked on a plate covered with a kitchen towel to maintain warmth and prevent them from drying out.
Variations
Sweet Variations
You can turn your crepes into a sweet treat. Try adding fresh fruit like strawberries or bananas. A drizzle of chocolate sauce adds a nice touch too. You can also sprinkle some powdered sugar on top for extra sweetness. Nutella works great as a filling. Just spread it inside the crepe and roll it up. If you want, add whipped cream for a rich flavor.
Savory Options
For savory crepes, the options are endless. Smoked salmon and cream cheese make a classic combo. Add capers and red onion for more flavor. Spinach and feta cheese also work well together. You can mix in sautéed mushrooms for an earthy taste. Try roasted red peppers and goat cheese for something different. Just be creative with your fillings!
Dietary Modifications
If you're looking for gluten-free options, use a gluten-free flour blend. You can also substitute the eggs with flaxseed meal and water for a vegan batter. For the filling, swap cream cheese with a plant-based cheese alternative. This way, everyone can enjoy these delicious crepes without worry. Don't hesitate to experiment with flavors that suit your diet!
Storage Info
Storing Cooked Crepes
To keep your cooked crepes fresh, stack them with parchment paper between each one. This prevents sticking. Place the stack in an airtight container. You can refrigerate them for up to three days. If you want to save them longer, freeze the crepes. Wrap them tightly in plastic wrap, then place them in a freezer bag. They can last up to two months in the freezer. When you want to use them, just thaw in the fridge overnight.
Storing the Filling
To keep the cream cheese filling fresh, transfer it to an airtight container. Make sure the container is sealed well. You can store it in the fridge for up to four days. If you plan to save it longer, consider freezing the filling. Place it in a freezer-safe container. It can last up to two months. When you're ready to use it, thaw in the fridge and give it a good stir before stuffing your crepes.
Reheating Instructions
Reheating your crepes properly keeps them soft and tasty. For the best results, use a skillet. Heat the skillet over low heat. Place a crepe in the skillet for about 30 seconds on each side. This warms it through without making it dry. If you are reheating many crepes, you can use the oven. Preheat the oven to 350°F (175°C). Place the crepes on a baking sheet, cover with foil, and heat for about 10 minutes. This method works well for keeping them warm before serving.
FAQs
What can I serve with brunch stuffed crepes?
You can serve many tasty sides with brunch stuffed crepes. Here are some ideas:
- Fresh fruit salad
- Crispy bacon or sausage
- Lightly dressed mixed greens
- Sweet maple syrup for drizzling
- Freshly squeezed orange juice
- Coffee or herbal tea
These options add flavor and balance to your meal.
How do I know when my crepes are done?
Look for these signs to know when your crepes are ready:
- The edges lift easily from the pan.
- The bottom is golden brown, not dark.
- The top looks slightly dry, with small bubbles.
These visual cues help ensure your crepes are cooked perfectly.
Can I make the filling ahead of time?
Yes, making the filling ahead saves time! Here are some tips:
- Store the filling in an airtight container.
- Keep it in the fridge for up to two days.
- Stir well before using to regain creaminess.
This way, you can quickly assemble your crepes when you're ready to serve.
You learned how to make delicious stuffed crepes. We covered the key ingredients, like flour and cream cheese, and detailed each cooking step. Properly resting the batter is crucial for great texture. Remember to try sweet or savory variations to keep it exciting. With these tips, you can create wonderful meals for any occasion. Enjoy your cooking and share your tasty results with others!