Are you ready to impress at dinner time? Sesame crusted seared Ahi tuna is a dish that combines rich flavor and stunning presentation. With just a few simple ingredients, you can create a meal that feels like fine dining. I’ll guide you through each step, from marinating the tuna to plating it with delicious garnishes. If you want to elevate your cooking game, keep reading to uncover my favorite tips and tricks!
Why I Love This Recipe
- Quick and Easy: This recipe comes together in just 15 minutes, making it perfect for a weeknight dinner or a last-minute meal.
- Healthy and Delicious: Ahi tuna is a lean source of protein, and the sesame seeds add healthy fats and a delightful crunch.
- Impressive Presentation: With its vibrant colors and elegant plating, this dish is sure to impress guests at any dinner party.
- Customizable Flavor: The addition of wasabi and lime allows you to adjust the heat and brightness to your personal taste.
Ingredients
Main Ingredients
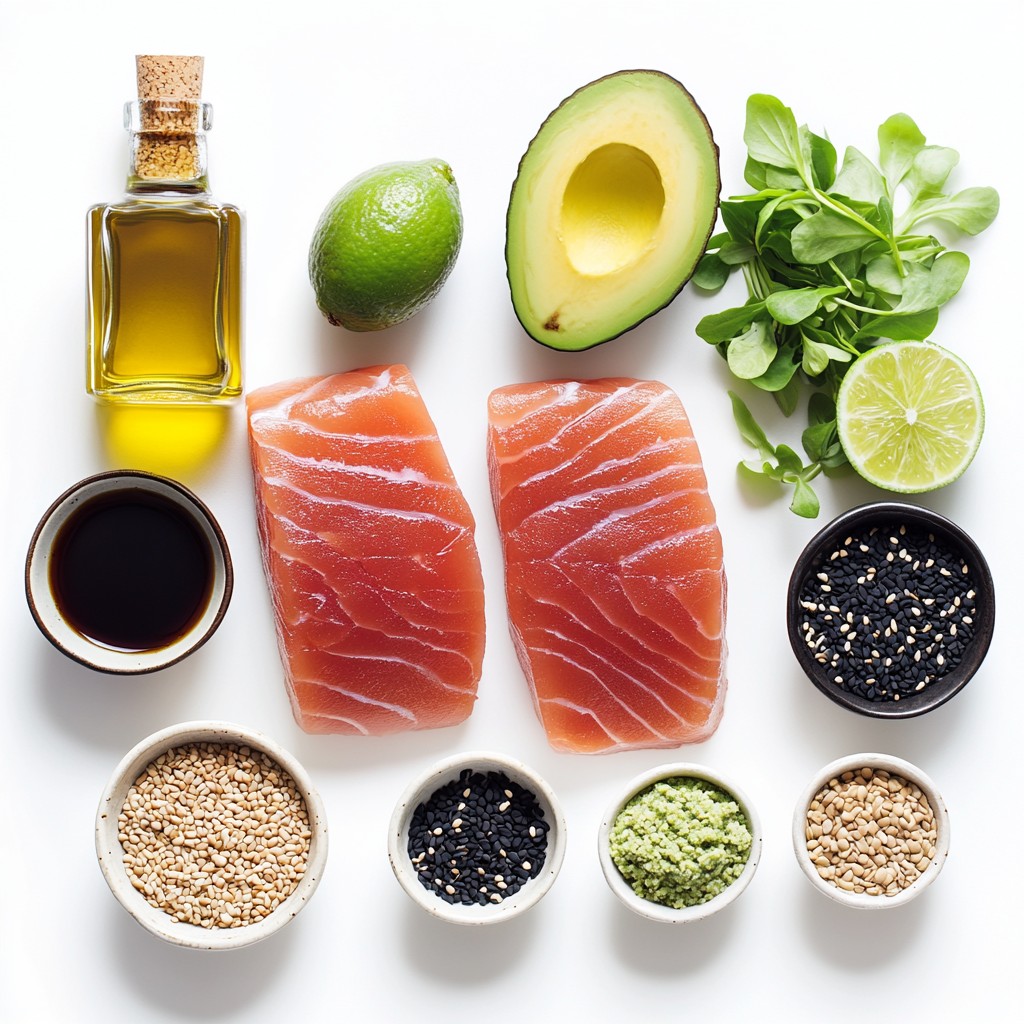
- 2 Ahi tuna steaks (approximately 6 oz each)
- 1/4 cup black sesame seeds
- 1/4 cup white sesame seeds
Marinade Ingredients
- 2 tablespoons soy sauce
- 1 tablespoon sesame oil
- 1 teaspoon freshly grated ginger
- 1 teaspoon wasabi paste (optional, for a spicy kick)
Garnishes
- 1 ripe avocado, sliced
- Microgreens or fresh cilantro leaves
- Lime wedges
These ingredients create a delightful dish. The Ahi tuna steaks are the star. They are rich and buttery. The sesame seeds add a crunchy texture. The marinade brings a savory depth. Soy sauce and sesame oil work well together. Fresh ginger gives a bright note. If you want spice, add wasabi.
For garnishing, sliced avocado adds creaminess. Microgreens or cilantro offer freshness. Lime wedges add a citrus pop. Each ingredient plays a key role. When combined, they create a dish that impresses.
Step-by-Step Instructions
Preparing the Tuna
Start by patting the Ahi tuna steaks dry with paper towels. This step helps the sesame seeds stick better. Lightly season both sides with salt and freshly ground pepper. Next, create a sesame seed mixture. In a shallow bowl, combine 1/4 cup of black sesame seeds and 1/4 cup of white sesame seeds. Mix them well to get a nice speckled look.
Marinating the Tuna
In a small bowl, whisk together 2 tablespoons of soy sauce, 1 tablespoon of sesame oil, and 1 teaspoon of freshly grated ginger. Make sure they blend together well. Now, brush this marinade evenly on both sides of your tuna steaks. This adds a lot of flavor.
Searing the Tuna
Heat a large skillet over medium-high heat. Add 2 tablespoons of vegetable oil. Wait until the oil shimmers; this shows it’s hot enough. Carefully place the sesame-crusted tuna steaks in the skillet. Sear for about 1-2 minutes on each side if you like it rare. Adjust the time if you want it cooked more, but be careful not to overcook it. This keeps the tuna moist and tender.
Plating the Dish
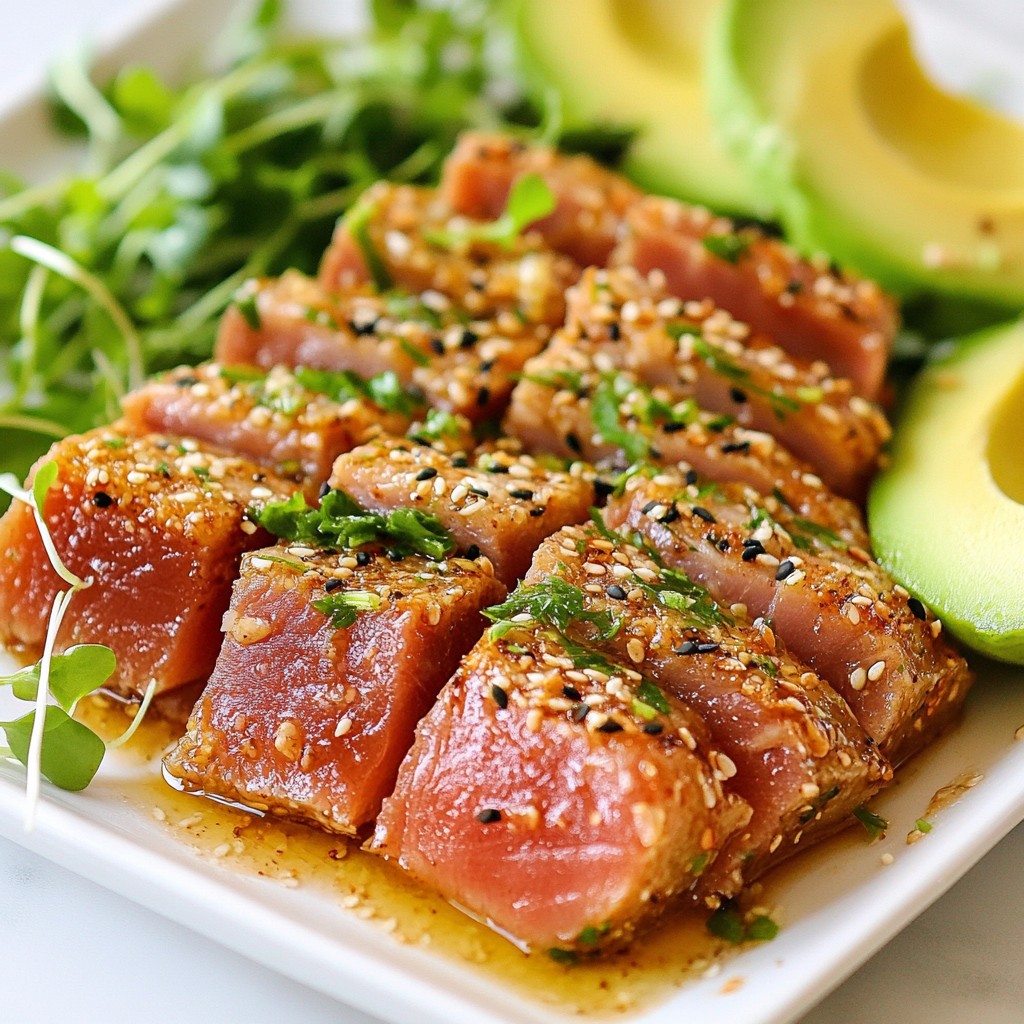
After searing, remove the tuna from the skillet and let it rest for about a minute. This lets the juices settle. Slice the tuna into thin strips at a slight angle for a nice presentation. For plating, arrange the sliced tuna in a fan shape on a plate. Garnish with sliced avocado and sprinkle microgreens or fresh cilantro on top. Serve with lime wedges on the side for a fresh citrus kick.
Tips & Tricks
Achieving Perfectly Seared Tuna
To cook Ahi tuna just right, timing is key. For rare tuna, sear for 1-2 minutes on each side. If you prefer it medium, aim for 2-3 minutes per side. Remember, the center should stay pink and moist. After cooking, let it rest for one minute. This allows the juices to spread, making each bite juicy and flavorful.
Best Cooking Equipment
Using the right skillet makes a big difference. I recommend a heavy cast-iron or non-stick skillet. These heat evenly and help create that perfect crust. Also, a good knife is important. A sharp knife will slice the tuna cleanly, keeping its beautiful shape. Aim for a knife that is around 6 to 8 inches long.
Enhancing Flavor
Want to take your dish to the next level? Consider adding a drizzle of ponzu or spicy mayo on top. You can also serve it with a side of pickled ginger for a zesty kick. For a complete meal, pair the tuna with a fresh salad or jasmine rice. This adds balance and makes your plate pop with color.
Pro Tips
- Freshness is Key: Always choose the freshest Ahi tuna you can find. Look for bright color and a clean ocean scent to ensure the best flavor and texture.
- Perfect Searing: Make sure your skillet is hot enough before adding the tuna. This will create a nice crust while keeping the inside tender and rare.
- Slice Like a Pro: Use a sharp knife to slice the tuna at a slight angle. This not only enhances presentation but also ensures each piece is tender and easy to eat.
- Customize Your Garnish: Feel free to add additional garnishes like radish slices or pickled ginger for extra flavor and visual appeal.
Variations
Different Tuna Preparations
You can switch up the crust on your tuna for new flavors. Instead of sesame seeds, try using panko bread crumbs. This gives a different crunch and taste. You can also mix herbs with the panko for a fresh twist. If you want a lighter option, grill or bake the tuna. Grilling adds a smoky flavor, while baking keeps it tender.
Side Dish Suggestions
To make your meal complete, pair the tuna with great sides. A fresh salad works well. Try a simple mix of greens, cucumber, and a light vinaigrette. You can also serve it with grains like quinoa or rice. These add texture and help soak up the flavors.
Dietary Modifications
For gluten-free needs, use gluten-free soy sauce. This keeps the dish safe while still being tasty. If you're looking for vegan or vegetarian options, consider using firm tofu. Coat it with the same sesame seeds and prepare it like the tuna. It’s a fun way to enjoy similar flavors and textures!
Storage Info
Storing Leftovers
To keep your sesame crusted seared Ahi tuna fresh, store it in the fridge. Place the leftovers in an airtight container. This keeps the fish from drying out and helps maintain its flavor. You should eat the leftovers within two days. After that, the quality may decline, and it can become unsafe.
Reheating Tips
When it comes to reheating, you want to keep it juicy. The best method is to use a skillet. Heat the skillet on low. Add a small amount of oil to keep the tuna moist. Gently warm the tuna for a few minutes on each side. This avoids a rubbery texture. You can also use a microwave, but cover the tuna with a damp paper towel. This helps keep moisture in. Remember, less heat and time are key to keeping it tender.
FAQs
How long do I sear Ahi tuna for rare?
To achieve a rare sear on Ahi tuna, I recommend cooking it for about 1-2 minutes on each side. This timing allows the outside to form a beautiful crust while keeping the inside tender and cool. Always watch carefully to avoid overcooking. Tuna is best enjoyed medium-rare, so timing is key for the perfect bite.
Can I use frozen Ahi tuna?
Yes, you can use frozen Ahi tuna. If you opt for frozen, just ensure to thaw it properly in the fridge overnight. This helps maintain its texture. Frozen tuna might lack the same freshness as fresh, but it can still taste great if cooked well. Just remember, always check for quality and avoid any fish that smells off.
What to serve with Sesame Crusted Seared Ahi Tuna?
There are many great side dishes to pair with this dish. Here are some popular options:
- Steamed rice: A simple white or brown rice complements the flavors.
- Quinoa salad: A light salad with veggies can add freshness.
- Roasted vegetables: Carrots, asparagus, or zucchini work well.
- Miso soup: A warm soup can enhance the Asian flavors.
- Sliced avocado: It adds creaminess and pairs nicely with tuna.
These sides not only enhance the meal but also add color and variety to your plate. Enjoy experimenting with different combinations!
This post detailed how to prepare a tasty sesame-crusted seared Ahi tuna dish. We covered the main ingredients, marinade, and garnishes. You learned step-by-step instructions for preparing, marinating, searing, and plating the tuna. I shared tips for perfect searing and suggested variations for different preferences. Lastly, I provided useful storage information and answered common FAQs. Enjoy trying this dish at home and impress your friends with your skills! Happy cooking!