Red Velvet Crinkle Cookies Delightfully Easy Bake

WANT TO SAVE THIS RECIPE?

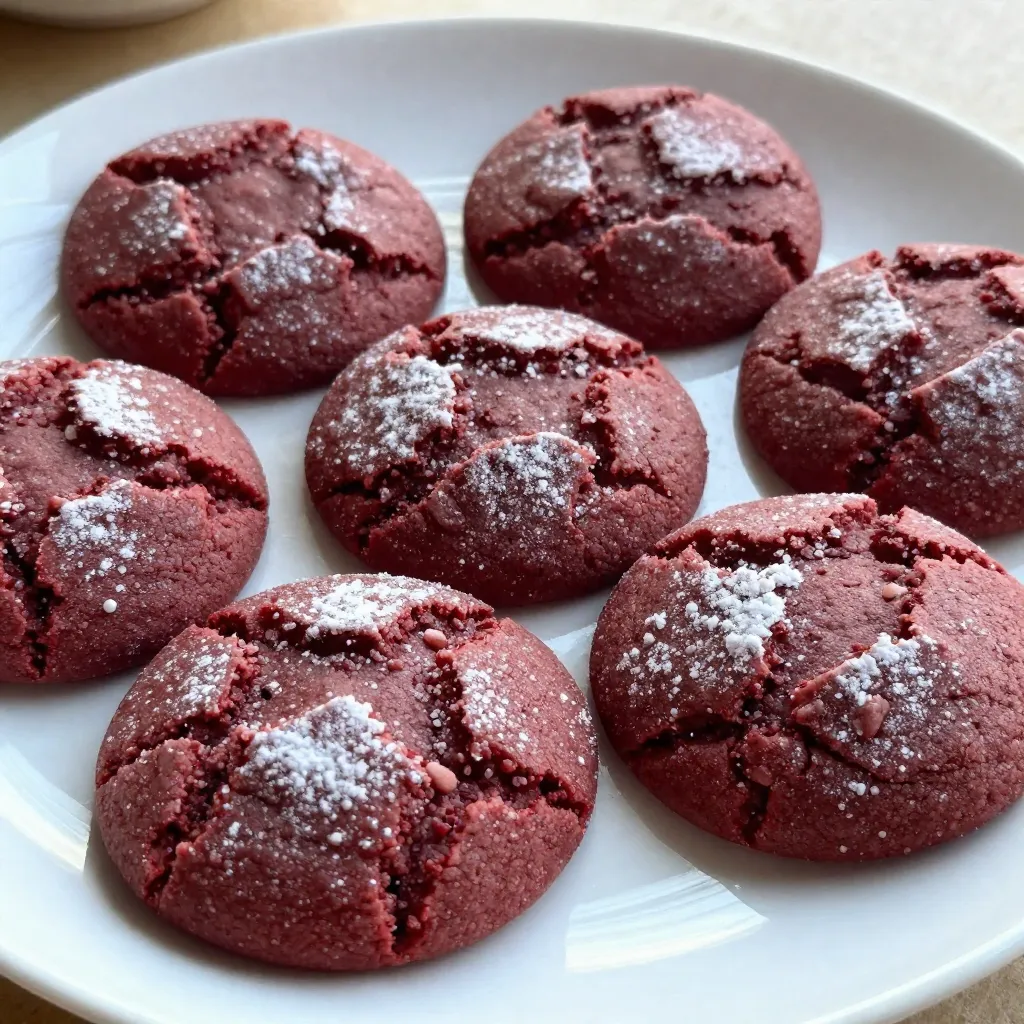
If you crave a sweet treat that’s both fun and easy, Red Velvet Crinkle Cookies are perfect for you! These soft, chewy cookies bring a beautiful red hue and a delightful cocoa flavor that’s hard to resist. In this guide, I’ll walk you through the simple steps to create these eye-catching delights. Get ready to impress your friends and family with your baking skills and enjoy every delicious bite!

- 1 1/4 cups all-purpose flour - 1/2 cup unsweetened cocoa powder - 1 teaspoon baking powder - 1/4 teaspoon salt - 1/2 cup unsalted butter, softened - 1 cup granulated sugar - 1 large egg - 1 tablespoon red food coloring - 1 teaspoon vanilla extract - 1/2 cup powdered sugar (for coating) Each ingredient plays a key role in making these cookies wonderful. - All-purpose flour gives structure to the cookie. - Cocoa powder adds a rich chocolate flavor. - Baking powder helps the cookies rise and become fluffy. - Salt enhances the other flavors. - Unsalted butter makes the cookies rich and adds moisture. - Granulated sugar sweetens the dough and helps with texture. - Egg binds the dough and adds moisture. - Red food coloring gives the cookies their signature look. - Vanilla extract adds a lovely aroma and flavor. - Powdered sugar creates a sweet, snowy coating. You can swap some ingredients if needed. - All-purpose flour can be replaced with a gluten-free blend. - Unsweetened cocoa powder might be swapped with Dutch-processed cocoa for a deeper flavor. - Granulated sugar can be substituted with brown sugar for a hint of molasses. - Egg can be replaced with a chia egg or flaxseed meal for a vegan option. - Butter can be replaced with coconut oil for dairy-free cookies. These substitutions can keep the fun alive in your baking! {{ingredient_image_2}} First, you need to preheat your oven to 350°F (175°C). This step is key for even baking. While the oven heats up, prepare your baking sheets. Line them with parchment paper. This makes it easy to remove the cookies later. In a medium bowl, sift together the dry ingredients. You will need: - 1 1/4 cups all-purpose flour - 1/2 cup unsweetened cocoa powder - 1 teaspoon baking powder - 1/4 teaspoon salt Mix these well and set the bowl aside. In a separate large bowl, cream the softened butter with granulated sugar. Use an electric mixer on medium speed for about 3-4 minutes. The mix should feel light and fluffy. Next, add a large egg, 1 tablespoon of red food coloring, and 1 teaspoon of vanilla extract to the butter-sugar mix. Mix until smooth. Gradually add the dry ingredients to this wet mixture. Mix on low speed until just combined. Your dough should be thick and sticky at this point. Now comes a very important step—chill the dough! Place it in the refrigerator for at least 30 minutes. This helps the dough firm up, making it easier to scoop and shape later. After chilling, take the dough out. Use a tablespoon to scoop portions of dough. Roll each scoop into a ball using your hands. Then, roll each ball in powdered sugar until fully coated. This gives a lovely crinkle look when baked. Place the balls on the prepared sheets, leaving about 2 inches between each. Bake your cookies in the preheated oven for 10-12 minutes. You want the edges to set while the centers stay soft. This ensures a chewy texture. Once they are done, let them cool on the baking sheet for about 5 minutes. Then, carefully transfer them to a wire rack to cool completely. Enjoy these delightful treats! To get that perfect crinkle on your cookies, follow these steps: - Use chilled dough. Chill the dough for at least 30 minutes. This helps it hold its shape. - Roll the dough balls in powdered sugar. A thick coat will create a beautiful crackled look as they bake. - Bake at the right temperature. Set your oven to 350°F (175°C) for even baking. Handling your dough correctly makes all the difference: - Always chill the dough before rolling. This makes it easier to work with. - Use a tablespoon to scoop consistent portions. This helps to keep the cookies even. - If you have leftover dough, wrap it tightly in plastic wrap. Store it in the fridge for up to a week. Baking cookies evenly ensures they taste great and look nice: - Line your baking sheets with parchment. This prevents sticking and helps with even baking. - Leave enough space between the dough balls. Two inches is ideal for spreading. - Rotate the baking sheets halfway through baking. This ensures all cookies bake evenly. Pro Tips Chill for Perfection: Chilling the dough for at least 30 minutes is essential. It helps the cookies maintain their shape and results in a softer center. Use Quality Cocoa: Opt for high-quality unsweetened cocoa powder for a richer chocolate flavor that enhances the overall taste of the cookies. Even Coating: When rolling the dough balls in powdered sugar, ensure an even coating for that beautiful crinkle effect. You can sift the powdered sugar before use for a finer texture. Don’t Overbake: Keep an eye on the cookies while baking. They should be set on the edges and soft in the center to achieve that perfect chewy texture. {{image_4}} You can make gluten-free Red Velvet Crinkle Cookies easily. Swap out the all-purpose flour with a gluten-free blend. Look for a blend that includes xanthan gum for the best results. This helps keep the cookies soft and chewy. To make vegan Red Velvet Crinkle Cookies, replace the egg with a flax egg. Mix one tablespoon of ground flaxseed with three tablespoons of water. Let it sit for five minutes. Use vegan butter instead of regular butter. Also, check that your food coloring is vegan-friendly. Want to spice things up? Add chocolate chips or nuts to your dough. Dark chocolate chips work great with the red velvet flavor. Chopped walnuts or pecans add a nice crunch. You can also try adding a dash of peppermint extract for a fresh twist. Just mix these extras into the dough before chilling. Store your baked Red Velvet Crinkle Cookies in an airtight container. This keeps them fresh and soft. You can place a piece of bread in the container to help retain moisture. The bread will absorb excess air and keep your cookies chewy. At room temperature, these cookies last for about 3 to 5 days. If you put them in the fridge, they can last up to 2 weeks. For longer storage, freeze them. In the freezer, they stay good for 3 months. Just make sure to wrap them well in plastic wrap or foil before freezing. To reheat your cookies, preheat your oven to 350°F (175°C). Place the cookies on a baking sheet and heat for 5 to 10 minutes. This will revive their soft texture. You can also use a microwave. Heat them for about 10 to 15 seconds. Enjoy your warm cookies just like fresh! Red velvet cookies have roots in Southern U.S. cuisine. They evolved from classic red velvet cake. The bright red color comes from cocoa powder and often some food coloring. Over time, bakers turned this cake into a cookie, making it more portable and fun. The crinkle effect adds charm, creating a beautiful treat that stands out. Yes, you can freeze the cookie dough! After you form the dough balls, place them on a baking sheet. Freeze them for about 30 minutes until firm. Then, transfer the dough balls to a zip-top bag. Label the bag with the date, and store in the freezer for up to three months. When you're ready to bake, there's no need to thaw. Just bake them straight from the freezer, adding a couple of extra minutes to the baking time. If your cookies spread too much, first check the dough temperature. If it’s too warm, chill it longer. You can also try adding a bit more flour to the mixture. Make sure to measure your flour correctly. Fluff it up and scoop it without packing. If the dough is too sticky, this can cause spreading, so chilling is key. Look for the edges of the cookies to set while the centers remain soft. This usually takes about 10 to 12 minutes. They will continue to firm up as they cool on the baking sheet. If the edges are golden brown and the tops look crinkled, they’re ready to come out! Absolutely! You can make these cookies ahead of time. They stay fresh for several days in an airtight container. If you want to prepare them weeks in advance, freeze the cookies. Just let them cool completely before storing. When you’re ready to serve, you can enjoy them at room temperature or warm them slightly. You now know how to make Red Velvet Crinkle Cookies from scratch. We covered the ingredients, their importance, and possible substitutions. I shared step-by-step instructions for baking these cookies perfectly. You learned tips for crinkly texture and storage advice. I also included variations for gluten-free and vegan options. Baking is fun. Enjoy the process and share your cookies with others. Happy baking!

Why I Love This Recipe

  1. Vibrant Color: The striking crimson hue of these cookies makes them a standout dessert for any occasion.
  2. Deliciously Chewy: These cookies have a perfect balance of softness and chewiness, creating a delightful texture in every bite.
  3. Festive Treat: Perfect for holiday celebrations, these cookies bring joy and a festive spirit to your dessert table.
  4. Simple Ingredients: With easy-to-find ingredients, this recipe is accessible for bakers of all skill levels.
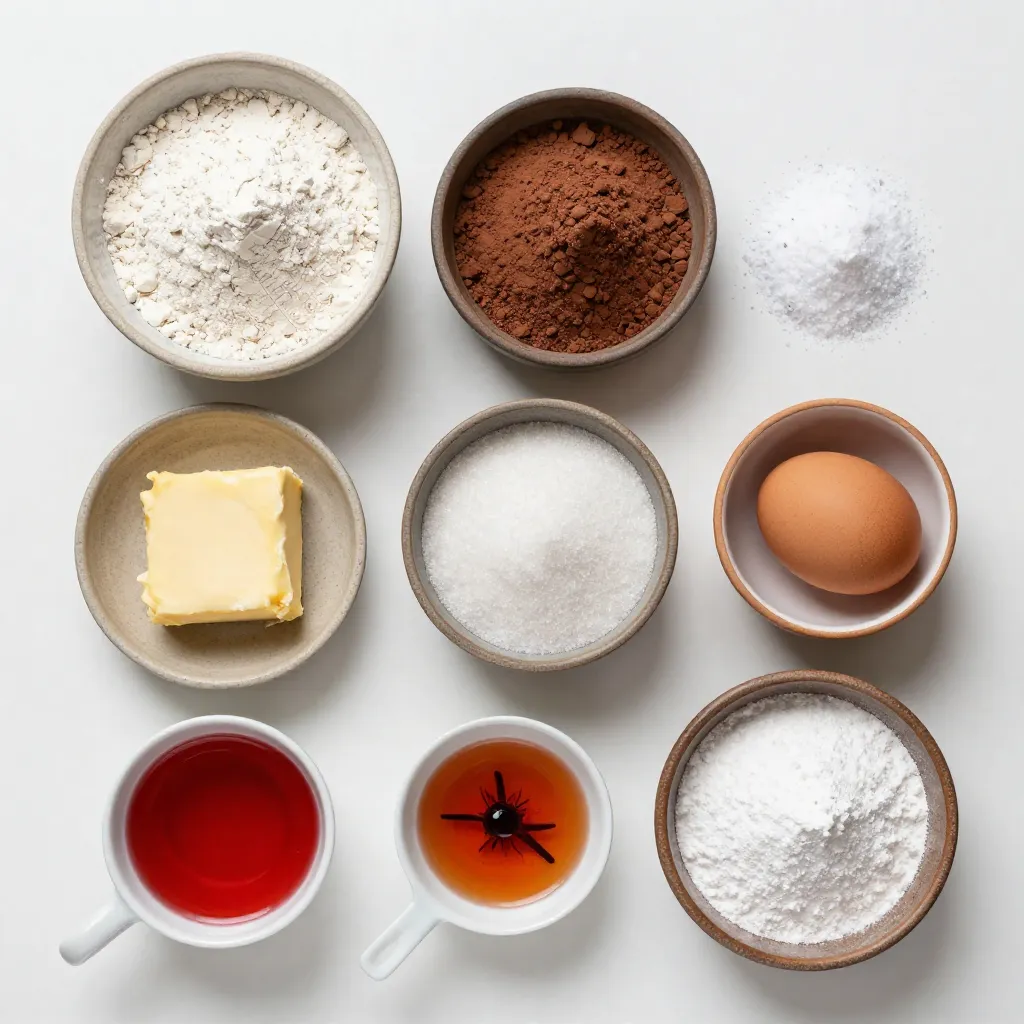
Ingredients

List of ingredients for Red Velvet Crinkle Cookies

– 1 1/4 cups all-purpose flour

– 1/2 cup unsweetened cocoa powder

– 1 teaspoon baking powder

– 1/4 teaspoon salt

– 1/2 cup unsalted butter, softened

– 1 cup granulated sugar

– 1 large egg

– 1 tablespoon red food coloring

– 1 teaspoon vanilla extract

– 1/2 cup powdered sugar (for coating)

Importance of each ingredient in the recipe

Each ingredient plays a key role in making these cookies wonderful.

All-purpose flour gives structure to the cookie.

Cocoa powder adds a rich chocolate flavor.

Baking powder helps the cookies rise and become fluffy.

Salt enhances the other flavors.

Unsalted butter makes the cookies rich and adds moisture.

Granulated sugar sweetens the dough and helps with texture.

Egg binds the dough and adds moisture.

Red food coloring gives the cookies their signature look.

Vanilla extract adds a lovely aroma and flavor.

Powdered sugar creates a sweet, snowy coating.

Possible substitutions for common ingredients

You can swap some ingredients if needed.

All-purpose flour can be replaced with a gluten-free blend.

Unsweetened cocoa powder might be swapped with Dutch-processed cocoa for a deeper flavor.

Granulated sugar can be substituted with brown sugar for a hint of molasses.

Egg can be replaced with a chia egg or flaxseed meal for a vegan option.

Butter can be replaced with coconut oil for dairy-free cookies.

These substitutions can keep the fun alive in your baking!

Step-by-Step Instructions

Prepping the oven and baking sheets

First, you need to preheat your oven to 350°F (175°C). This step is key for even baking. While the oven heats up, prepare your baking sheets. Line them with parchment paper. This makes it easy to remove the cookies later.

Mixing dry ingredients and creaming butter

In a medium bowl, sift together the dry ingredients. You will need:

– 1 1/4 cups all-purpose flour

– 1/2 cup unsweetened cocoa powder

– 1 teaspoon baking powder

– 1/4 teaspoon salt

Mix these well and set the bowl aside. In a separate large bowl, cream the softened butter with granulated sugar. Use an electric mixer on medium speed for about 3-4 minutes. The mix should feel light and fluffy.

Combining wet and dry ingredients and preparing the dough

Next, add a large egg, 1 tablespoon of red food coloring, and 1 teaspoon of vanilla extract to the butter-sugar mix. Mix until smooth. Gradually add the dry ingredients to this wet mixture. Mix on low speed until just combined. Your dough should be thick and sticky at this point.

Chilling the dough for the perfect texture

Now comes a very important step—chill the dough! Place it in the refrigerator for at least 30 minutes. This helps the dough firm up, making it easier to scoop and shape later.

Forming and rolling cookies before baking

After chilling, take the dough out. Use a tablespoon to scoop portions of dough. Roll each scoop into a ball using your hands. Then, roll each ball in powdered sugar until fully coated. This gives a lovely crinkle look when baked. Place the balls on the prepared sheets, leaving about 2 inches between each.

Baking time and cooling tips

Bake your cookies in the preheated oven for 10-12 minutes. You want the edges to set while the centers stay soft. This ensures a chewy texture. Once they are done, let them cool on the baking sheet for about 5 minutes. Then, carefully transfer them to a wire rack to cool completely. Enjoy these delightful treats!

Tips & Tricks

Tips for achieving a crinkly texture

To get that perfect crinkle on your cookies, follow these steps:

– Use chilled dough. Chill the dough for at least 30 minutes. This helps it hold its shape.

– Roll the dough balls in powdered sugar. A thick coat will create a beautiful crackled look as they bake.

– Bake at the right temperature. Set your oven to 350°F (175°C) for even baking.

How to properly handle and store the dough

Handling your dough correctly makes all the difference:

– Always chill the dough before rolling. This makes it easier to work with.

– Use a tablespoon to scoop consistent portions. This helps to keep the cookies even.

– If you have leftover dough, wrap it tightly in plastic wrap. Store it in the fridge for up to a week.

Best practices for baking uniform cookies

Baking cookies evenly ensures they taste great and look nice:

– Line your baking sheets with parchment. This prevents sticking and helps with even baking.

– Leave enough space between the dough balls. Two inches is ideal for spreading.

– Rotate the baking sheets halfway through baking. This ensures all cookies bake evenly.

Pro Tips

  1. Chill for Perfection: Chilling the dough for at least 30 minutes is essential. It helps the cookies maintain their shape and results in a softer center.
  2. Use Quality Cocoa: Opt for high-quality unsweetened cocoa powder for a richer chocolate flavor that enhances the overall taste of the cookies.
  3. Even Coating: When rolling the dough balls in powdered sugar, ensure an even coating for that beautiful crinkle effect. You can sift the powdered sugar before use for a finer texture.
  4. Don’t Overbake: Keep an eye on the cookies while baking. They should be set on the edges and soft in the center to achieve that perfect chewy texture.

Variations

Gluten-free Red Velvet Crinkle Cookies

You can make gluten-free Red Velvet Crinkle Cookies easily. Swap out the all-purpose flour with a gluten-free blend. Look for a blend that includes xanthan gum for the best results. This helps keep the cookies soft and chewy.

Vegan Red Velvet Crinkle Cookies

To make vegan Red Velvet Crinkle Cookies, replace the egg with a flax egg. Mix one tablespoon of ground flaxseed with three tablespoons of water. Let it sit for five minutes. Use vegan butter instead of regular butter. Also, check that your food coloring is vegan-friendly.

Flavor variations

Want to spice things up? Add chocolate chips or nuts to your dough. Dark chocolate chips work great with the red velvet flavor. Chopped walnuts or pecans add a nice crunch. You can also try adding a dash of peppermint extract for a fresh twist. Just mix these extras into the dough before chilling.

Storage Info

How to store baked cookies

Store your baked Red Velvet Crinkle Cookies in an airtight container. This keeps them fresh and soft. You can place a piece of bread in the container to help retain moisture. The bread will absorb excess air and keep your cookies chewy.

How long cookies last at room temperature vs. in the fridge/freezer

At room temperature, these cookies last for about 3 to 5 days. If you put them in the fridge, they can last up to 2 weeks. For longer storage, freeze them. In the freezer, they stay good for 3 months. Just make sure to wrap them well in plastic wrap or foil before freezing.

Reheating tips for leftover cookies

To reheat your cookies, preheat your oven to 350°F (175°C). Place the cookies on a baking sheet and heat for 5 to 10 minutes. This will revive their soft texture. You can also use a microwave. Heat them for about 10 to 15 seconds. Enjoy your warm cookies just like fresh!

FAQs

What is the origin of Red Velvet Crinkle Cookies?

Red velvet cookies have roots in Southern U.S. cuisine. They evolved from classic red velvet cake. The bright red color comes from cocoa powder and often some food coloring. Over time, bakers turned this cake into a cookie, making it more portable and fun. The crinkle effect adds charm, creating a beautiful treat that stands out.

Can I freeze the cookie dough?

Yes, you can freeze the cookie dough! After you form the dough balls, place them on a baking sheet. Freeze them for about 30 minutes until firm. Then, transfer the dough balls to a zip-top bag. Label the bag with the date, and store in the freezer for up to three months. When you’re ready to bake, there’s no need to thaw. Just bake them straight from the freezer, adding a couple of extra minutes to the baking time.

What can I do if my cookies spread too much?

If your cookies spread too much, first check the dough temperature. If it’s too warm, chill it longer. You can also try adding a bit more flour to the mixture. Make sure to measure your flour correctly. Fluff it up and scoop it without packing. If the dough is too sticky, this can cause spreading, so chilling is key.

How do I know when the cookies are done baking?

Look for the edges of the cookies to set while the centers remain soft. This usually takes about 10 to 12 minutes. They will continue to firm up as they cool on the baking sheet. If the edges are golden brown and the tops look crinkled, they’re ready to come out!

Are Red Velvet Crinkle Cookies okay to make ahead of time?

Absolutely! You can make these cookies ahead of time. They stay fresh for several days in an airtight container. If you want to prepare them weeks in advance, freeze the cookies. Just let them cool completely before storing. When you’re ready to serve, you can enjoy them at room temperature or warm them slightly.

You now know how to make Red Velvet Crinkle Cookies from scratch. We covered the ingredients, their importance, and possible substitutions. I shared step-by-step instructions for baking these cookies perfectly. You learned tips for crinkly texture and storage advice. I also included variations for gluten-free and vegan options.

Baking is fun. Enjoy the process and share your cookies with others. Happy bakin

- 1 1/4 cups all-purpose flour - 1/2 cup unsweetened cocoa powder - 1 teaspoon baking powder - 1/4 teaspoon salt - 1/2 cup unsalted butter, softened - 1 cup granulated sugar - 1 large egg - 1 tablespoon red food coloring - 1 teaspoon vanilla extract - 1/2 cup powdered sugar (for coating) Each ingredient plays a key role in making these cookies wonderful. - All-purpose flour gives structure to the cookie. - Cocoa powder adds a rich chocolate flavor. - Baking powder helps the cookies rise and become fluffy. - Salt enhances the other flavors. - Unsalted butter makes the cookies rich and adds moisture. - Granulated sugar sweetens the dough and helps with texture. - Egg binds the dough and adds moisture. - Red food coloring gives the cookies their signature look. - Vanilla extract adds a lovely aroma and flavor. - Powdered sugar creates a sweet, snowy coating. You can swap some ingredients if needed. - All-purpose flour can be replaced with a gluten-free blend. - Unsweetened cocoa powder might be swapped with Dutch-processed cocoa for a deeper flavor. - Granulated sugar can be substituted with brown sugar for a hint of molasses. - Egg can be replaced with a chia egg or flaxseed meal for a vegan option. - Butter can be replaced with coconut oil for dairy-free cookies. These substitutions can keep the fun alive in your baking! {{ingredient_image_2}} First, you need to preheat your oven to 350°F (175°C). This step is key for even baking. While the oven heats up, prepare your baking sheets. Line them with parchment paper. This makes it easy to remove the cookies later. In a medium bowl, sift together the dry ingredients. You will need: - 1 1/4 cups all-purpose flour - 1/2 cup unsweetened cocoa powder - 1 teaspoon baking powder - 1/4 teaspoon salt Mix these well and set the bowl aside. In a separate large bowl, cream the softened butter with granulated sugar. Use an electric mixer on medium speed for about 3-4 minutes. The mix should feel light and fluffy. Next, add a large egg, 1 tablespoon of red food coloring, and 1 teaspoon of vanilla extract to the butter-sugar mix. Mix until smooth. Gradually add the dry ingredients to this wet mixture. Mix on low speed until just combined. Your dough should be thick and sticky at this point. Now comes a very important step—chill the dough! Place it in the refrigerator for at least 30 minutes. This helps the dough firm up, making it easier to scoop and shape later. After chilling, take the dough out. Use a tablespoon to scoop portions of dough. Roll each scoop into a ball using your hands. Then, roll each ball in powdered sugar until fully coated. This gives a lovely crinkle look when baked. Place the balls on the prepared sheets, leaving about 2 inches between each. Bake your cookies in the preheated oven for 10-12 minutes. You want the edges to set while the centers stay soft. This ensures a chewy texture. Once they are done, let them cool on the baking sheet for about 5 minutes. Then, carefully transfer them to a wire rack to cool completely. Enjoy these delightful treats! To get that perfect crinkle on your cookies, follow these steps: - Use chilled dough. Chill the dough for at least 30 minutes. This helps it hold its shape. - Roll the dough balls in powdered sugar. A thick coat will create a beautiful crackled look as they bake. - Bake at the right temperature. Set your oven to 350°F (175°C) for even baking. Handling your dough correctly makes all the difference: - Always chill the dough before rolling. This makes it easier to work with. - Use a tablespoon to scoop consistent portions. This helps to keep the cookies even. - If you have leftover dough, wrap it tightly in plastic wrap. Store it in the fridge for up to a week. Baking cookies evenly ensures they taste great and look nice: - Line your baking sheets with parchment. This prevents sticking and helps with even baking. - Leave enough space between the dough balls. Two inches is ideal for spreading. - Rotate the baking sheets halfway through baking. This ensures all cookies bake evenly. Pro Tips Chill for Perfection: Chilling the dough for at least 30 minutes is essential. It helps the cookies maintain their shape and results in a softer center. Use Quality Cocoa: Opt for high-quality unsweetened cocoa powder for a richer chocolate flavor that enhances the overall taste of the cookies. Even Coating: When rolling the dough balls in powdered sugar, ensure an even coating for that beautiful crinkle effect. You can sift the powdered sugar before use for a finer texture. Don’t Overbake: Keep an eye on the cookies while baking. They should be set on the edges and soft in the center to achieve that perfect chewy texture. {{image_4}} You can make gluten-free Red Velvet Crinkle Cookies easily. Swap out the all-purpose flour with a gluten-free blend. Look for a blend that includes xanthan gum for the best results. This helps keep the cookies soft and chewy. To make vegan Red Velvet Crinkle Cookies, replace the egg with a flax egg. Mix one tablespoon of ground flaxseed with three tablespoons of water. Let it sit for five minutes. Use vegan butter instead of regular butter. Also, check that your food coloring is vegan-friendly. Want to spice things up? Add chocolate chips or nuts to your dough. Dark chocolate chips work great with the red velvet flavor. Chopped walnuts or pecans add a nice crunch. You can also try adding a dash of peppermint extract for a fresh twist. Just mix these extras into the dough before chilling. Store your baked Red Velvet Crinkle Cookies in an airtight container. This keeps them fresh and soft. You can place a piece of bread in the container to help retain moisture. The bread will absorb excess air and keep your cookies chewy. At room temperature, these cookies last for about 3 to 5 days. If you put them in the fridge, they can last up to 2 weeks. For longer storage, freeze them. In the freezer, they stay good for 3 months. Just make sure to wrap them well in plastic wrap or foil before freezing. To reheat your cookies, preheat your oven to 350°F (175°C). Place the cookies on a baking sheet and heat for 5 to 10 minutes. This will revive their soft texture. You can also use a microwave. Heat them for about 10 to 15 seconds. Enjoy your warm cookies just like fresh! Red velvet cookies have roots in Southern U.S. cuisine. They evolved from classic red velvet cake. The bright red color comes from cocoa powder and often some food coloring. Over time, bakers turned this cake into a cookie, making it more portable and fun. The crinkle effect adds charm, creating a beautiful treat that stands out. Yes, you can freeze the cookie dough! After you form the dough balls, place them on a baking sheet. Freeze them for about 30 minutes until firm. Then, transfer the dough balls to a zip-top bag. Label the bag with the date, and store in the freezer for up to three months. When you're ready to bake, there's no need to thaw. Just bake them straight from the freezer, adding a couple of extra minutes to the baking time. If your cookies spread too much, first check the dough temperature. If it’s too warm, chill it longer. You can also try adding a bit more flour to the mixture. Make sure to measure your flour correctly. Fluff it up and scoop it without packing. If the dough is too sticky, this can cause spreading, so chilling is key. Look for the edges of the cookies to set while the centers remain soft. This usually takes about 10 to 12 minutes. They will continue to firm up as they cool on the baking sheet. If the edges are golden brown and the tops look crinkled, they’re ready to come out! Absolutely! You can make these cookies ahead of time. They stay fresh for several days in an airtight container. If you want to prepare them weeks in advance, freeze the cookies. Just let them cool completely before storing. When you’re ready to serve, you can enjoy them at room temperature or warm them slightly. You now know how to make Red Velvet Crinkle Cookies from scratch. We covered the ingredients, their importance, and possible substitutions. I shared step-by-step instructions for baking these cookies perfectly. You learned tips for crinkly texture and storage advice. I also included variations for gluten-free and vegan options. Baking is fun. Enjoy the process and share your cookies with others. Happy baking!

Crimson Delight Crinkle Cookies

Deliciously soft and chewy cookies with a vibrant red color and a crinkly surface, perfect for any festive occasion.
Prep Time 30 minutes
Cook Time 12 minutes
Total Time 1 hour
Course Dessert
Cuisine American
Servings 24
Calories 150 kcal

Ingredients
  

  • 1.25 cups all-purpose flour
  • 0.5 cups unsweetened cocoa powder
  • 1 teaspoon baking powder
  • 0.25 teaspoon salt
  • 0.5 cups unsalted butter, softened to room temperature
  • 1 cups granulated sugar
  • 1 large egg, at room temperature
  • 1 tablespoon red food coloring
  • 1 teaspoon vanilla extract
  • 0.5 cups powdered sugar (for coating)

Instructions
 

  • Begin by preheating your oven to 350°F (175°C). Prepare two baking sheets by lining them with parchment paper for easy cookie removal.
  • In a medium mixing bowl, sift together the all-purpose flour, unsweetened cocoa powder, baking powder, and salt. Make sure these dry ingredients are well combined, then set this bowl aside.
  • In a large mixing bowl, use an electric mixer to cream the softened unsalted butter and granulated sugar together. Beat on medium speed until the mixture becomes light and fluffy, about 3-4 minutes.
  • Incorporate the large egg, red food coloring, and vanilla extract into the butter-sugar mixture. Continue mixing until everything is well combined and the batter appears smooth.
  • Gradually add the sifted dry ingredients to the wet mixture, mixing on low speed until just combined. Your dough should have a thick and sticky consistency.
  • To make the dough easier to handle, chill it in the refrigerator for at least 30 minutes. This step is crucial for achieving the perfect texture for scooping.
  • After chilling, use a tablespoon to scoop out portions of the dough. Roll each scoop into a ball with your hands.
  • Roll each dough ball in powdered sugar until they are thoroughly coated. Place the coated balls on the prepared baking sheets, leaving about 2 inches of space between them to allow for spreading.
  • Bake in the preheated oven for 10-12 minutes. The edges should be set while the centers remain slightly soft; this will ensure a delightful texture.
  • Once baked, let the cookies cool on the baking sheet for about 5 minutes. After that, carefully transfer them to a wire rack to cool completely.

Notes

For a charming presentation, arrange the crimson cookies in a decorative tin or on a vibrant serving plate. Dust with extra powdered sugar before serving.
Keyword cookies, crinkle, dessert, red

WANT TO SAVE THIS RECIPE?