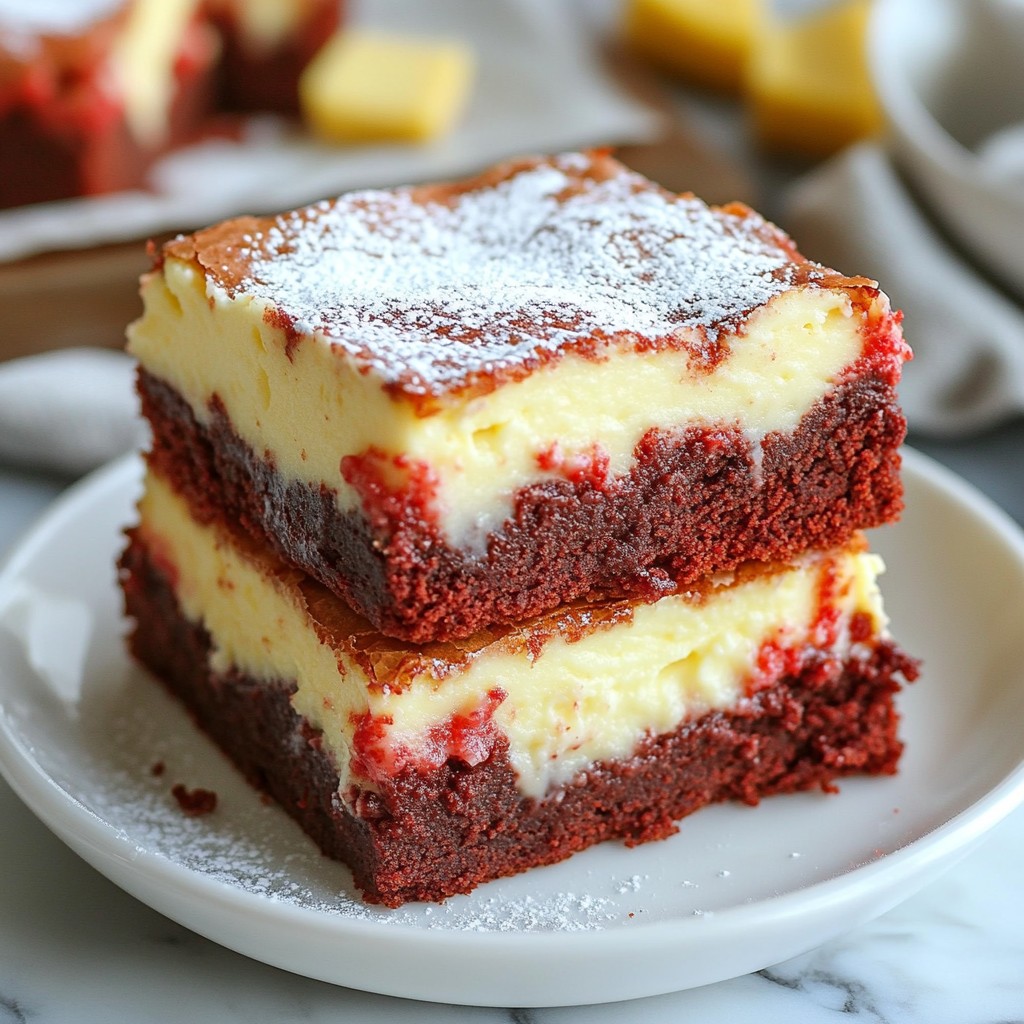
Get ready for a treat that will wow your taste buds! Red Velvet Cheesecake Brownies combine rich, fudgy brownie layers with a creamy cheesecake swirl. This dessert is a perfect blend of chocolate, cream cheese, and vibrant color. Whether you’re planning a special event or just a cozy night in, these brownies are sure to impress. Let’s dive into this sweet delight and discover how to make them shine!
Why I Love This Recipe
- Decadent Flavor: The combination of rich red velvet and creamy cheesecake creates an indulgent dessert that's hard to resist.
- Perfect for Any Occasion: These brownies are ideal for celebrations, gatherings, or simply to satisfy a sweet tooth.
- Visually Stunning: The vibrant red color and marbled cheesecake layer make these brownies a showstopper on any dessert table.
- Easy to Make: With simple ingredients and straightforward steps, this recipe is accessible for bakers of all skill levels.
Ingredients
Brownie Batter Ingredients
- 1 cup unsalted butter, melted
- 2 cups granulated sugar
- 4 large eggs
- 2 teaspoons vanilla extract
- 1 tablespoon red food coloring
- 1 ¾ cups all-purpose flour
- ½ teaspoon baking powder
- ½ teaspoon salt
- 1 cup semi-sweet chocolate chips (optional)
Cheesecake Layer Ingredients
- 8 oz cream cheese, softened
- ½ cup granulated sugar
- 1 large egg
- 1 teaspoon vanilla extract
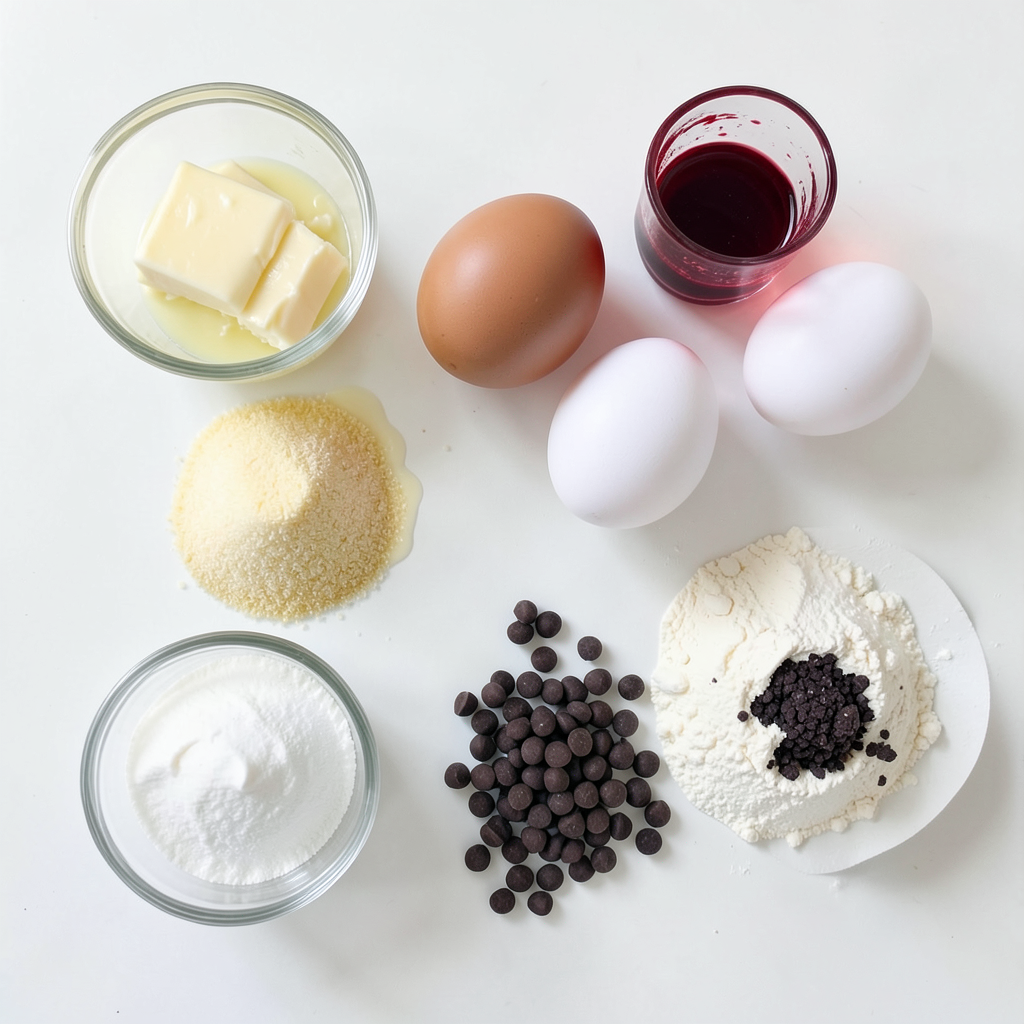
The ingredients for these Red Velvet Cheesecake Brownies make them truly special. You need a mix of simple pantry staples and a touch of flair.
Start with the brownie batter. The melted butter and sugar blend well. This creates a rich base. The eggs give it a nice lift. The red food coloring adds that wow factor. You want it to pop!
Next, the dry ingredients come in. Flour, baking powder, and salt work together to create the right texture. If you like chocolate, toss in some semi-sweet chocolate chips. They add extra flavor and fun!
Now for the cheesecake layer. Cream cheese gives it a smooth and creamy feel. The sugar sweetens it just right. One egg helps bind it all together. The vanilla extract adds a lovely warmth.
These ingredients combine to create a dessert that is both rich and creamy. When baked, they will form a delicious layer of brownie and cheesecake. The result is a treat you won’t forget!
Step-by-Step Instructions
Preheat and Prepare
- Preheat the oven to 350°F (175°C).
- Prepare the baking pan with parchment lining.
Start by preheating your oven. This step is key for even baking. Then, take a 9x13-inch baking pan and grease it lightly. Line the bottom with parchment paper. Make sure the paper hangs over the sides. This will help you lift out the brownies later.
Make the Brownie Batter
- Combine melted butter and sugar.
- Add eggs, vanilla, and food coloring.
- Mix in dry ingredients and fold in chocolate chips.
In a big bowl, pour in the melted butter. Add the sugar and whisk them together until smooth. Crack in the eggs one at a time. Mix well after each egg. Then, stir in the vanilla extract and red food coloring. The batter should become bright and vibrant.
In a separate bowl, mix the flour, baking powder, and salt. Sift these dry ingredients to avoid lumps. Gradually add this to the wet mix. Stir gently until just combined. If you want a chocolatey twist, fold in semi-sweet chocolate chips.
Prepare the Cheesecake Mixture
- Beat cream cheese and sugar until smooth.
- Add egg and vanilla extract.
In another bowl, beat the softened cream cheese with sugar. Keep mixing until it’s smooth and creamy. Add in the egg and vanilla extract. Mix until everything is well combined. This will create a rich cheesecake layer.
Layering the Mixtures
- Pour brownie batter into pan, then the cheesecake layer.
- Swirl the layers for marbling.
Now it’s time to layer! Pour half of the brownie batter into the prepared pan. Spread it evenly across the bottom. Next, drop spoonfuls of the cheesecake mix on top. Use a spatula to gently spread it out. Pour the rest of the brownie batter over the cheesecake. With a knife, swirl the two mixtures together to create a nice marbled effect.
Baking Instructions
- Bake for 30-35 minutes and check for doneness.
- Cool before cutting into squares.
Place the pan in the preheated oven. Bake for 30 to 35 minutes. To check if they are done, insert a toothpick in the center. It should come out with a few moist crumbs. Be careful not to overbake. This keeps the brownies fudgy and soft.
Once baked, let the brownies cool in the pan for about 15 minutes. Use the parchment paper to lift them out. Place them on a wire rack to cool fully. After cooling, cut into 12 to 16 squares. Enjoy this sweet treat!
Tips & Tricks
Baking Tips
- Avoid overmixing for fudgy texture: When mixing your batter, stop as soon as the flour blends in. Overmixing makes the brownies tough. You want a soft, fudgy treat.
- Check doneness using a toothpick: Insert a toothpick in the center. If it comes out with a few moist crumbs, your brownies are ready. Too many crumbs mean they need more time.
Presentation Tips
- Serve warm or at room temperature: Enjoy these brownies fresh from the oven for the best taste. They are great at room temp too.
- Garnish with powdered sugar, whipped cream, or fresh berries: A sprinkle of powdered sugar adds charm. A dollop of whipped cream gives a creamy touch. Fresh berries add color and a fruity burst. These small touches make your dessert look stunning!
Pro Tips
- Use Quality Ingredients: For the best flavor, use high-quality cocoa powder and pure vanilla extract. This will elevate the overall taste of your brownies.
- Room Temperature Ingredients: Ensure that your cream cheese and eggs are at room temperature before mixing. This helps achieve a smoother cheesecake layer without lumps.
- Swirling Technique: When creating the marbled effect, use a gentle hand. Too much swirling can blend the layers too much, losing the visual appeal.
- Storage Tips: Store any leftovers in an airtight container at room temperature for up to 3 days, or refrigerate for up to a week. They can also be frozen for longer storage.
Variations
Gluten-Free Option
You can make these brownies gluten-free. Just swap the all-purpose flour with a gluten-free blend. This simple change keeps the taste and texture great. Look for a blend that works well in baking. Many brands offer good options that mimic regular flour.
Flavor Variations
Want to mix things up? Here are some fun ideas:
- Mint Extract: Add a few drops of mint extract. This gives your brownies a fresh, peppermint twist. The mint pairs well with the chocolate.
- White Chocolate Chips: Toss in some white chocolate chips. They add a nice sweetness and a creamy texture. This makes your brownies even more delicious.
These variations let you customize your brownies. Experiment and find your favorite flavors!
Storage Info
Short-Term Storage
You can keep your Red Velvet Cheesecake Brownies fresh for up to 3 days. To do this, store them in an airtight container at room temperature. This helps maintain their moist texture and rich flavor. Just make sure to place them in a cool spot, away from direct sunlight or heat sources.
Long-Term Storage
If you want to enjoy these brownies for a longer time, refrigerate them. They will stay good for up to a week in the fridge. Just remember to seal them well to keep out any odors.
For even longer storage, you can freeze these brownies. Wrap them tightly in plastic wrap or aluminum foil. Then, place them in a freezer-safe bag or container. When you're ready to enjoy them again, let them thaw in the fridge overnight. You’ll still get that lovely taste and texture!
FAQs
Can I use different food coloring?
Yes, you can use other colors. Try blue or green for fun! You could even blend colors for a unique look. Just remember, the shade will change the dessert's vibe but not the taste. Always use gel or liquid food color. These work best for bright results.
How do I know when the brownies are done?
To test if the brownies are ready, use a toothpick. Insert it into the center of the brownies. If it comes out with a few moist crumbs, they are done. If it comes out wet, they need more time. Avoid overbaking, as this keeps them fudgy and soft.
Can I make these brownies ahead of time?
Yes, you can make these brownies in advance. Allow them to cool completely first. Then, store them in an airtight container at room temperature. They will stay fresh for up to three days. For longer storage, refrigerate them for up to a week. You can also freeze them for a later treat. Just wrap them well and enjoy later!
You’ve learned how to make delicious brownie cheesecake with simple steps. We covered the key ingredients for both the brownie and cheesecake layers. The process involves layering, swirling, and baking. Remember to store your treats properly and try different flavors.
These brownies are easy to make and are a hit for any occasion. I hope you enjoy creating your own tasty version!