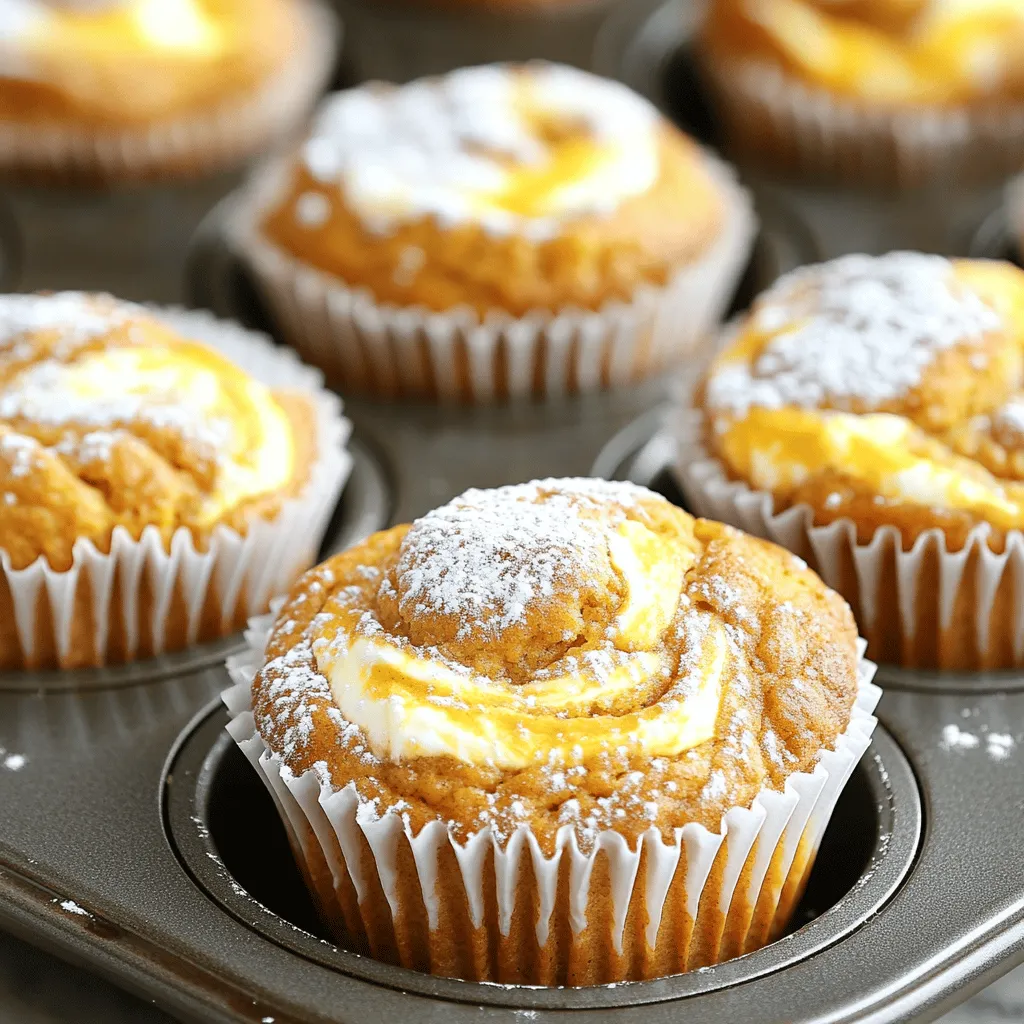
Welcome to the cozy world of baking! Today, I’ll show you how to make Pumpkin Cream Cheese Swirl Muffins that will warm your heart and your home. These muffins combine rich pumpkin flavor with a creamy swirl that’s simply irresistible. Whether you’re a seasoned baker or a beginner, my step-by-step guide will help you create these tasty treats. Grab your apron and let’s get started on this delicious autumn delight!
Ingredients
Dry Ingredients
– 1 ½ cups all-purpose flour
– 1 teaspoon baking powder
– 1 teaspoon baking soda
– ½ teaspoon salt
– 1 teaspoon ground cinnamon
– ½ teaspoon ground nutmeg
– ½ teaspoon ground ginger
Wet Ingredients
– ½ cup granulated sugar
– ½ cup brown sugar, packed
– 1 cup canned pumpkin puree
– ½ cup vegetable oil
– 2 large eggs
– 1 teaspoon vanilla extract
Cream Cheese Swirl Ingredients
– 8 oz cream cheese, softened at room temperature
– ¼ cup powdered sugar
– 1 teaspoon vanilla extract
– 1 large egg
In this recipe, I use simple ingredients that create a warm, cozy flavor. The dry mix combines flour, baking powder, soda, and spices. The spices, like cinnamon and nutmeg, give the muffins that classic fall taste.
The wet mix features both granulated and brown sugar for a nice balance. I love adding pumpkin puree; it keeps the muffins moist and adds a lovely orange hue. Vegetable oil makes the batter light and fluffy, while eggs and vanilla extract add richness and depth.
For the cream cheese swirl, I use softened cream cheese, which blends well with powdered sugar and a touch of vanilla. A little egg helps bind it all together, creating a smooth mixture. This creamy layer brings a delightful contrast to the spiced pumpkin.
Gather these ingredients, and you’re set for a delicious baking adventure! You’ll be amazed at how well they blend to create the perfect muffin.
Step-by-Step Instructions
Preparing the Oven and Muffin Tin
First, you need to preheat your oven to 350°F (175°C). This temperature helps the muffins rise nicely. While the oven heats, prepare your muffin tin. You can line it with paper liners or grease each cup lightly. This step prevents the muffins from sticking.
Mixing Dry Ingredients
In a medium bowl, whisk together the dry ingredients. Use 1 ½ cups of all-purpose flour, 1 teaspoon of baking powder, 1 teaspoon of baking soda, and ½ teaspoon of salt. Add 1 teaspoon of ground cinnamon, ½ teaspoon of ground nutmeg, and ½ teaspoon of ground ginger. Mix these well so the spices are evenly spread.
Combining Wet Ingredients
Next, grab a large bowl for the wet mix. Combine ½ cup of granulated sugar and ½ cup of packed brown sugar. Add 1 cup of canned pumpkin puree, ½ cup of vegetable oil, 2 large eggs, and 1 teaspoon of vanilla extract. Use a whisk or an electric mixer to blend these until smooth and uniform.
Creating the Batter
Now, it’s time to combine the dry and wet mixes. Gradually add the dry ingredients from the first bowl into the wet mixture. Stir gently, just until everything is combined. It’s okay if the batter has a few lumps; overmixing can make the muffins tough.
Making the Cream Cheese Mixture
In a small bowl, make the cream cheese mixture. Beat 8 oz of softened cream cheese with ¼ cup of powdered sugar and 1 teaspoon of vanilla extract. Add 1 large egg to this mix. Beat until you have a smooth and creamy texture.
Filling and Swirling
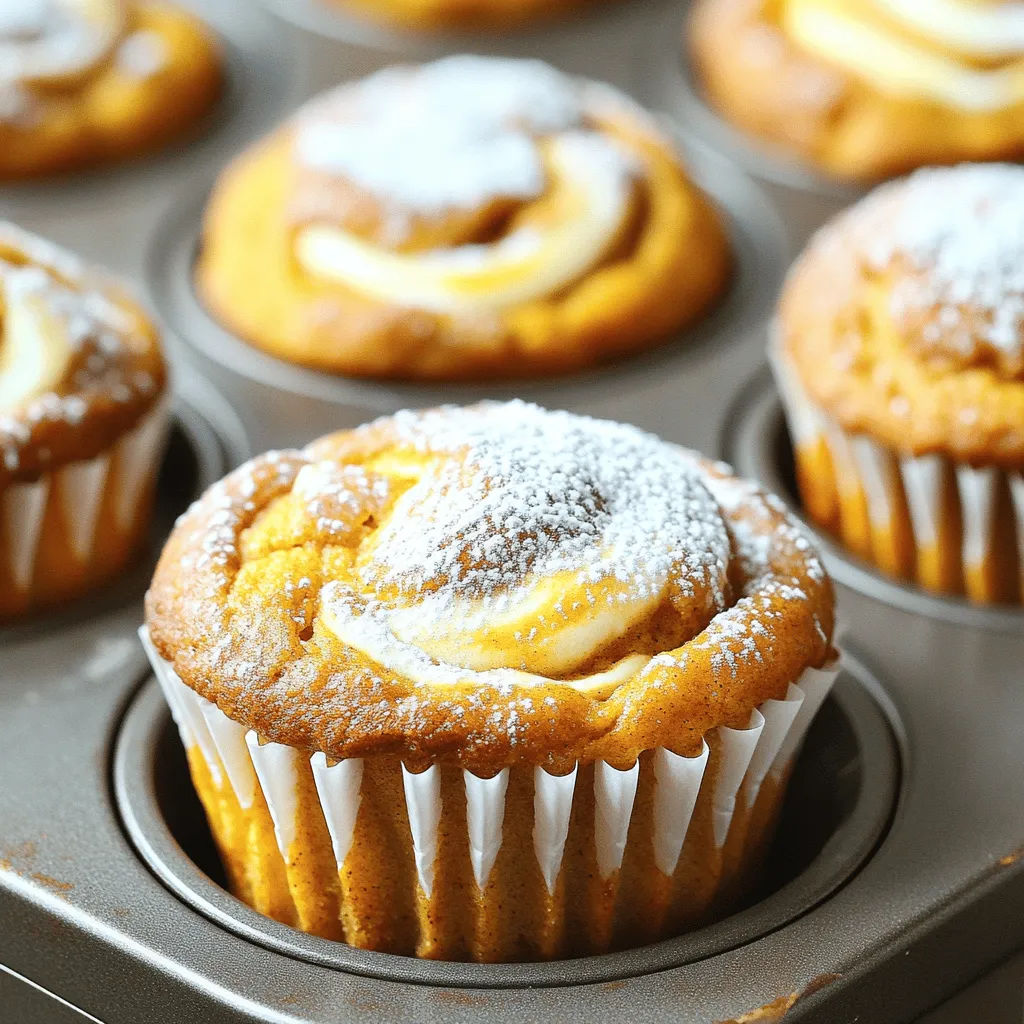
With a spoon or scoop, fill each muffin cup with the pumpkin batter until they are about two-thirds full. Next, place about one tablespoon of the cream cheese mixture on top of each filled muffin cup. Take a toothpick or the back of a small spoon and gently swirl the cream cheese into the pumpkin batter. Aim for a pretty marbled look.
Baking Instructions
Place your muffin tin in the preheated oven. Bake for 20-25 minutes. To check for doneness, insert a toothpick into the center. It should come out clean or with a few moist crumbs attached. Once done, let the muffins cool in the pan for about 5 minutes. Then transfer them to a wire rack to cool completely.
Tips & Tricks
Achieving the Perfect Muffin Texture
To get fluffy muffins, you must avoid overmixing. When you mix the dry and wet ingredients, stir gently. It’s okay to have some lumps; they help keep your muffins light. Overmixing can make them tough. Aim for a just-combined batter for the best results.
Enhancing Flavor
You can boost the flavor with a few simple spices. Adding a pinch of allspice or cloves can give a warm kick. You might also try a splash of maple syrup for sweetness. Another option is to mix in chopped nuts or chocolate chips for a fun twist.
Presentation Tips
To make your muffins look special, dust them with powdered sugar. This adds a nice touch and sweetness. Serve them warm for the best experience. A pat of butter on top while they are still warm melts beautifully. Enjoy them with a hot cup of coffee or tea for a cozy treat!
Variations
Alternatives for Cream Cheese
You can swap cream cheese with Greek yogurt or ricotta. Greek yogurt adds a tangy twist and keeps muffins moist. Ricotta gives a lighter texture and a subtle flavor. Both options work well in the swirl. Just keep the same amount, about eight ounces.
Gluten-Free Version
For a gluten-free option, use almond flour or a gluten-free blend. Almond flour gives a nutty taste and moist texture. A gluten-free blend often works best for muffins, keeping the texture fluffy. Always check the package for the right amount to use.
Adding Mix-ins
Mix in some chopped nuts, chocolate chips, or dried fruit for extra flavor. Walnuts or pecans add crunch. Chocolate chips bring sweetness and fun. Dried cranberries or raisins offer a chewy texture. Aim for about half a cup of your favorite mix-ins to keep muffins balanced.
Storage Info
Storing Muffins
To keep your pumpkin cream cheese swirl muffins fresh, store them at room temperature. Use an airtight container to prevent drying out. If you live in a humid area, keep them in the fridge. They will stay good for about 3 to 5 days. You can also place parchment paper between layers to avoid sticking.
Freezing Muffins
Freezing muffins is easy and keeps them tasty. First, let the muffins cool completely. Wrap each muffin in plastic wrap. Then, place them in a freezer bag or airtight container. They will last up to 3 months. To thaw, simply leave them at room temperature for a few hours or microwave for 15-20 seconds. This way, they stay moist and delicious.
Reheating Instructions
Reheating muffins brings back their warm, cozy feel. The best way is to use the oven. Preheat it to 350°F (175°C). Place the muffins on a baking sheet for about 10 minutes. If you’re in a hurry, you can use the microwave. Heat for 10-15 seconds. Enjoy your muffins warm, with some butter if you like!
FAQs
Can I use fresh pumpkin instead of canned?
Yes, you can use fresh pumpkin. However, it needs some prep. First, peel and chop the pumpkin. Then, steam or roast it until soft. After that, mash it until smooth. Fresh pumpkin has a different moisture level than canned. You may need to adjust the flour. Start with a little less flour, then add more if needed. Fresh pumpkin can add a bright taste and a bit of texture to your muffins.
How long do these muffins last?
These muffins stay fresh for about three to five days. Keep them in an airtight container at room temperature. This keeps them soft and moist. If you want to extend their life, you can store them in the fridge. They can last up to a week there. Remember, the cream cheese swirl can make them spoil faster. Always check for signs of mold or an off smell before eating.
Can I make the batter ahead of time?
Yes, you can prepare the batter ahead of time. Mix up the wet and dry ingredients separately. Then, keep them in the fridge for up to 24 hours. When you’re ready to bake, just combine them. If the batter thickens, add a splash of milk to loosen it. This helps keep the muffins fluffy and light. Just remember to swirl in the cream cheese mix right before baking for the best taste!
This blog post covered everything you need to make delicious pumpkin muffins. We discussed the right ingredients, clear steps, and helpful tips for success. You learned how to create the perfect texture and flavor, plus how to customize your muffins. Store your treats properly for long-lasting freshness. Now, you’re ready to bake and share your tasty creations. Enjoy the process and the yummy results!