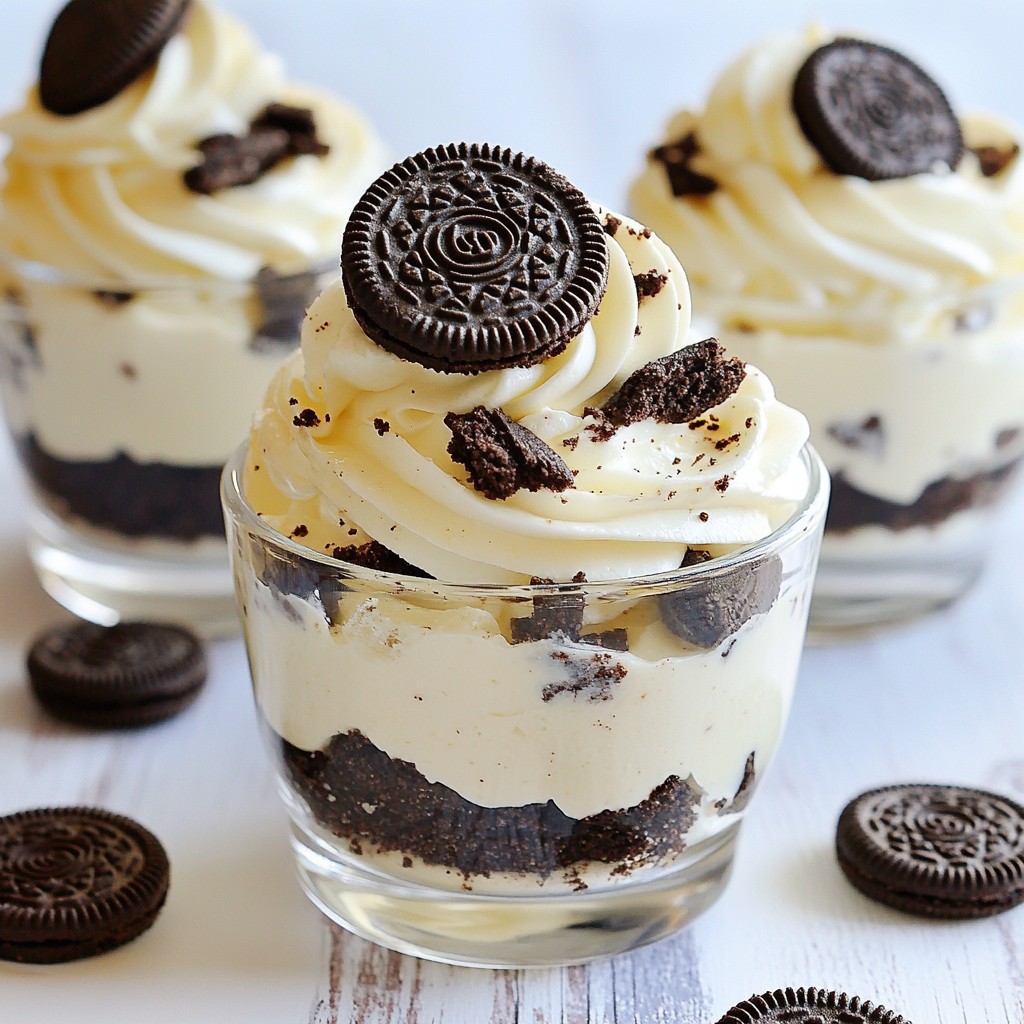
Craving a sweet treat but short on time? Look no further! My No-Bake Oreo Cheesecake Cups are a quick and easy delight that anyone can whip up. With just a few simple ingredients, like Oreo cookies and cream cheese, you’ll impress friends and family alike. In this post, I’ll guide you step-by-step through making these creamy, dreamy cups that will satisfy any dessert lover’s sweet tooth. Let’s dive right in!
Why I Love This Recipe
- Easy to Make: This no-bake cheesecake recipe is simple and requires minimal effort, making it perfect for both novice and experienced bakers.
- Deliciously Rich: The combination of cream cheese and whipped cream creates a light yet indulgent filling that pairs perfectly with crushed Oreos.
- Customizable: You can easily adapt this recipe by adding different toppings or mixing in various ingredients, like chocolate or fruit, to suit your taste.
- Perfect for Any Occasion: These cheesecake cups are not only visually appealing but also make a delightful dessert for parties, gatherings, or a sweet treat at home.
Ingredients
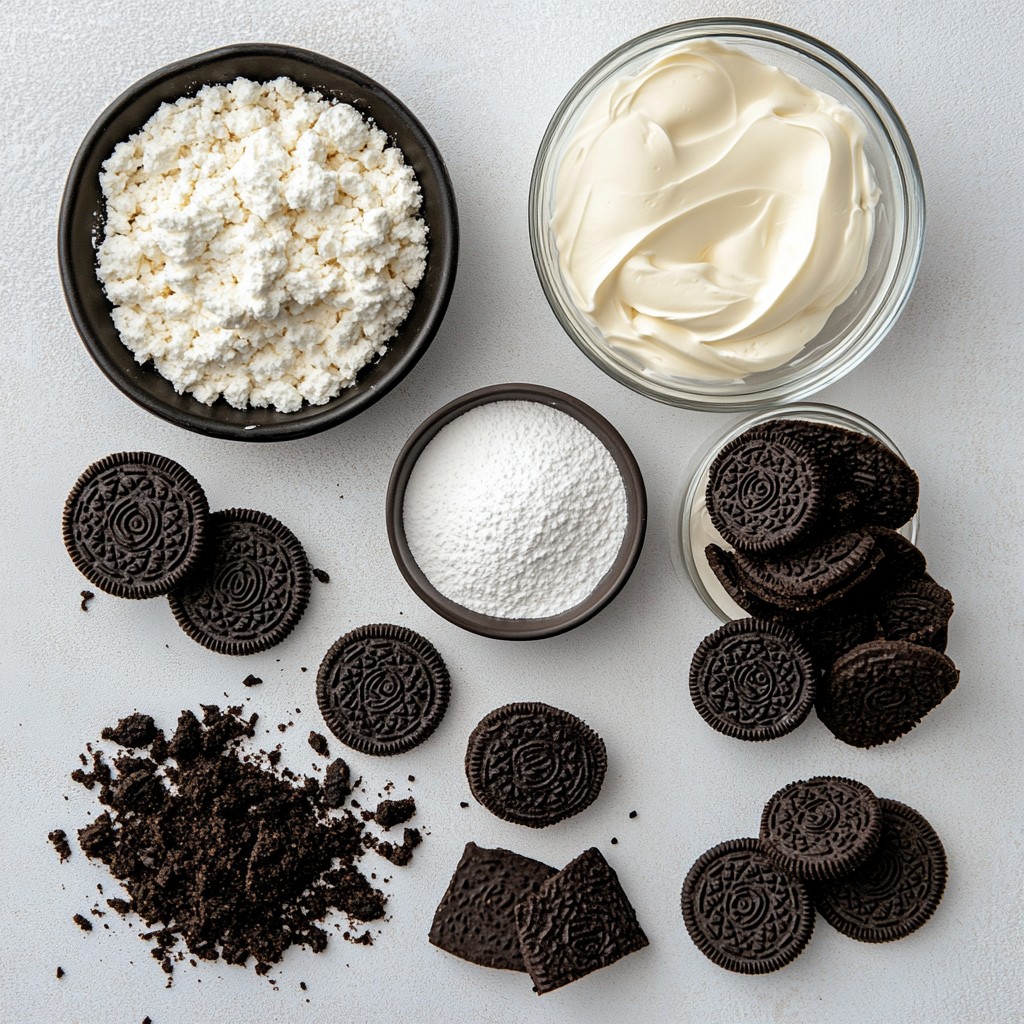
List of Ingredients
- 16 Oreo cookies, finely crushed
- 2 tablespoons unsalted butter, melted
- 8 ounces cream cheese, softened to room temperature
- 1 cup powdered sugar
- 1 teaspoon vanilla extract
- 1 cup heavy whipping cream
- 6 Oreo cookies, coarsely chopped (for filling)
- Extra crushed Oreos for topping
Measurement and Preparation Tips
Using room temperature cream cheese is key. Cold cream cheese does not mix well. It can turn lumpy and hard to blend. Let it sit out for 30 minutes before using.
When measuring soft ingredients, use a dry measuring cup. For the cream cheese, scoop it in and pack it down. For the powdered sugar, sift it to avoid clumps. This makes your mixture smooth and creamy.
Now, let's get ready to make these tasty cups!
Step-by-Step Instructions
Preparation of the Oreo Base
To start, take your 16 Oreo cookies and crush them finely. You can use a food processor or put them in a bag and crush them with a rolling pin. Next, add 2 tablespoons of melted unsalted butter to the crushed Oreos. Mix this well with a fork until it feels like wet sand.
Now, take your serving cups and evenly distribute the Oreo mixture among them. Press the mixture down firmly with a spoon or your fingers. You want to make a solid base layer in each cup.
Making the Cheesecake Filling
Next, we will focus on the cheesecake filling. In a large mixing bowl, beat 8 ounces of softened cream cheese with an electric mixer. Mix this for about 2-3 minutes until it is smooth and creamy.
Gradually add in 1 cup of powdered sugar while you mix. Then, pour in 1 teaspoon of vanilla extract. Keep mixing until everything is combined and fluffy.
In another bowl, pour in 1 cup of heavy whipping cream. Beat this with the electric mixer until stiff peaks form, which usually takes around 3-4 minutes.
Gently fold the whipped cream into the cream cheese mixture. Use a spatula and be careful to keep the airy texture of the whipped cream. Mix until just combined. Lastly, add in 6 coarsely chopped Oreos and stir them in gently.
Assembling the Cheesecake Cups
Now it’s time to fill the cups. Using a spoon, carefully fill each cup with the cheesecake mixture. Fill them almost to the top for a nice presentation.
Cover each filled cup with plastic wrap. Place them in the fridge for at least 4 hours. This chilling time helps the cheesecake set and firm up nicely.
Before serving, sprinkle extra crushed Oreos on top for a fun crunch and a nice look. Enjoy your tasty treat!
Tips & Tricks
Common Mistakes to Avoid
- Overmixing the cream cheese and whipped cream can ruin the texture. Mix gently until just combined to keep it fluffy.
- Not allowing sufficient chilling time makes the cups soft and messy. Chill for at least four hours for best results.
Serving Suggestions
- Garnish with whole Oreos on top for a fun and tasty touch. This makes each cup look special.
- Consider plating ideas like using a cake stand or decorative platter. This enhances the visual appeal and impresses your guests.
Pro Tips
- Chill Your Cream Cheese: For a smoother cheesecake mixture, ensure your cream cheese is at room temperature. This will help it blend more easily with the other ingredients.
- Whip Cream to Stiff Peaks: Make sure to whip your heavy cream until stiff peaks form. This is crucial for achieving a light and airy cheesecake texture.
- Layering Technique: When filling the cups, use a piping bag to create layers of cheesecake filling for a more professional and visually appealing presentation.
- Make Ahead: These cheesecake cups can be made a day in advance. This not only saves time but also allows the flavors to meld together beautifully.
Variations
Flavor Enhancements
You can switch up the flavor of your cheesecake cups by using different cookies. Try peanut butter Oreos for a nutty twist. They add a rich taste that pairs well with the cream cheese. You can also swirl in chocolate or caramel sauces. Drizzling these sauces on top or mixing them into the filling adds a fun layer of flavor. Experiment with your favorite flavors to make it your own!
Dietary Modifications
For those with dietary needs, there are easy swaps. Use gluten-free Oreo cookies to make these treats safe for gluten-sensitive friends. They taste just as good! If you're looking for dairy-free options, choose a dairy-free cream cheese and whipped cream. Many brands offer tasty alternatives that work well in this recipe. These adjustments let everyone enjoy a delicious dessert!
Storage Info
Best Practices for Storing Cheesecake Cups
To keep your No-Bake Oreo Cheesecake Cups fresh, store them in the fridge. They can last up to five days when covered well. Use plastic wrap or an airtight container to prevent drying out. If you want to save them for later, freezing is an option. Place them in a freezer-safe container. They will stay good for about two months in the freezer.
Reheating and Serving After Storage
If you freeze the cheesecake cups, safely defrost them in the fridge overnight. This keeps the texture smooth. Once thawed, you may notice they need a little help. To restore their creamy texture, gently stir the filling before serving. This simple step brings back the deliciousness and makes them ready to enjoy!
FAQs
How long do No-Bake Oreo Cheesecake Cups last in the fridge?
No-Bake Oreo Cheesecake Cups stay fresh in the fridge for about 3 to 5 days. To keep them at their best, store them in an airtight container. This way, they won’t absorb any odors from other foods. If you want to enjoy them longer, you can freeze them.
Can I use a different type of cookie for the crust?
Yes, you can swap Oreo cookies for many other types. Some good options are chocolate sandwich cookies, graham crackers, or even vanilla wafers. Just crush them finely and mix with melted butter. Each will give a unique flavor to your cheesecake cups.
What can I do if the cheesecake mixture seems too runny?
If your mixture is runny, it may be due to not whipping the cream enough. Make sure to whip it until stiff peaks form. If it's still runny, chill it for a bit before folding the whipped cream in. This helps it set better.
In this blog post, we explored how to make delicious No-Bake Oreo Cheesecake Cups. You learned the best ingredients and tips for perfect texture. Always use room temperature cream cheese and avoid overmixing. Remember to refrigerate for great flavor. You can get creative with flavors or dietary needs. Store them properly to keep them fresh. With these steps, you can enjoy tasty treats any time. Get ready to impress with your new skills!