Are you ready to impress your friends and family with a delicious treat? Mini Key Lime Cheesecakes are a simple and tangy delight that anyone can make! With just a few easy steps and fresh flavors, you'll create individual desserts that burst with zesty goodness. In this guide, I’ll walk you through the ingredients and equipment you need, plus all the steps to perfect these bite-sized cheesecakes. Let’s get baking!
Why I Love This Recipe
- Perfect Balance of Flavors: The tartness of key limes combined with the sweetness of the cream cheese creates a delightful contrast that is simply irresistible.
- Individual Portions: These mini cheesecakes are perfect for serving at gatherings, allowing guests to enjoy a personal-sized treat without feeling guilty.
- Easy to Make: With straightforward steps and minimal prep time, this recipe is accessible for both novice and experienced bakers alike.
- Refreshing Dessert: The light and zesty flavor of key lime makes these cheesecakes a refreshing option, especially during warm weather.
Ingredients
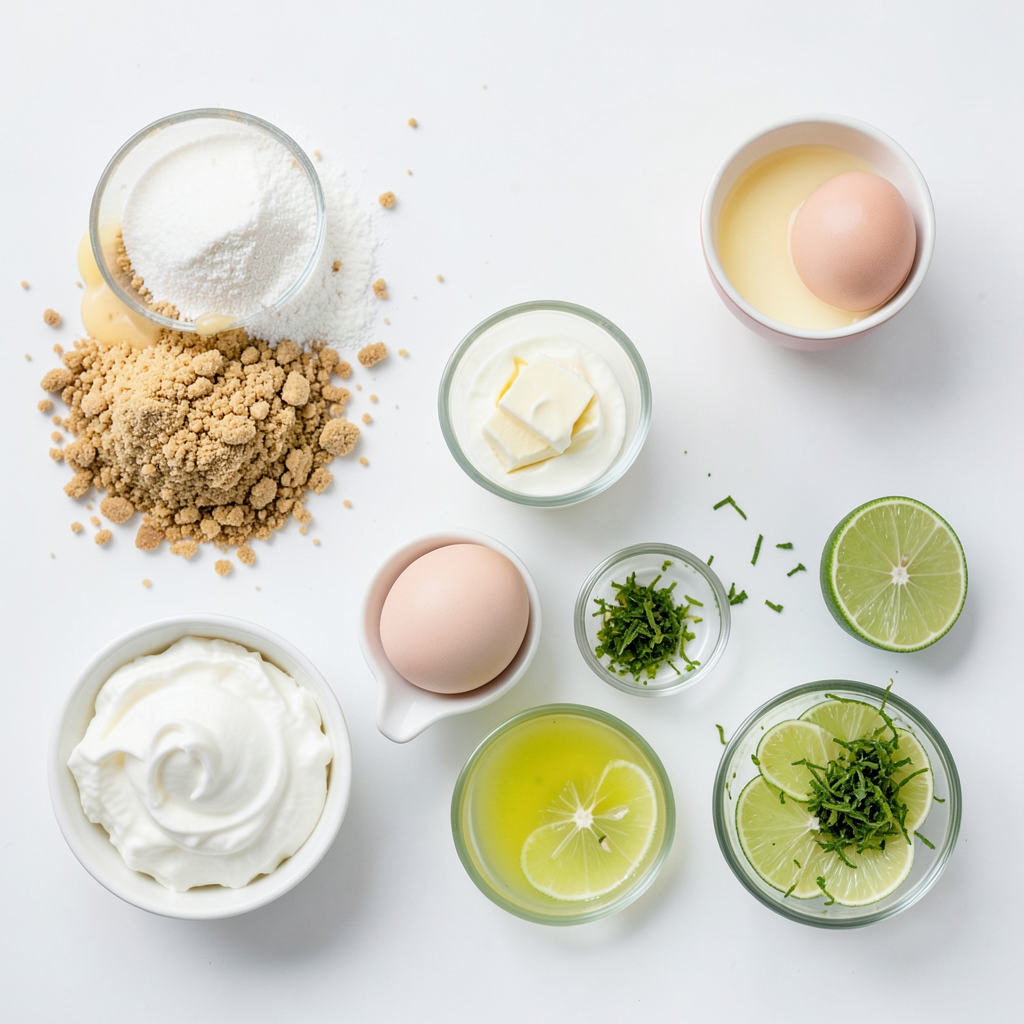
Essential Ingredients
- 1 cup graham cracker crumbs
- 1/4 cup granulated sugar
- 1/2 cup unsalted butter, melted
- 16 oz cream cheese, softened
- 1 cup sweetened condensed milk
- 1/2 cup fresh key lime juice
- 1 tablespoon lime zest
- 2 large eggs
- Whipped cream, for topping
- Lime slices, for garnish
Equipment Needed
- Cupcake pan
- Cupcake liners
- Mixing bowls
- Electric mixer
When I make mini key lime cheesecakes, I always use fresh ingredients. The graham cracker crumbs create a tasty crust. I mix them with sugar and melted butter. This combination gives a sweet and crunchy base.
Next, I turn to the filling. Cream cheese is key for a smooth texture. It blends perfectly with sweetened condensed milk. I add fresh key lime juice and lime zest for that zing. The eggs help bind everything together.
For equipment, I use a cupcake pan. Cupcake liners make clean-up easy and ensure no sticking. I always have mixing bowls and an electric mixer on hand. This setup makes the process quick and fun!
By selecting these ingredients and tools, you set yourself up for a delightful baking experience. Enjoy the process and the tasty results!
Step-by-Step Instructions
Preheat and Prepare
First, preheat your oven to 325°F (163°C). This helps the cheesecakes bake evenly. Next, grab a mixing bowl. Combine 1 cup of graham cracker crumbs with 1/4 cup of granulated sugar. Pour in 1/2 cup of melted unsalted butter. Mix until the crumbs look like wet sand.
Form and Bake the Crusts
Line a standard cupcake pan with cupcake liners. Take about 1 tablespoon of the graham cracker mixture. Press it firmly into the bottom of each liner. Make sure the crust is compact. Bake the crusts for 5-7 minutes until they turn golden. Remove them from the oven and cool slightly on a wire rack.
Create the Cheesecake Filling
In a large mixing bowl, beat 16 oz of softened cream cheese using an electric mixer. Mix until it is smooth and creamy. Gradually add 1 cup of sweetened condensed milk. Ensure everything blends well. Now, stir in 1/2 cup of fresh key lime juice and 1 tablespoon of lime zest. Finally, add 2 large eggs and mix until just blended.
Bake the Cheesecakes
Pour the cheesecake filling into each cooled crust, filling them about two-thirds full. This allows room for rising. Return the pan to the oven and bake for 15-20 minutes. The edges should set while the centers remain slightly jiggly. This gives a creamy texture.
Cooling and Chilling
After baking, turn off the oven and crack the door open. Let the cheesecakes cool in the oven for about 1 hour. Once cooled, take them out and let them sit at room temperature. Cover and place them in the refrigerator for at least 3 hours, or ideally overnight, to set properly.
Final Presentation
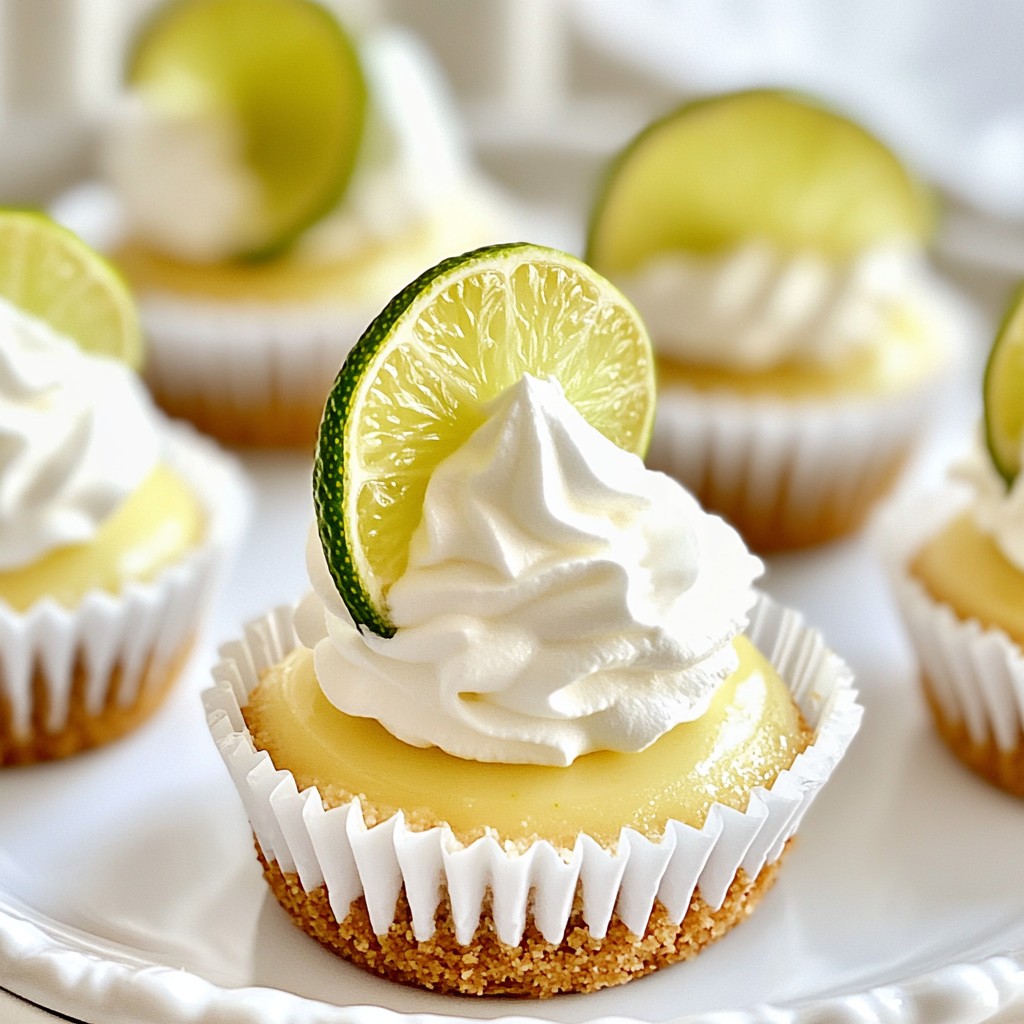
Before serving, top each mini cheesecake with a fluffy dollop of whipped cream. Add a vibrant slice of lime for garnish. This will make your desserts look fresh and inviting!
Tips & Tricks
Perfecting Your Cheesecakes
To get the best texture in your mini key lime cheesecakes, avoid overmixing. Overmixing adds too much air and can make the filling dense. Mix just until smooth and creamy. This keeps the texture light and fluffy.
When making the crust, ensure it is compactly formed. After mixing the graham cracker crumbs, sugar, and butter, press the mixture firmly into the cupcake liners. This helps the crust hold its shape while baking. A well-formed crust provides a sturdy base for the creamy filling.
Serving Suggestions
For special occasions, serve your mini cheesecakes on a beautiful platter. Add lime zest around each cheesecake for a fresh look. A sprig of mint can also add color and flavor.
Try pairing the cheesecakes with fresh berries or a scoop of vanilla ice cream. These flavors balance the tartness of the key lime. A light dessert wine can also enhance the experience.
Common Baking Mistakes
One common mistake is overbaking the cheesecakes. When the edges are set but the centers are still jiggly, they are done. If you bake too long, the filling may crack or become dry.
Watch for crust problems too. If your crust crumbles when you take it out, it may not be compact enough. Pressing it down well will help. Also, if it puffs up while baking, it may need more butter in the mix.
Pro Tips
- Use Fresh Limes: For the best flavor, always use fresh key limes or limes instead of bottled juice. The freshness makes a significant difference in taste.
- Don’t Overmix: When incorporating the eggs into the filling, mix just until combined. Overmixing can lead to a dense texture instead of a light and creamy cheesecake.
- Cool Gradually: Allow the cheesecakes to cool in the oven with the door ajar to prevent cracking. This gradual cooling helps maintain their beautiful appearance.
- Chill Overnight: For the best flavor and texture, chill the cheesecakes overnight. This allows the flavors to meld and the filling to firm up perfectly.
Variations
Flavor Swaps
You can swap key lime juice for other flavors. For a sweeter taste, use regular lime juice. You can also try lemon or orange juice for a twist. Each citrus adds a unique zing. Infusing the filling with zest from these fruits deepens the taste. This lets you create different mini cheesecakes, keeping things fresh.
Crust Alternatives
You don’t have to stick to graham crackers. A chocolate crust adds richness. You can use crushed Oreos or chocolate cookies. Almond flour mixed with butter makes a nutty crust. This option is both gluten-free and tasty. People with gluten issues will love this.
Toppings and Extras
Whipped cream is classic, but other toppings shine too. Fresh fruit like berries or kiwi adds color and flavor. You can drizzle a fruit sauce on top for fun. A berry compote is a great choice. It adds sweetness and a beautiful look. Experiment with different toppings for a unique touch!
Storage Info
How to Store Leftovers
To keep your mini cheesecakes fresh, place them in the fridge. Use an airtight container to protect them from drying out. You can also cover them tightly with plastic wrap. This method helps maintain their creamy texture and zesty flavor. Aim to eat them within a week for the best taste.
Freezing Mini Cheesecakes
If you want to save some for later, freezing is a great option. First, wrap each cheesecake tightly in plastic wrap. Then, place them in a freezer-safe bag or container. This keeps them safe from freezer burn. To thaw, move them to the fridge for several hours or overnight.
Making these mini cheesecakes ahead of time saves you stress. You can enjoy them at any time without extra work. Plus, they still taste great after freezing!
FAQs
How long do mini cheesecakes last in the fridge?
Mini cheesecakes last about five days in the fridge. Store them in a sealed container. This keeps them fresh and tasty. If you want them to last longer, consider freezing them.
Can I use bottled key lime juice instead of fresh?
Yes, you can use bottled key lime juice. But fresh juice has a better taste. Fresh juice gives a bright, tangy flavor. If you use bottled juice, check for quality to ensure flavor.
What is the best way to prevent cracks in cheesecakes?
To prevent cracks, avoid overmixing the batter. Mix until just combined. Also, bake at a low temperature. This helps the cheesecake cook evenly. Let it cool slowly in the oven after baking.
How do I know when my mini cheesecakes are done baking?
Mini cheesecakes are done when the edges look set. The centers should still jiggle slightly. This means they will firm up as they cool. Keep an eye on them during the last few minutes of baking.
Can this recipe be doubled for a larger batch?
Yes, you can double this recipe. Just use a larger cupcake pan or two pans. Make sure to adjust baking time as needed. Keep an eye on them for doneness.
You now have all the tools to make mini key lime cheesecakes. We explored essential ingredients, equipment, and step-by-step instructions. I shared tips for perfecting your recipe and variations to try.
Keep experimenting with flavors and toppings to make these treats your own. Remember, practice makes perfect. Enjoy the process of baking and the joy of sharing your delicious mini cheesecakes!