Looking for a quick, delicious family dinner? Let me introduce you to Garlic Parmesan Chicken Tenders. They're easy to make and packed with flavor that everyone will love. In this post, I’ll share the exact ingredients, step-by-step instructions, and helpful tips to ensure your chicken turns out perfectly every time. Let’s dive in and get your family excited for dinner!
Why I Love This Recipe
- Crispy Texture: The use of panko breadcrumbs gives these chicken tenders a delightful crunch that makes them irresistible.
- Flavorful Garlic: The addition of minced garlic infuses each bite with a robust flavor that pairs perfectly with the Parmesan.
- Healthier Option: Baking instead of frying means you can enjoy these tenders with less oil, making them a healthier choice.
- Quick and Easy: With a prep time of just 15 minutes, this recipe is perfect for a weeknight dinner that doesn’t compromise on taste.
Ingredients
Detailed Ingredients List
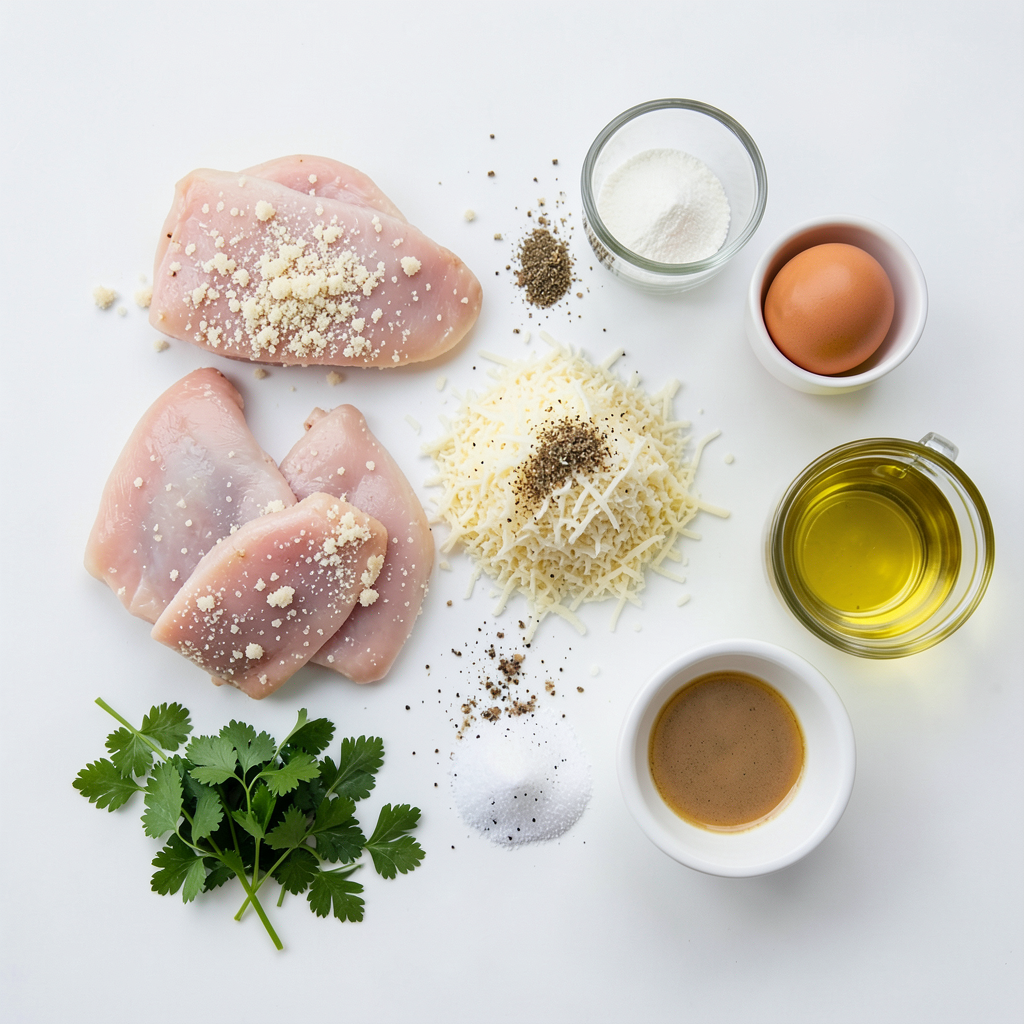
For Garlic Parmesan Chicken Tenders, gather these items:
- 1 pound of chicken tenders
- 1 cup of breadcrumbs (preferably panko for that extra crunch)
- 1/2 cup of grated Parmesan cheese
- 4 cloves of garlic, finely minced
- 1 teaspoon of Italian seasoning
- 1/2 teaspoon of salt
- 1/4 teaspoon of freshly ground black pepper
- 2 large eggs
- 1 tablespoon of extra virgin olive oil
- Fresh parsley, finely chopped (for garnish)
Nutritional Information Per Serving
Each serving of Garlic Parmesan Chicken Tenders offers:
- Calories: 350
- Protein: 30g
- Fat: 18g
- Carbohydrates: 20g
- Fiber: 1g
- Sodium: 400mg
This dish provides a good source of protein and fits well into a balanced meal.
Ingredient Substitutions
You can adapt the recipe as needed. Here are some ideas:
- Use chicken breasts if you can't find tenders.
- Swap panko breadcrumbs for regular ones if needed.
- Try nutritional yeast instead of Parmesan for a dairy-free option.
- Replace Italian seasoning with dried oregano or basil for a different flavor.
- Use coconut oil or avocado oil in place of olive oil for a unique taste.
These substitutions help you tailor the recipe to your taste or dietary needs while still keeping it delicious!
Step-by-Step Instructions
Preparation Time and Cooking Temperature
First, gather your ingredients. This recipe takes about 15 minutes to prep. Preheat your oven to 400°F (200°C). Line a baking sheet with parchment paper. This step helps with easy cleanup.
Coating the Chicken Tenders
In a big bowl, mix the breadcrumbs, grated Parmesan cheese, minced garlic, Italian seasoning, salt, and black pepper. Stir well to combine. In another bowl, whisk the two eggs until blended. Take each chicken tender and dip it into the egg mixture. Make sure it’s fully coated. Let any extra egg drip off. Now, move the chicken into the breadcrumb mixture. Press the breadcrumbs onto the chicken. This step ensures a thick and crunchy coating.
Baking Process
Place the coated chicken tenders on the lined baking sheet in a single layer. Drizzle the extra virgin olive oil on top. This makes the tenders golden and crispy. Bake them in the preheated oven for 15-20 minutes. Check the internal temperature; it should reach 165°F. When done, take the baking sheet out and let the chicken rest for a few minutes. This helps keep the juices inside. Just before serving, sprinkle fresh parsley on top for extra flavor and a pop of color.
Tips & Tricks
Perfecting the Crunch
To get that perfect crunch on your chicken tenders, use panko breadcrumbs. Panko gives you a light and crispy texture that regular breadcrumbs cannot. When you coat the chicken, press the breadcrumbs firmly. This helps them stick and form a nice crust. Drizzling olive oil before baking adds even more crunch.
Avoiding Common Mistakes
One common mistake is not preheating the oven. Always set your oven to 400°F before you start. This ensures even cooking. Another mistake is not letting the excess egg drip off before coating. If you leave too much egg, the breadcrumbs won’t stick well. Finally, don’t crowd the baking sheet. Space the tenders out so they cook evenly.
Variations for Flavor Enhancement
You can boost the flavor in many ways. Add some red pepper flakes for a spicy kick. You can also try different herbs, like rosemary or thyme. For a twist, mix in some lemon zest with the breadcrumbs. This adds a bright flavor that pairs well with garlic and Parmesan.
Pro Tips
- Choose the Right Breadcrumbs: Using panko breadcrumbs will give your chicken tenders an extra crunch. They’re lighter and crispier than regular breadcrumbs, making for a delightful texture.
- Don’t Rush the Coating: Ensure that the chicken tenders are well-coated in both the egg and breadcrumb mixtures. Pressing the breadcrumbs firmly onto the chicken ensures maximum adherence and a crispy finish.
- Monitor Cooking Time: Keep an eye on your chicken tenders as they bake. Cooking times can vary based on the size of the tenders, so use a meat thermometer to check for doneness (165°F) to avoid overcooking.
- Rest Before Serving: Allow the chicken tenders to rest for a few minutes after baking. This helps to seal in the juices, making them more tender and flavorful when you bite into them.
Variations
Spicy Garlic Parmesan Chicken Tenders
You can spice up garlic Parmesan chicken tenders easily. To make them spicy, add cayenne pepper or red pepper flakes to the breadcrumb mix. You can start with 1/2 teaspoon and adjust to your taste. This adds heat while keeping the classic flavors.
Baked vs. Fried Options
Both baking and frying work well for chicken tenders. Baking is healthier and gives a nice crunch. To bake, preheat your oven to 400°F (200°C) and follow the recipe. For frying, heat oil in a deep pan. Cook the tenders until they turn golden brown. Frying adds richness and a crispy texture but use it sparingly for health reasons.
Dietary Modifications (Gluten-Free, Dairy-Free)
You can easily adapt this recipe for dietary needs. For gluten-free, swap regular breadcrumbs with gluten-free ones. There are many options available that still provide crunch. For dairy-free, use nutritional yeast instead of Parmesan cheese. This gives a cheesy flavor without dairy. Both adaptations keep the dish tasty and accessible for everyone.
Storage Info
Best Storage Practices
To keep your garlic Parmesan chicken tenders fresh, store them in an airtight container. Let them cool to room temperature first. This helps prevent moisture build-up. You can keep them in the fridge for up to three days. If you want them to last longer, freezing is a great option.
Reheating Instructions
When you’re ready to enjoy your chicken tenders again, reheat them in the oven. Preheat your oven to 375°F (190°C). Place the tenders on a baking sheet lined with parchment paper. Bake for about 10-15 minutes, or until heated through. This method keeps them crispy. You can also use an air fryer for quick reheating. Just set it to 375°F (190°C) and heat for about 5-7 minutes.
Freezing Chicken Tenders for Later
To freeze chicken tenders, first, let them cool completely. Arrange them in a single layer on a baking sheet. Freeze them for about an hour until they are firm. Once frozen, transfer them to a freezer bag or container. Label the bag with the date. They can last in the freezer for up to three months. When you want to eat them, follow the reheating instructions above. Enjoy that fresh taste!
FAQs
How do I know when the chicken tenders are fully cooked?
You can check if the chicken tenders are done by using a meat thermometer. The thickest part should reach 165°F. If you don’t have a thermometer, cut one tender in half. The meat should be white and the juices should run clear. This shows the chicken is safe to eat.
Can I prepare these chicken tenders ahead of time?
Yes, you can prepare the chicken tenders ahead of time. After coating them, cover and refrigerate them for up to 24 hours. This allows the flavors to blend and makes cooking easy on busy nights. Just remember to bake them straight from the fridge. You may need to add a few extra minutes to the baking time.
What is the difference between regular and panko breadcrumbs?
Panko breadcrumbs are larger and flakier than regular breadcrumbs. This gives your chicken tenders a crunchier texture. Regular breadcrumbs are fine and may not create the same crispiness. If you want that extra crunch in your Garlic Parmesan Chicken Tenders, always opt for panko.
This blog covered the key ingredients, steps, and tips for making delicious chicken tenders. You learned about ingredient swaps, perfect cooking methods, and tasty variations. Remember, proper storage keeps them fresh for later.
In my experience, great chicken tenders come down to using the right techniques. With practice, you can create tender, crunchy bites that everyone will love. Enjoy your cooking and feel free to experiment!