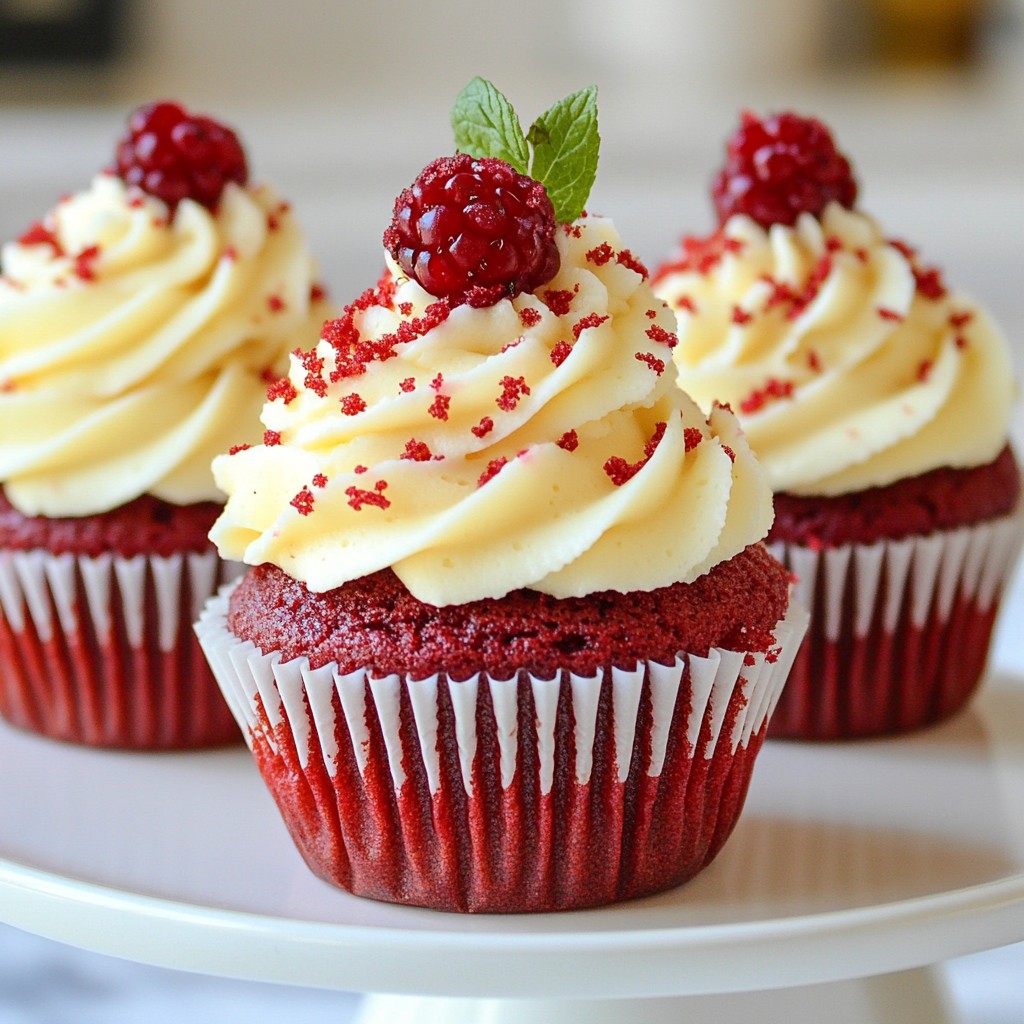
Are you ready to indulge in a sweet classic? This simple recipe for Classic Red Velvet Cupcakes will have your taste buds dancing. With rich flavors and a stunning red hue, these treats are perfect for any occasion. I'll guide you step-by-step to create fluffy cupcakes topped with creamy frosting. Whether you’re a baking novice or a pro, this recipe is easy and delightful. Let’s get started on your red velvet journey!
Why I Love This Recipe
- Unique Flavor: The combination of buttermilk and cocoa powder creates a rich, tangy flavor that sets these cupcakes apart from ordinary chocolate cupcakes.
- Vibrant Color: The addition of red food coloring gives these cupcakes their signature look, making them a showstopper for any occasion.
- Easy to Make: This recipe is straightforward and doesn’t require any fancy techniques, perfect for bakers of all skill levels.
- Perfect for Any Celebration: These velvety red cupcakes are ideal for birthdays, anniversaries, or Valentine’s Day, adding a touch of elegance to any dessert table.
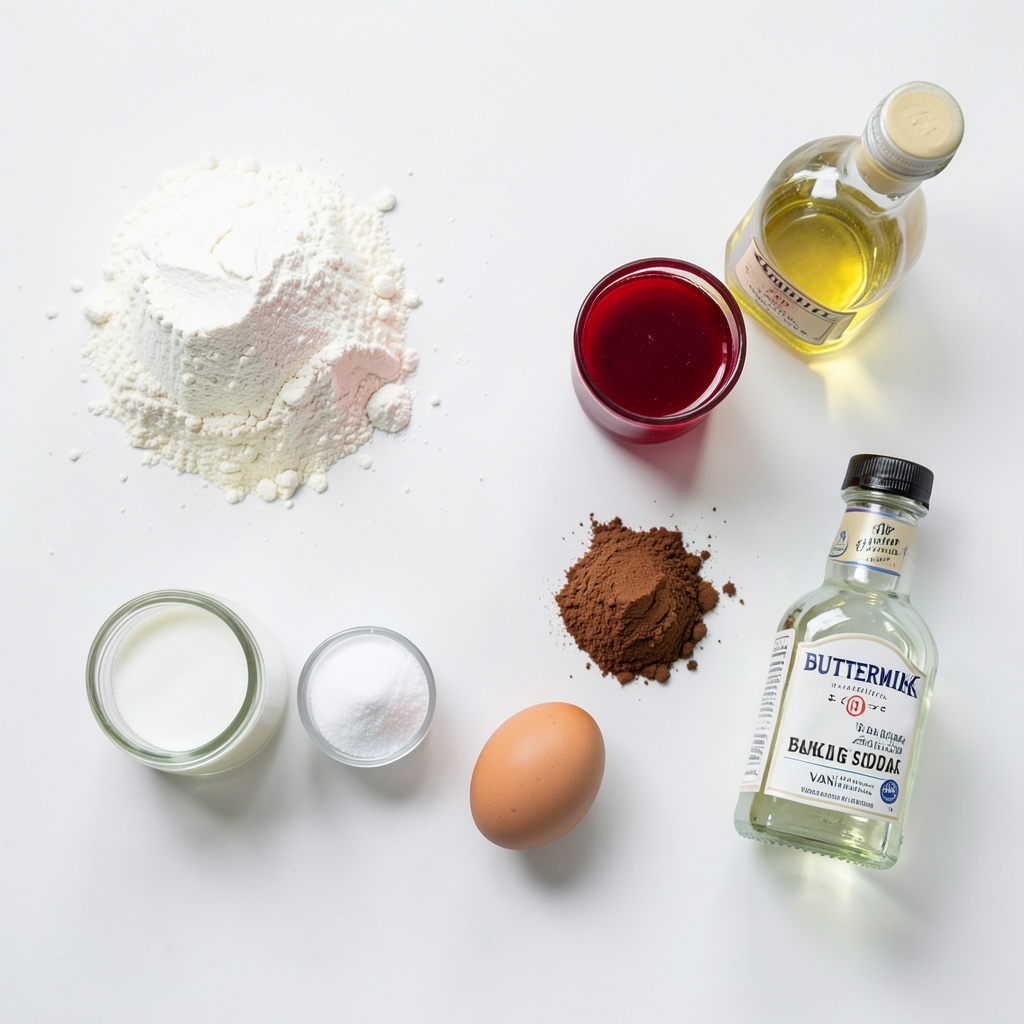
Ingredients
List of Ingredients
- 1 ½ cups all-purpose flour
- 1 cup granulated sugar
- 1 teaspoon baking soda
- 1 teaspoon unsweetened cocoa powder
- 1 teaspoon fine salt
- 1 cup vegetable oil
- 1 cup buttermilk, at room temperature
- 2 large eggs, at room temperature
- 2 tablespoons red food coloring
- 1 teaspoon pure vanilla extract
- 1 teaspoon distilled white vinegar
To make classic red velvet cupcakes, you need a handful of key ingredients. First, the base of these cupcakes is all-purpose flour. It gives structure and a light texture. Next, granulated sugar adds sweetness, balancing the flavors beautifully.
Baking soda helps the cupcakes rise and gives them a fluffy feel. Unsweetened cocoa powder adds a subtle chocolate taste without overpowering the red color. Fine salt is important. It enhances the sweetness and brings the flavors together.
Now, let’s talk about moisture. Vegetable oil keeps the cupcakes soft and tender. Buttermilk adds a rich taste and helps with the texture. Use large eggs at room temperature for the best mixing results.
The star of the show is red food coloring. It gives these cupcakes their stunning hue. Pure vanilla extract adds depth to the flavor, while distilled white vinegar balances the buttermilk’s acidity.
Each ingredient plays a role. When combined, they create a delightful cupcake experience.
Step-by-Step Instructions
Preheat the Oven
Set your oven to 350°F (175°C). This is the perfect temperature for baking. Line a standard cupcake pan with paper liners. This helps you remove the cupcakes easily after baking.
Mixing Dry Ingredients
In a medium bowl, sift together the flour, sugar, baking soda, cocoa powder, and salt. Sifting is key. It helps mix the dry ingredients well and adds air. Aerated flour gives your cupcakes a lighter texture.
Preparing the Wet Mixture
In a large bowl, whisk together the vegetable oil, buttermilk, eggs, red food coloring, vanilla extract, and vinegar. Make sure to mix these well. You want a smooth and vibrant mixture. This step is important for flavor and color.
Combining Mixtures
Gradually add the sifted dry ingredients to the wet mixture. Use a spatula or wooden spoon to fold gently. Be careful not to over-mix. Over-mixing can make your cupcakes dense, not fluffy.
Filling the Cupcake Liners
Use a scoop or spoon to fill each cupcake liner about two-thirds full. This helps ensure even baking. If you fill them too much, they may overflow while baking.
Baking and Testing for Doneness
Place the cupcake pan in your preheated oven. Bake for about 18 to 20 minutes. To test if they are done, insert a toothpick into the center of a cupcake. If it comes out clean, they are ready.
Cooling the Cupcakes
After baking, let the cupcakes cool in the pan for about 5 minutes. Then, transfer them to a wire rack to cool completely. Cooling them on a rack helps air circulate, making them less soggy.
Tips & Tricks
Baking Perfect Cupcakes
To bake perfect red velvet cupcakes, follow these tips:
- Key baking techniques: Always sift your dry ingredients. This helps mix air into the flour and other dry items. Lightly folding the wet and dry mixtures keeps your cupcakes soft.
- Temperature tips for ingredients: Use room-temperature eggs and buttermilk. This helps the batter blend smoothly. Cold ingredients can make your cupcakes dense.
Frosting Techniques
Frosting adds a sweet touch to your cupcakes. Here’s how to do it right:
- Best practices for cream cheese frosting: Soften your cream cheese before mixing. This ensures a smooth and creamy texture. Beat it with butter until fluffy for a light frosting.
- Tips for an attractive presentation: Use a piping bag for neat frosting. Swirl it high for a pretty look. Top with crumbled cake or berries for color and style.
Troubleshooting Common Issues
Sometimes, baking can go wrong. Here’s how to fix common problems:
- Dealing with dry cupcakes: If your cupcakes turn out dry, check your oven's temperature. Too high can dry them out. Also, avoid over-mixing the batter.
- Fixing sunken cupcakes: If your cupcakes sink, it might be due to underbaking. Always use a toothpick to check if they’re done. If they sink, they may need a few extra minutes.
Pro Tips
- Use Room Temperature Ingredients: Ensuring that your eggs and buttermilk are at room temperature will help create a smoother batter and result in a more even rise during baking.
- Don’t Overmix the Batter: Mixing too much can lead to dense cupcakes. Stir until just combined for light and fluffy results.
- Check for Doneness: Instead of relying solely on baking time, use a toothpick to check if the cupcakes are done; they should spring back when lightly pressed.
- Cooling is Key: Allow your cupcakes to cool in the pan for a few minutes before transferring them to a wire rack. This helps maintain their structure and prevents them from becoming soggy.
Variations
Flavor Variations
You can make your red velvet cupcakes even more fun. Try adding spices like cinnamon or nutmeg for warmth. You can also mix in a bit of almond extract for a twist. For frosting, cream cheese is classic, but you can use chocolate or whipped cream for a change. These options bring new flavors to your special treat.
Dietary Adjustments
If you're gluten-free, swap the all-purpose flour for a gluten-free blend. This keeps the texture light and fluffy. For vegan cupcakes, replace eggs with flax eggs or applesauce. Use plant-based milk instead of buttermilk. These simple swaps let everyone enjoy red velvet cupcakes, no matter their diet.
Mini and Jumbo Cupcake Adjustments
Baking mini cupcakes? Reduce the baking time to about 12-15 minutes. Check for doneness with a toothpick to avoid overbaking. For jumbo cupcakes, increase the time to 25-30 minutes. Adjust portion sizes to fit your needs, keeping in mind that yields will change with size.
Storage Info
Short-term Storage
To keep your red velvet cupcakes fresh, store them in an airtight container. This prevents them from drying out. Place them at room temperature for up to three days. If you want to keep the frosting fresh, cover it separately. You can also frost the cupcakes right before serving.
Long-term Storage
For long-term storage, you can freeze the cupcakes. First, let them cool completely. Then, wrap each cupcake tightly in plastic wrap. Place them in a freezer-safe bag or container. They will last for up to three months in the freezer.
When you are ready to enjoy them, take the cupcakes out of the freezer. Let them thaw in the fridge overnight. For best taste, serve them at room temperature. You can add fresh frosting before serving. This way, they taste just as good as when they were first baked.
FAQs
What is the origin of red velvet cupcakes?
Red velvet cupcakes come from the Southern United States. They became popular in the 1920s. The name comes from the cake’s rich, red color and soft texture. Some say it got its color from cocoa powder and acidic ingredients. Others claim it was dyed with red food coloring. The unique flavor comes from a mix of cocoa and buttermilk.
Can I make red velvet cupcakes without buttermilk?
Yes, you can make red velvet cupcakes without buttermilk. If you don't have buttermilk, use milk with vinegar. Mix one cup of milk with one tablespoon of vinegar. Let it sit for about five minutes. This will give you a similar tangy flavor. You can also use yogurt or sour cream as a substitute.
How do I know when the cupcakes are done baking?
Check the cupcakes with a toothpick. Insert it into the center of a cupcake. If it comes out clean, they are done. Usually, red velvet cupcakes bake for 18 to 20 minutes. Keep an eye on them. Every oven is different, and baking times may vary.
What’s the best frosting for red velvet cupcakes?
The best frosting for red velvet cupcakes is cream cheese frosting. It adds a nice tang that goes well with the cake. To make it, mix cream cheese, butter, powdered sugar, and vanilla. You can also top your cupcakes with a little chocolate ganache for extra flavor.
Can I bake these as a cake instead of cupcakes?
Yes, you can bake red velvet as a cake. Adjust the baking time. A round cake will take about 25 to 30 minutes. Use the toothpick test to check for doneness. Remember to grease and flour your cake pans well to avoid sticking.
This guide covers all you need for perfect red velvet cupcakes. You learned about the essential ingredients, step-by-step mixing and baking techniques, and tips for frosting. I shared variations and storage tips to help you get the best results.
Red velvet cupcakes are fun to make and great for any occasion. With practice, you can enjoy baking these treats and impress your family and friends. Happy baking!