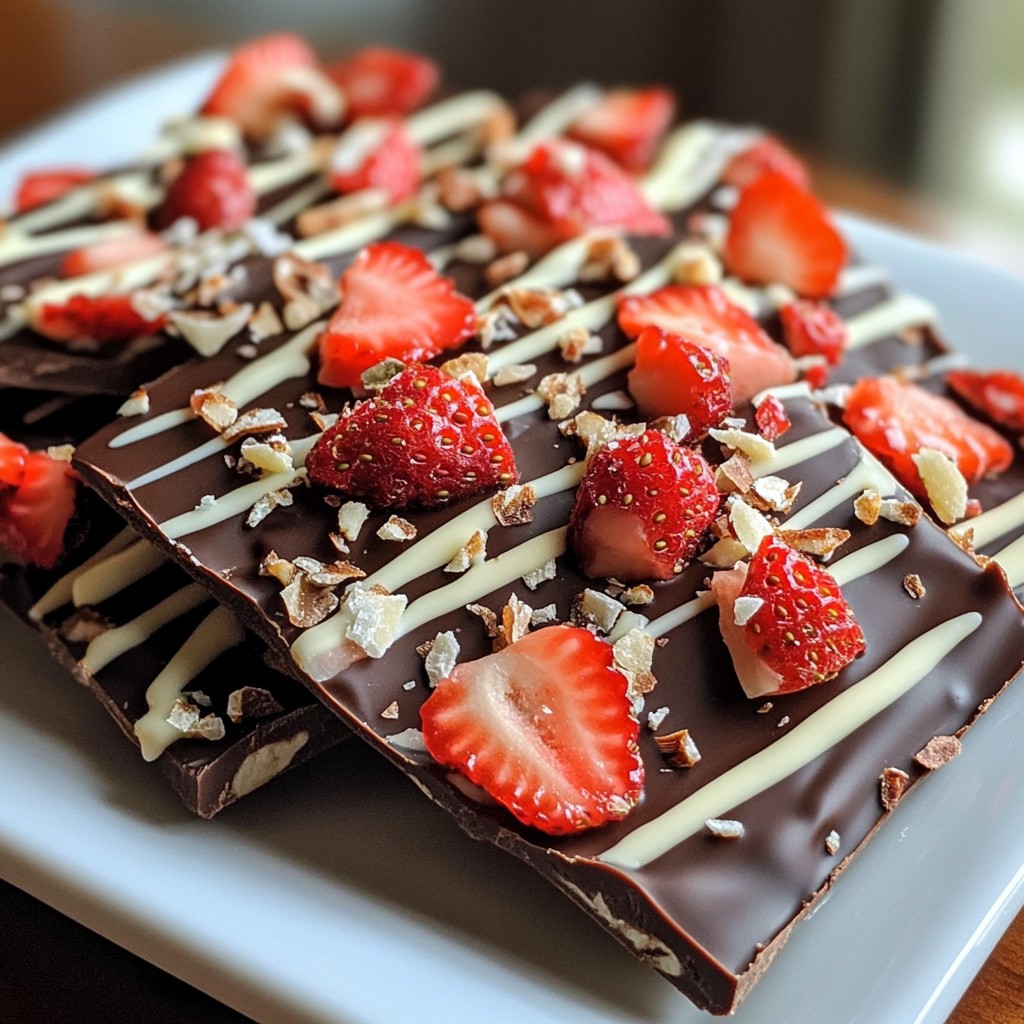
Are you ready to indulge in a sweet and easy treat? Chocolate Covered Strawberry Bark is an irresistible delight that combines rich chocolate and sweet strawberries in every bite. With just a few simple ingredients and steps, you can create this stunning dessert at home. Whether you want to impress guests or enjoy a tasty snack, this bark is perfect for any occasion. Let’s dive into how you can make it!
Why I Love This Recipe
- Delicious Combination: The rich, dark chocolate perfectly complements the sweet and tangy strawberries, creating a delightful flavor explosion in every bite.
- Easy to Make: This recipe is simple and quick, requiring minimal ingredients and just a few steps, making it accessible for all skill levels.
- Customizable: You can easily switch up the toppings or chocolate types to suit your taste, allowing for endless variations of this treat.
- Perfect for Sharing: Chocolate Covered Strawberry Bark makes for a stunning presentation, ideal for parties, gatherings, or as a thoughtful homemade gift.
Ingredients
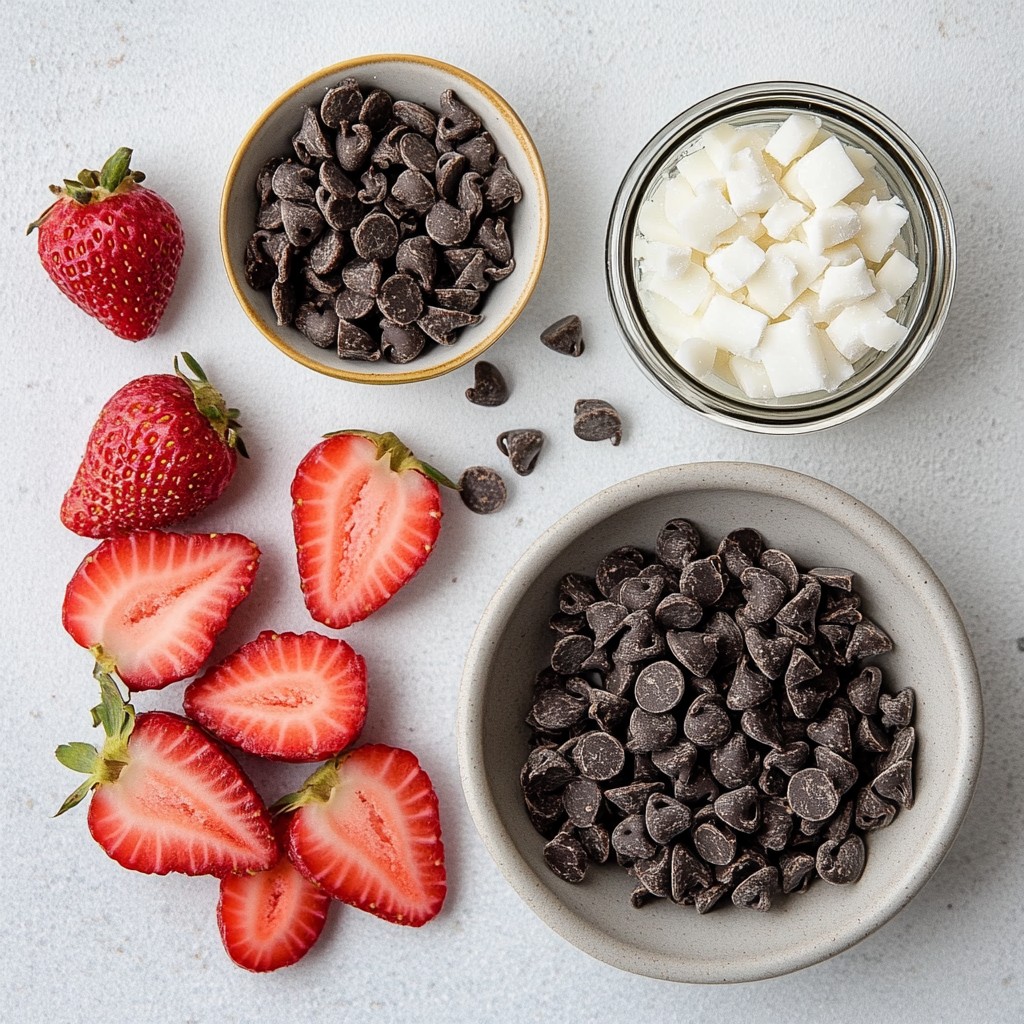
The right mix of ingredients makes a great treat. Here’s what you need for chocolate covered strawberry bark:
- 2 cups dark chocolate chips
- 1 cup freeze-dried strawberries, crushed into small pieces
- 1 cup fresh strawberries, hulled and sliced into thin rounds
- 1/2 cup white chocolate chips (for decorative drizzling)
- Sea salt flakes, to taste (for garnish)
- 1 teaspoon coconut oil (optional, for achieving a smoother melted chocolate consistency)
Using dark chocolate chips gives a rich base. The freeze-dried strawberries add a fun crunch. Fresh strawberries bring a juicy burst of flavor. White chocolate chips are perfect for that sweet drizzle. Sea salt adds a nice contrast to the sweetness. You can use coconut oil if you want smoother chocolate.
This mix creates a tasty bark that everyone will love.
Step-by-Step Instructions
Preparation Steps
1. Lining the baking sheet
Start by lining a baking sheet with parchment paper. Make sure the paper hangs over the sides. This will help you lift the bark out later.
2. Melting the dark chocolate
In a microwave-safe bowl, mix the dark chocolate chips with coconut oil, if you want. Microwave it on medium power for 30 seconds. Stir the chocolate well after each time. Keep going until it melts smoothly, about 1 to 2 minutes total.
3. Spreading the chocolate on the baking sheet
Once melted, carefully pour the dark chocolate onto the lined baking sheet. Use a spatula to spread it evenly. Aim for a layer that is about 1/4 inch thick.
Adding the Toppings
1. Sprinkling freeze-dried strawberries
While the chocolate is still warm, sprinkle the crushed freeze-dried strawberries over it. This will help them stick better.
2. Arranging fresh strawberries
Next, take the sliced fresh strawberries and arrange them on top. Press them down gently into the chocolate. This ensures they stay in place.
3. Drizzling white chocolate
In a new bowl, melt the white chocolate chips. Use the same microwave method. Once melted, use a fork or a piping bag to drizzle the white chocolate over the bark. Be creative!
Setting the Bark
1. Chill time in the refrigerator
Place the baking sheet in the refrigerator. Let the chocolate set for about 30 minutes. It should be completely hard when you check it.
2. Breaking the bark into pieces
After the chocolate has set, lift the bark off the parchment paper. Break it into different pieces. This gives it a rustic look. Enjoy your treat!
Tips & Tricks
Best Chocolate Melting Techniques
- Using a microwave vs. double boiler: The microwave is quick and easy. Start with a microwave-safe bowl. Heat the chocolate in short bursts. Stir often to avoid burning. A double boiler is great for slow melting. It uses steam to gently melt the chocolate. This method helps keep it smooth.
- Adding coconut oil for smoothness: Coconut oil makes chocolate silky. Add 1 teaspoon when melting. This gives your bark a nice shine and helps it harden better.
Ensuring Fruit Adherence
- Pressing fruit into chocolate: After pouring the melted chocolate, add the fruit quickly. Gently press the fruit into the warm chocolate. This helps it stick well. If you wait too long, the chocolate will start to set, and the fruit won’t hold.
- Timing for optimal adhesion: Aim to add the fruit right after you spread the chocolate. This ensures perfect bonding. It should be warm enough to grip the fruit.
Presentation and Serving Suggestions
- Decorative serving ideas: Use a pretty platter for serving. Arrange the bark pieces in a fun way. Add whole strawberries around the edges for color. This makes the treat look fancy.
- Gift-wrapping tips for homemade gifts: Wrap your bark in clear cellophane. Tie it with a pretty ribbon. This adds a personal touch. It makes a great gift for friends and family.
Pro Tips
- Choose Quality Chocolate: Opt for high-quality dark chocolate for a richer flavor. The better the chocolate, the more delicious your bark will be!
- Fruit Placement: For a more visually appealing bark, arrange the sliced fresh strawberries in a pattern before pressing them into the chocolate.
- Experiment with Toppings: Feel free to add other toppings like nuts, or coconut flakes for added texture and flavor.
- Storage Tips: Store the bark in an airtight container at room temperature for up to a week, or in the refrigerator for longer freshness.
Variations
Ingredient Substitutions
You can switch up the chocolate types in this recipe. I love using milk chocolate for a sweeter taste. White chocolate also works well if you want a creamy finish.
If you want to change the fruit, consider nuts or dried fruits. Chopped almonds or walnuts add a nice crunch. Dried cranberries or mango can bring new flavors to your bark.
Flavor Enhancements
Adding extracts or flavorings can make your bark even better. A splash of vanilla extract or almond extract can deepen the taste. You can also try using spices like cinnamon. A pinch of sea salt can balance the sweetness too.
Dietary Adjustments
If you follow a vegan diet, look for vegan chocolate options. Many brands now offer dark chocolate that is dairy-free. This way, you can enjoy the treat without worry.
For gluten-free needs, rest easy. This recipe is naturally gluten-free. Just ensure all your ingredients are certified gluten-free.
Storage Info
How to Store Chocolate Covered Strawberry Bark
To keep your chocolate covered strawberry bark fresh, store it in an airtight container. This will protect it from moisture and odors. Make sure the container is clean and dry before adding the bark.
Keep the container in a cool, dry place. A kitchen cupboard or pantry works well. Avoid areas with high humidity or heat. These conditions can make your bark soft or cause it to melt.
Shelf Life Information
Your chocolate covered strawberry bark can stay fresh for about two weeks. After that, you may notice changes in taste and texture.
Look for signs of spoilage, such as a dull appearance or a white film. This film is called "bloom" and happens when chocolate is not stored well. If you see this, it’s best to toss it out to enjoy fresh bark.
FAQs
How long does it take for chocolate bark to set?
Chocolate bark takes about 30 minutes to set in the refrigerator. This time helps the chocolate harden fully. You should check it after 30 minutes. If it feels firm, it is ready. If it's still soft, give it a bit more time.
Can I use fresh strawberries instead of freeze-dried?
Yes, you can use fresh strawberries. They add a juicy burst of flavor. However, they can make the bark a bit softer. Freeze-dried strawberries are crunchy and stay crisp. They also add bright color and flavor. Using both can give you the best of both worlds.
Where can I buy chocolate-covered strawberry bark?
You can find chocolate-covered strawberry bark in many stores. Check local candy shops or bakeries. Many grocery stores also sell it in their sweet sections. Online, you can find it on websites like Amazon or specialty food sites. If you want a fresh taste, I recommend making it at home!
You learned how to make chocolate-covered strawberry bark using simple ingredients and steps. We explored techniques for melting chocolate, adding fruit, and presenting your treats. Remember, you can customize this recipe with different chocolates and fruits to fit your tastes. Ensure proper storage for freshness. Making this bark is fun and perfect for gifts or special treats at home. Enjoy experimenting with flavors and make this tasty treat your own!