Cherry Pie Bars Delightful Dessert for Any Occasion

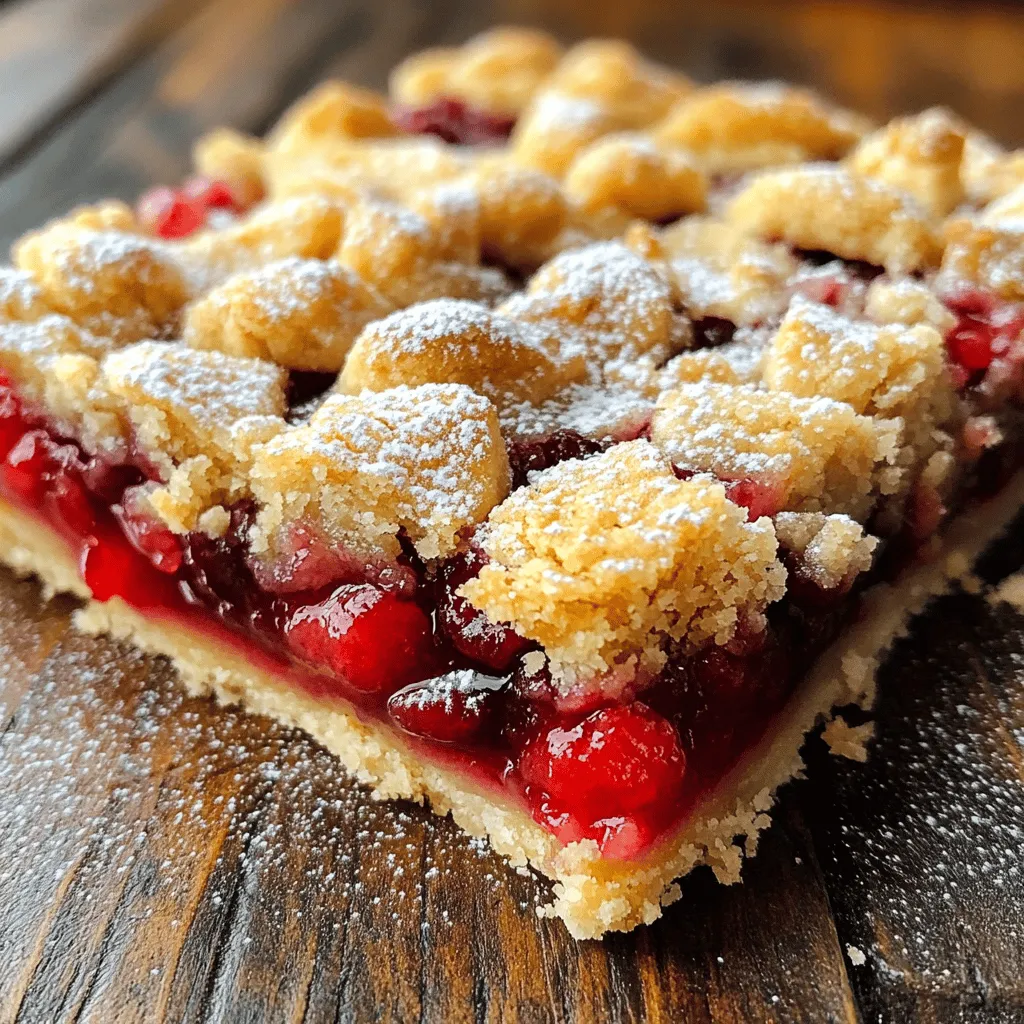
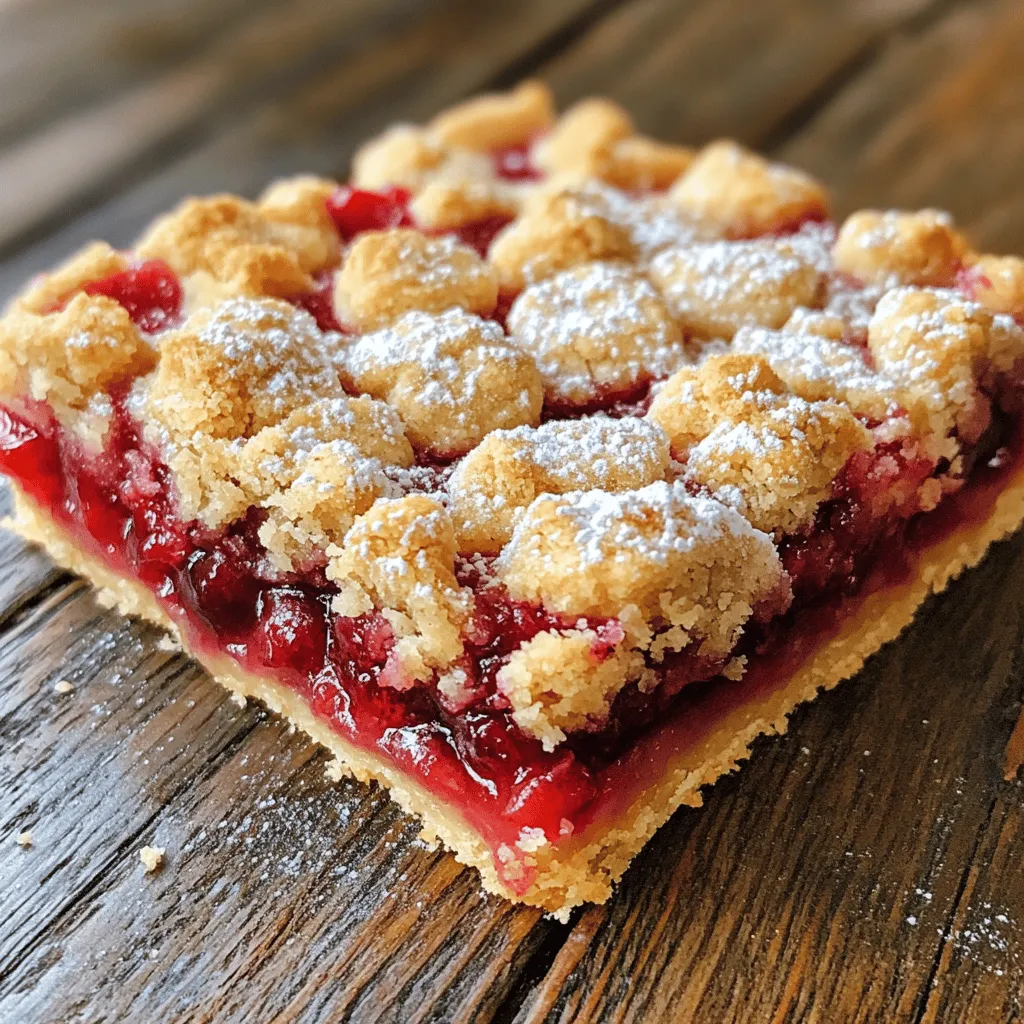
If you love sweet treats, then my Cherry Pie Bars are a must-try! These easy-to-make bars burst with cherry flavor and are perfect for any occasion. With simple ingredients and step-by-step instructions, you’ll find baking these bars incredibly fun. Plus, they can be customized to fit your taste. So, let’s dive in and learn how to make this delightful dessert that will impress everyone!

For the perfect cherry pie bars, gather these simple ingredients: - 2 cups all-purpose flour - 1 cup granulated sugar - ½ cup unsalted butter, melted - 1 large egg - 1 teaspoon vanilla extract - 1 teaspoon baking powder - ¼ teaspoon salt - 2 cups fresh or frozen cherries, pitted and halved - 1 tablespoon lemon juice - 1 tablespoon cornstarch - ½ teaspoon almond extract - Powdered sugar for dusting (optional) This list gives you everything you need to create a delightful treat. Use fresh cherries for a burst of flavor. If those are not available, frozen cherries work just as well. This flexibility makes it easy to whip up this dessert any time of year. Each ingredient plays a vital role. The flour and sugar create a sturdy base. The butter helps bind the mixture, while the egg adds moisture and richness. Vanilla and almond extracts bring depth to the flavor. The cornstarch thickens the cherry filling, making it just right. You can add powdered sugar as a finishing touch. It gives the bars a sweet look and taste. Now that you have your ingredients ready, let’s dive into the full recipe and make these cherry pie bars! - Preheat oven to 350°F (175°C). - Grease and line an 8x8-inch baking pan with parchment paper. - In a large bowl, mix these dry ingredients: - 2 cups all-purpose flour - 1 cup granulated sugar - 1 teaspoon baking powder - ¼ teaspoon salt - In another bowl, combine these wet ingredients: - ½ cup unsalted butter, melted - 1 large egg - 1 teaspoon vanilla extract - Whisk until smooth, then pour the wet mix into the dry mix. - Stir until you get a crumbly dough. - Press about two-thirds of the dough firmly into the bottom of the baking pan. - In a separate bowl, mix: - 2 cups fresh or frozen cherries, pitted and halved - 1 tablespoon lemon juice - 1 tablespoon cornstarch - ½ teaspoon almond extract - Toss the cherries gently until coated. - Spread the cherry mixture evenly over the dough in the pan. - Crumble the remaining dough on top of the cherries. - Bake for 35-40 minutes until golden brown and bubbly. - Allow cooling for 15 minutes in the pan. - Lift the bars out using the parchment paper and let them cool completely. - Slice into squares and dust with powdered sugar if desired. For the complete process, check the Full Recipe for detailed instructions. Enjoy your baking! To get the best texture in your cherry pie bars, use a room temperature egg. Cold eggs can make the dough tough. It’s best to take the egg out of the fridge about 30 minutes before you start. This small step makes a big difference. For the dough, you want it to be thick but still easy to work with. If it feels too dry, add a tiny bit of water. If it’s too wet, sprinkle in a bit more flour. Aim for a crumbly but moldable dough. Press two-thirds of it into your baking pan firmly to create a strong base. When baking, check for doneness by looking for golden brown color on top. You should also see some bubbly fruit filling around the edges. These signs mean your bars are ready to come out of the oven. After baking, let the bars cool in the pan for about 15 minutes. This helps them set. To slice the bars cleanly, use a sharp knife. Wipe the knife between cuts to keep the edges neat. Enjoy your beautiful cherry pie bars! For the full recipe, check here. {{image_4}} You can switch out cherries for other fruits. Blueberries and raspberries work great. They add a different flavor. You can also try peaches or apples for a unique twist. Each fruit brings its own taste, making your bars fun and exciting. Adding spices can make your cherry pie bars shine. A bit of cinnamon adds warmth. Nutmeg gives a nice touch, too. You might even want to mix in chocolate chips or nuts. Dark chocolate pairs well with cherries. Nuts add a crunchy texture that everyone loves. If you need gluten-free options, substitute regular flour with almond or coconut flour. These flours keep the bars tasty and enjoyable. For vegan baking, replace eggs with flax eggs or applesauce. Use coconut oil instead of butter for a dairy-free treat. These changes let everyone enjoy your dessert. Check out the Full Recipe for more details! To keep your cherry pie bars fresh, store them in an airtight container. This helps prevent them from drying out. You can also wrap them tightly in plastic wrap if you don’t have a container. Make sure you let them cool completely before storing. This way, they stay soft and yummy. For best results, keep the bars in the fridge. They can last up to a week this way. If you want to keep them longer, consider freezing. To freeze cherry pie bars, first ensure they are completely cool. Cut them into squares and place them in a single layer on a baking sheet. This prevents them from sticking together. Once frozen solid, transfer the bars into a freezer-safe bag or container. To thaw, simply move the bars to the fridge overnight. If you want to serve them warm, you can reheat them in the oven at 350°F (175°C) for about 10 minutes. This will make them soft and tasty again. Enjoy your cherry pie bars fresh or frozen! For the full recipe, check out the Cherry Bliss Pie Bars. Yes, you can use frozen cherries for cherry pie bars. They work well and save time. Just thaw and drain them before using. This keeps the filling from getting too watery. You’ll still get that sweet cherry flavor! If you want to skip almond extract, simply leave it out. You can use extra vanilla extract for more flavor. You might also try a bit of lemon or orange zest. This adds a nice, fresh taste! Cherry pie bars are tasty on their own. However, you can serve them with whipped cream or a scoop of vanilla ice cream. These toppings add creaminess and balance the sweet cherries. You could also pair them with a hot cup of coffee or tea! Cherry pie bars can last about four days at room temperature. If you store them in the fridge, they can last up to a week. Make sure to keep them in an airtight container to keep them fresh! To make cherry pie bars less sweet, reduce the sugar in the recipe. You can cut the sugar by a quarter cup. You can also use tart cherries for a more balanced flavor. This makes the bars less sugary and more tangy! In this post, we explored a tasty recipe for cherry pie bars. You learned about the ingredients, step-by-step instructions, and storage tips. I highlighted ways to adjust flavors or use different fruits. These tips ensure your cherry pie bars will be a hit. Remember, the key to success lies in the right texture and proper baking. Enjoy making and sharing these delicious treats with friends and family!

Ingredients

For the perfect cherry pie bars, gather these simple ingredients:

– 2 cups all-purpose flour

– 1 cup granulated sugar

– ½ cup unsalted butter, melted

– 1 large egg

– 1 teaspoon vanilla extract

– 1 teaspoon baking powder

– ¼ teaspoon salt

– 2 cups fresh or frozen cherries, pitted and halved

– 1 tablespoon lemon juice

– 1 tablespoon cornstarch

– ½ teaspoon almond extract

– Powdered sugar for dusting (optional)

This list gives you everything you need to create a delightful treat. Use fresh cherries for a burst of flavor. If those are not available, frozen cherries work just as well. This flexibility makes it easy to whip up this dessert any time of year.

Each ingredient plays a vital role. The flour and sugar create a sturdy base. The butter helps bind the mixture, while the egg adds moisture and richness. Vanilla and almond extracts bring depth to the flavor. The cornstarch thickens the cherry filling, making it just right.

You can add powdered sugar as a finishing touch. It gives the bars a sweet look and taste.

Step-by-Step Instructions

Preparation of the Baking Pan

– Preheat oven to 350°F (175°C).

– Grease and line an 8×8-inch baking pan with parchment paper.

Making the Dough

– In a large bowl, mix these dry ingredients:

– 2 cups all-purpose flour

– 1 cup granulated sugar

– 1 teaspoon baking powder

– ¼ teaspoon salt

– In another bowl, combine these wet ingredients:

– ½ cup unsalted butter, melted

– 1 large egg

– 1 teaspoon vanilla extract

– Whisk until smooth, then pour the wet mix into the dry mix.

– Stir until you get a crumbly dough.

Assembling Cherry Pie Bars

– Press about two-thirds of the dough firmly into the bottom of the baking pan.

– In a separate bowl, mix:

– 2 cups fresh or frozen cherries, pitted and halved

– 1 tablespoon lemon juice

– 1 tablespoon cornstarch

– ½ teaspoon almond extract

– Toss the cherries gently until coated.

– Spread the cherry mixture evenly over the dough in the pan.

– Crumble the remaining dough on top of the cherries.

– Bake for 35-40 minutes until golden brown and bubbly.

– Allow cooling for 15 minutes in the pan.

– Lift the bars out using the parchment paper and let them cool completely.

– Slice into squares and dust with powdered sugar if desired.Enjoy your baking!

Tips & Tricks

Ensuring Perfect Texture

To get the best texture in your cherry pie bars, use a room temperature egg. Cold eggs can make the dough tough. It’s best to take the egg out of the fridge about 30 minutes before you start. This small step makes a big difference.

For the dough, you want it to be thick but still easy to work with. If it feels too dry, add a tiny bit of water. If it’s too wet, sprinkle in a bit more flour. Aim for a crumbly but moldable dough. Press two-thirds of it into your baking pan firmly to create a strong base.

Baking Tips

When baking, check for doneness by looking for golden brown color on top. You should also see some bubbly fruit filling around the edges. These signs mean your bars are ready to come out of the oven.

After baking, let the bars cool in the pan for about 15 minutes. This helps them set. To slice the bars cleanly, use a sharp knife. Wipe the knife between cuts to keep the edges neat. Enjoy your beautiful cherry pie bars!

Variations

Fruit Alternatives

You can switch out cherries for other fruits. Blueberries and raspberries work great. They add a different flavor. You can also try peaches or apples for a unique twist. Each fruit brings its own taste, making your bars fun and exciting.

Flavor Enhancements

Adding spices can make your cherry pie bars shine. A bit of cinnamon adds warmth. Nutmeg gives a nice touch, too. You might even want to mix in chocolate chips or nuts. Dark chocolate pairs well with cherries. Nuts add a crunchy texture that everyone loves.

Dietary Adjustments

If you need gluten-free options, substitute regular flour with almond or coconut flour. These flours keep the bars tasty and enjoyable. For vegan baking, replace eggs with flax eggs or applesauce. Use coconut oil instead of butter for a dairy-free treat. These changes let everyone enjoy your dessert.

Storage Info

Storing Cherry Pie Bars

To keep your cherry pie bars fresh, store them in an airtight container. This helps prevent them from drying out. You can also wrap them tightly in plastic wrap if you don’t have a container. Make sure you let them cool completely before storing. This way, they stay soft and yummy.

For best results, keep the bars in the fridge. They can last up to a week this way. If you want to keep them longer, consider freezing.

Freezing Instructions

To freeze cherry pie bars, first ensure they are completely cool. Cut them into squares and place them in a single layer on a baking sheet. This prevents them from sticking together. Once frozen solid, transfer the bars into a freezer-safe bag or container.

To thaw, simply move the bars to the fridge overnight. If you want to serve them warm, you can reheat them in the oven at 350°F (175°C) for about 10 minutes. This will make them soft and tasty again. Enjoy your cherry pie bars fresh or frozen!

FAQs

Can I use frozen cherries instead of fresh?

Yes, you can use frozen cherries for cherry pie bars. They work well and save time. Just thaw and drain them before using. This keeps the filling from getting too watery. You’ll still get that sweet cherry flavor!

How can I make cherry pie bars without almond extract?

If you want to skip almond extract, simply leave it out. You can use extra vanilla extract for more flavor. You might also try a bit of lemon or orange zest. This adds a nice, fresh taste!

What to serve with cherry pie bars?

Cherry pie bars are tasty on their own. However, you can serve them with whipped cream or a scoop of vanilla ice cream. These toppings add creaminess and balance the sweet cherries. You could also pair them with a hot cup of coffee or tea!

How long do cherry pie bars last?

Cherry pie bars can last about four days at room temperature. If you store them in the fridge, they can last up to a week. Make sure to keep them in an airtight container to keep them fresh!

Is there a way to make the bars less sweet?

To make cherry pie bars less sweet, reduce the sugar in the recipe. You can cut the sugar by a quarter cup. You can also use tart cherries for a more balanced flavor. This makes the bars less sugary and more tangy!

In this post, we explored a tasty recipe for cherry pie bars. You learned about the ingredients, step-by-step instructions, and storage tips. I highlighted ways to adjust flavors or use different fruits. These tips ensure your cherry pie bars will be a hit. Remember, the key to success lies in the right texture and proper baking. Enjoy making and sharing these delicious treats with friends and family!

For the perfect cherry pie bars, gather these simple ingredients: - 2 cups all-purpose flour - 1 cup granulated sugar - ½ cup unsalted butter, melted - 1 large egg - 1 teaspoon vanilla extract - 1 teaspoon baking powder - ¼ teaspoon salt - 2 cups fresh or frozen cherries, pitted and halved - 1 tablespoon lemon juice - 1 tablespoon cornstarch - ½ teaspoon almond extract - Powdered sugar for dusting (optional) This list gives you everything you need to create a delightful treat. Use fresh cherries for a burst of flavor. If those are not available, frozen cherries work just as well. This flexibility makes it easy to whip up this dessert any time of year. Each ingredient plays a vital role. The flour and sugar create a sturdy base. The butter helps bind the mixture, while the egg adds moisture and richness. Vanilla and almond extracts bring depth to the flavor. The cornstarch thickens the cherry filling, making it just right. You can add powdered sugar as a finishing touch. It gives the bars a sweet look and taste. Now that you have your ingredients ready, let’s dive into the full recipe and make these cherry pie bars! - Preheat oven to 350°F (175°C). - Grease and line an 8x8-inch baking pan with parchment paper. - In a large bowl, mix these dry ingredients: - 2 cups all-purpose flour - 1 cup granulated sugar - 1 teaspoon baking powder - ¼ teaspoon salt - In another bowl, combine these wet ingredients: - ½ cup unsalted butter, melted - 1 large egg - 1 teaspoon vanilla extract - Whisk until smooth, then pour the wet mix into the dry mix. - Stir until you get a crumbly dough. - Press about two-thirds of the dough firmly into the bottom of the baking pan. - In a separate bowl, mix: - 2 cups fresh or frozen cherries, pitted and halved - 1 tablespoon lemon juice - 1 tablespoon cornstarch - ½ teaspoon almond extract - Toss the cherries gently until coated. - Spread the cherry mixture evenly over the dough in the pan. - Crumble the remaining dough on top of the cherries. - Bake for 35-40 minutes until golden brown and bubbly. - Allow cooling for 15 minutes in the pan. - Lift the bars out using the parchment paper and let them cool completely. - Slice into squares and dust with powdered sugar if desired. For the complete process, check the Full Recipe for detailed instructions. Enjoy your baking! To get the best texture in your cherry pie bars, use a room temperature egg. Cold eggs can make the dough tough. It’s best to take the egg out of the fridge about 30 minutes before you start. This small step makes a big difference. For the dough, you want it to be thick but still easy to work with. If it feels too dry, add a tiny bit of water. If it’s too wet, sprinkle in a bit more flour. Aim for a crumbly but moldable dough. Press two-thirds of it into your baking pan firmly to create a strong base. When baking, check for doneness by looking for golden brown color on top. You should also see some bubbly fruit filling around the edges. These signs mean your bars are ready to come out of the oven. After baking, let the bars cool in the pan for about 15 minutes. This helps them set. To slice the bars cleanly, use a sharp knife. Wipe the knife between cuts to keep the edges neat. Enjoy your beautiful cherry pie bars! For the full recipe, check here. {{image_4}} You can switch out cherries for other fruits. Blueberries and raspberries work great. They add a different flavor. You can also try peaches or apples for a unique twist. Each fruit brings its own taste, making your bars fun and exciting. Adding spices can make your cherry pie bars shine. A bit of cinnamon adds warmth. Nutmeg gives a nice touch, too. You might even want to mix in chocolate chips or nuts. Dark chocolate pairs well with cherries. Nuts add a crunchy texture that everyone loves. If you need gluten-free options, substitute regular flour with almond or coconut flour. These flours keep the bars tasty and enjoyable. For vegan baking, replace eggs with flax eggs or applesauce. Use coconut oil instead of butter for a dairy-free treat. These changes let everyone enjoy your dessert. Check out the Full Recipe for more details! To keep your cherry pie bars fresh, store them in an airtight container. This helps prevent them from drying out. You can also wrap them tightly in plastic wrap if you don’t have a container. Make sure you let them cool completely before storing. This way, they stay soft and yummy. For best results, keep the bars in the fridge. They can last up to a week this way. If you want to keep them longer, consider freezing. To freeze cherry pie bars, first ensure they are completely cool. Cut them into squares and place them in a single layer on a baking sheet. This prevents them from sticking together. Once frozen solid, transfer the bars into a freezer-safe bag or container. To thaw, simply move the bars to the fridge overnight. If you want to serve them warm, you can reheat them in the oven at 350°F (175°C) for about 10 minutes. This will make them soft and tasty again. Enjoy your cherry pie bars fresh or frozen! For the full recipe, check out the Cherry Bliss Pie Bars. Yes, you can use frozen cherries for cherry pie bars. They work well and save time. Just thaw and drain them before using. This keeps the filling from getting too watery. You’ll still get that sweet cherry flavor! If you want to skip almond extract, simply leave it out. You can use extra vanilla extract for more flavor. You might also try a bit of lemon or orange zest. This adds a nice, fresh taste! Cherry pie bars are tasty on their own. However, you can serve them with whipped cream or a scoop of vanilla ice cream. These toppings add creaminess and balance the sweet cherries. You could also pair them with a hot cup of coffee or tea! Cherry pie bars can last about four days at room temperature. If you store them in the fridge, they can last up to a week. Make sure to keep them in an airtight container to keep them fresh! To make cherry pie bars less sweet, reduce the sugar in the recipe. You can cut the sugar by a quarter cup. You can also use tart cherries for a more balanced flavor. This makes the bars less sugary and more tangy! In this post, we explored a tasty recipe for cherry pie bars. You learned about the ingredients, step-by-step instructions, and storage tips. I highlighted ways to adjust flavors or use different fruits. These tips ensure your cherry pie bars will be a hit. Remember, the key to success lies in the right texture and proper baking. Enjoy making and sharing these delicious treats with friends and family!

Cherry Pie Bars

Indulge in the delightful Cherry Bliss Pie Bars, a perfect treat for any occasion! These easy-to-make bars combine a crumbly crust with a luscious cherry filling that will please any sweet tooth. With simple ingredients like fresh cherries and buttery goodness, they're irresistibly delicious. Ready in just over an hour, these bars are a fantastic way to enjoy a burst of cherry flavor.

Ingredients
  

2 cups all-purpose flour

1 cup granulated sugar

½ cup unsalted butter, melted

1 large egg

1 teaspoon vanilla extract

1 teaspoon baking powder

¼ teaspoon salt

2 cups fresh or frozen cherries, pitted and halved

1 tablespoon lemon juice

1 tablespoon cornstarch

½ teaspoon almond extract

Powdered sugar for dusting (optional)

Instructions
 

Start by preheating your oven to 350°F (175°C). Prepare an 8x8-inch baking pan by greasing it lightly and lining it with parchment paper, ensuring some edges overhang for easy lifting later.

    In a spacious mixing bowl, whisk together the flour, granulated sugar, baking powder, and salt until evenly combined.

      In a separate mixing bowl, combine the melted butter, egg, and vanilla extract. Whisk thoroughly until the mixture is smooth and cohesive.

        Gradually pour the wet mixture into the dry ingredients. Stir until a crumbly dough forms—the consistency should be thick but manageable. Press about two-thirds of this dough firmly into the base of the prepared baking pan, ensuring an even layer.

          In another bowl, combine the pitted and halved cherries with the lemon juice, cornstarch, and almond extract. Gently toss until the cherries are well-coated with the mixture.

            Evenly distribute the cherry mixture over the crust in the baking pan, ensuring it covers it completely.

              Then take the remaining dough and crumble it evenly over the cherry layer to create a rustic topping.

                Place the pan in the preheated oven and bake for 35-40 minutes, or until the topping turns a beautiful golden brown and the cherry filling starts bubbling invitingly around the edges.

                  Once baked, remove the pan from the oven and allow it to cool in the pan for about 15 minutes. Use the overhanging parchment paper to lift the bars out of the pan carefully.

                    Let the bars cool completely on a wire rack before slicing them into squares. If you like, dust the top with powdered sugar for an extra touch of sweetness.

                      Prep Time: 25 minutes | Total Time: 1 hour | Servings: 12 bars

                        - Presentation Tip: For an elegant touch, arrange the bars on a serving platter and garnish with fresh cherry halves and mint leaves before serving.