FREE DINNER EBOOK! Get your copy!
  • Cookie Policy
  • GDPR Policy
  • Disclaimer
  • Terms Of Use
  • Visit my other site: Fun Cookie Recipes
homedishhaven
  • Home
  • Dinner
  • Desserts
  • Drinks
  • Appetizers
  • Contact
  • About
  • Privacy Policy
  • Home
  • Dinner
  • Desserts
  • Drinks
  • Appetizers
  • Contact
  • About
  • Privacy Policy
  • Cookie Policy
  • GDPR Policy
  • Disclaimer
  • Terms Of Use
Visit my other site: Fun Cookie Recipes

HOME / CATEGORIES /

Latest

For a tasty Cajun Shrimp and Sausage Skillet, gather these key ingredients: - 1 lb large shrimp, peeled and deveined - 1 lb smoked sausage, sliced (Andouille or your choice) - 1 medium bell pepper, diced (red or green) - 1 small onion, chopped - 3 cloves garlic, minced - 1 cup cherry tomatoes, halved - 2 cups fresh spinach, washed - 2 teaspoons Cajun seasoning - 1 teaspoon smoked paprika - 1/2 teaspoon cayenne pepper (adjust for heat) - 3 tablespoons olive oil - Salt and black pepper to taste - Fresh parsley, chopped for garnish When selecting shrimp, look for those that are firm and smell fresh. Avoid shrimp that look dull or have a strong odor. For sausage, choose a smoked variety for the best flavor. Andouille is a classic choice, but any good-quality smoked sausage works well. If you can’t find fresh shrimp, frozen shrimp can be a great option. Just thaw them in cold water before cooking. For a lighter dish, swap in turkey sausage. You can also mix in extra veggies like zucchini or corn for added color and flavor. For the full recipe, check the detailed instructions. To start, prepare your shrimp and sausage. Peel and devein the shrimp if needed. Slice your sausage into bite-sized pieces. I like using Andouille sausage for its smoky flavor. Next, heat 2 tablespoons of olive oil in a large skillet over medium heat. Once it shimmers, add the sausage slices. Cook for 4-5 minutes until they are browned and crispy. Remove the sausage and set it aside on a plate. In the same skillet, add 1 tablespoon of olive oil. Heat it up, then add the chopped onion and diced bell pepper. Sauté for 3-4 minutes until they soften. The aroma will fill your kitchen! Now, stir in 3 minced garlic cloves. Cook for 1 minute. You want the garlic to smell good but not burn. After that, add 1 cup of halved cherry tomatoes. Cook for another 2-3 minutes until they soften and juice up. Now we add flavor! Sprinkle 2 teaspoons of Cajun seasoning, 1 teaspoon of smoked paprika, and 1/2 teaspoon of cayenne pepper over the mixture. Stir well, so the spices coat all the veggies. It's time to combine everything! Add the cooked sausage back into the skillet. Now, toss in the shrimp. Cook for 3-4 minutes until the shrimp turns pink. It should not be translucent anymore. Next, gently fold in 2 cups of fresh spinach. Cook it just until it wilts, which takes about a minute. Taste your dish and adjust the salt and black pepper if you need to. Before serving, let the skillet cool slightly. This allows the flavors to meld together. For a fun twist, serve it bubbling hot straight from the skillet. Garnish with fresh parsley for a pop of color. You can find the full recipe for more details! To make Cajun Shrimp and Sausage Skillet shine, use bold spices. I recommend Cajun seasoning, smoked paprika, and cayenne pepper. These spices bring warmth and depth. You can adjust the cayenne to match your heat level. If you like it spicy, add more. If not, skip it. Cooking techniques matter too. Sautéing the sausage until it's crisp adds flavor. Use a hot skillet to get that nice sear. It helps lock in juices and flavors. When you add the garlic, stir it for just a minute. This way, it becomes fragrant but does not burn. Garnishing makes your dish look great. I love using fresh parsley. It adds a pop of color. Serve the dish hot from the skillet for a cozy feel. You can also sprinkle some extra Cajun seasoning on top for flair. For a full meal, pair it with crusty bread or a scoop of rice. Both options soak up the tasty juices. Enjoy the vibrant colors and flavors. This dish not only tastes good but looks amazing too. For the full recipe, check the detailed instructions. {{image_4}} You can switch shrimp for chicken or tofu. Chicken works well in this dish. Cut it into small pieces to cook evenly. Use boneless chicken thighs for more flavor. Tofu is a great choice for a plant-based meal. Press the tofu before cooking to remove excess water. This will help it absorb flavors better. For sausage, try different types to change the taste. Andouille adds a smoky kick. Italian sausage gives a milder flavor. You can even use turkey sausage for a leaner option. Each type brings its own unique flavor, so feel free to experiment. Adding vegetables can make this dish even better. You can include zucchini, mushrooms, or corn. These veggies add color and texture. Try seasonal veggies like asparagus in spring or squash in fall for a fresh twist. You can also add leafy greens such as kale or Swiss chard. They cook down nicely and boost nutrition. Mixing different vegetables can create a unique taste each time. Don't be afraid to try what you have on hand or what looks fresh at the store. To keep your Cajun shrimp and sausage skillet fresh, follow these steps: - Cool Down: Let the dish cool before storing. - Refrigerate: Place leftovers in an airtight container. Store in the fridge. - Label: Write the date on the container to track freshness. For freezing, do this: - Use Freezer Bags: Transfer the cooled dish into freezer bags. - Remove Air: Squeeze out as much air as possible to avoid freezer burn. - Freeze Quickly: Lay the bag flat in the freezer for easy stacking. In the fridge, the dish lasts about 3-4 days. After that, the flavors may fade. For frozen leftovers, expect about 2-3 months of good quality. Watch for these signs of spoilage: - Off Smell: A sour or strange odor indicates it's bad. - Color Changes: If the shrimp looks dull or gray, discard it. - Texture Issues: If it feels slimy or sticky, do not eat it. How spicy is Cajun Shrimp and Sausage Skillet? The spice level can vary. I use cayenne pepper to add heat. You can adjust it to your taste. If you prefer mild, use less cayenne. If you love heat, add more. The Cajun seasoning also brings spice, so taste as you cook. Can I make this recipe ahead of time? Yes, you can make this dish ahead. Cook it, let it cool, and store it in the fridge. It stays good for about three days. Reheat it gently on the stove or in the microwave. The flavors will blend even more over time. What can I serve with Cajun Shrimp and Sausage Skillet? This dish pairs well with many sides. You can serve it over rice or pasta. Crusty bread is also a great choice. A simple salad on the side adds freshness. Choose what you like best! Is this recipe suitable for meal prep? Absolutely! This dish works great for meal prep. Divide it into containers for easy lunches or dinners. It keeps well and reheat easily. Just remember to store it properly in the fridge. Can I use frozen shrimp instead of fresh? Yes, you can use frozen shrimp! Just thaw them before cooking. Rinse them under cold water to remove ice. Frozen shrimp can be just as tasty when cooked right. For the full cooking instructions, check the [Full Recipe](#). In this blog post, we explored the key ingredients for a Cajun Shrimp and Sausage Skillet. I shared tips for selecting the best shrimp and sausage, along with helpful alternatives. You learned step-by-step cooking methods and how to enhance flavors. I also covered variations to suit your taste and how to properly store leftovers. This dish is versatile and inviting, making it a great addition to your meals. Enjoy cooking and sharing this vibrant dish with others!

Cajun Shrimp and Sausage Skillet Flavorful Quick Fix

For this tasty dish, gather these ingredients: - 1 whole turkey (12-14 lbs), fully thawed - 1 cup unsalted butter, softened to room temperature - 8 cloves garlic, finely minced - 2 tablespoons fresh rosemary, finely chopped - 2 tablespoons fresh thyme, finely chopped - 2 tablespoons fresh parsley, finely chopped - 1 tablespoon lemon zest, freshly grated - Salt and freshly ground black pepper, to taste - 2 cups low-sodium chicken broth - 1 large onion, quartered - 2 carrots, peeled and chopped - 2 celery stalks, chopped - A selection of fresh herbs for garnish (optional) Accurate measurements matter. Use a scale for the turkey. A 12-14 lb turkey serves 10-12 people. For the butter, ensure it’s soft for easy mixing. Chop the garlic and herbs finely. This helps release their strong flavors. Grate the lemon zest lightly to avoid bitter bits. When measuring salt and pepper, start small. You can always add more later. Choose fresh ingredients for the best taste. Look for a turkey that is organic or free-range. This often means better flavor and texture. Use high-quality unsalted butter. It should be creamy and soft. Fresh herbs should be vibrant and fragrant. Avoid dried herbs if possible; they lack the punch of fresh ones. Lastly, use low-sodium chicken broth for control over salt levels in your dish. First, preheat your oven to 325°F (165°C). This step is key for even cooking. Next, take the whole turkey out of its packaging. You must remove any giblets or bags from the turkey cavity. Use paper towels to pat the turkey dry. This helps the skin get crispy when roasting. To make the garlic herb butter, grab a mixing bowl. Combine 1 cup of softened butter with 8 cloves of minced garlic. Add 2 tablespoons each of fresh rosemary, thyme, and parsley. Mix in 1 tablespoon of lemon zest, along with salt and pepper to taste. Stir until all the ingredients blend into a smooth, flavorful butter. Now it's time to roast! First, slide your fingers under the turkey skin. Create pockets, especially on the breast and thighs. Spread half the garlic herb butter under the skin. Rub the rest all over the turkey’s outside. This adds flavor and gives a golden look. Stuff the turkey cavity with quartered onions, chopped carrots, and chopped celery. These veggies add great flavor and keep the turkey moist. Pour 2 cups of low-sodium chicken broth into a roasting pan. Place a roasting rack inside the pan, setting the turkey on top, breast side up. Roast the turkey in the oven. Baste it with pan juices every 30 minutes. Cook for about 13-15 minutes per pound. You want the internal temperature to reach 165°F (75°C) in the thigh's thickest part. After roasting, let the turkey rest for 20-30 minutes. This helps the juices spread throughout the meat. Finally, carve the turkey and arrange the slices on a platter. Drizzle some pan juices over the slices for extra flavor. For a lovely touch, garnish with fresh herbs. Enjoy your garlic herb butter roasted turkey! For the complete instructions, check out the Full Recipe. To get a crispy skin on your turkey, start with a dry bird. Pat the turkey with paper towels. This helps remove extra moisture. Next, use the garlic herb butter. Spread it under the skin and on top. The butter adds flavor and helps brown the skin. Roast your turkey at 325°F (165°C) for even cooking. Avoid opening the oven too much. This keeps the heat steady and helps the skin crisp up. Basting is key to a juicy turkey. Baste your turkey every 30 minutes. Use the pan juices to keep the meat moist. This adds flavor and helps with browning. When you baste, use a large spoon. Pour the juices over the turkey. Make sure to get the breast and the legs. This simple step makes a big difference in taste. To know when your turkey is done, use a meat thermometer. Insert it into the thickest part of the thigh. The internal temperature should be at least 165°F (75°C). If you don't have a thermometer, check the juices. They should run clear, not pink. Let the turkey rest for 20-30 minutes after cooking. This helps the juices stay in the meat. For the full recipe, check the detailed instructions in the earlier sections. {{image_4}} You can change the taste of your turkey with different herbs. Try sage and thyme for a classic twist. If you like something fresh, use basil and oregano. For a bit of spice, mix in some chili flakes or paprika. Each combination brings a unique flavor that delights the taste buds. Want to try something new? You can deep-fry or smoke your turkey. Deep-frying gives a crispy skin and juicy meat. Just make sure to safely handle hot oil. Smoking infuses a rich, smoky flavor that is hard to beat. Each method offers a fun way to enjoy turkey. Serve your garlic herb butter roasted turkey with sides that complement its flavor. Mashed potatoes and gravy pair well. Roasted veggies or a crisp salad add freshness. For drinks, a light white wine or sparkling cider enhances the meal. These pairings make your feast even more special. You can find the full recipe for this delicious turkey and more tips to make it shine. After your feast, you may have leftover turkey. To store it right, follow these steps: - Cool down: Let the turkey cool for about two hours. - Slice it: Cut the turkey into smaller pieces for quick access. - Use airtight containers: Place the slices in glass or plastic containers or use heavy-duty foil. - Label: Write the date on each container to track freshness. This way, your turkey will stay tasty and safe to eat for up to four days in the fridge. When you’re ready to enjoy your leftover turkey, reheating it properly is key. Here’s how to do it: - Oven method: Preheat your oven to 325°F (165°C). Place slices in a baking dish, adding a bit of broth to keep it moist. Cover with foil. Heat for about 20-30 minutes or until hot. - Microwave method: Place turkey slices on a microwave-safe plate. Cover with a damp paper towel. Heat in 30-second bursts until warm. Both methods help keep the turkey juicy and delicious. Freezing cooked turkey is a smart way to save it for later. Here are some tips: - Cool first: Make sure the turkey is completely cool before freezing. - Wrap tightly: Use freezer bags or wrap slices in plastic wrap. Squeeze out as much air as possible. This helps prevent freezer burn. - Label and date: Mark the bag with the contents and date. Use within three months for best taste. These steps ensure your turkey stays flavorful and ready for another meal! For more cooking tips, check out the Full Recipe for Garlic Herb Butter Roasted Turkey. Cooking a turkey takes about 13-15 minutes per pound. For example, a 12-pound turkey will take around 2.5 to 3 hours. Always check the thickest part of the thigh for doneness. It should reach 165°F (75°C). This ensures the turkey is safe to eat and juicy. Yes, you can prepare the garlic herb butter ahead of time. Make it a day or two before cooking. Store it in the fridge in a sealed container. When you are ready, just take it out and let it soften. This saves time on the big day. To keep your turkey moist, basting is key. Baste it with pan juices every 30 minutes. Also, adding vegetables like onions, carrots, and celery in the cavity helps. Finally, let the turkey rest after cooking. This allows the juices to spread, making each slice juicy and tender. For the full recipe, check out the Garlic Herb Butter Roasted Turkey recipe above. In this post, we covered how to make a delicious garlic herb butter roasted turkey. We looked at key ingredients, proper preparation, and quality tips. You learned step-by-step instructions for roasting. I also shared tips for a crispy skin and when to check for doneness. Various herb mixes and cooking methods added fun ideas for your meal. In the end, with careful prep and good ingredients, your turkey will shine. Enjoy this dish, and make it a part of your holiday tradition!

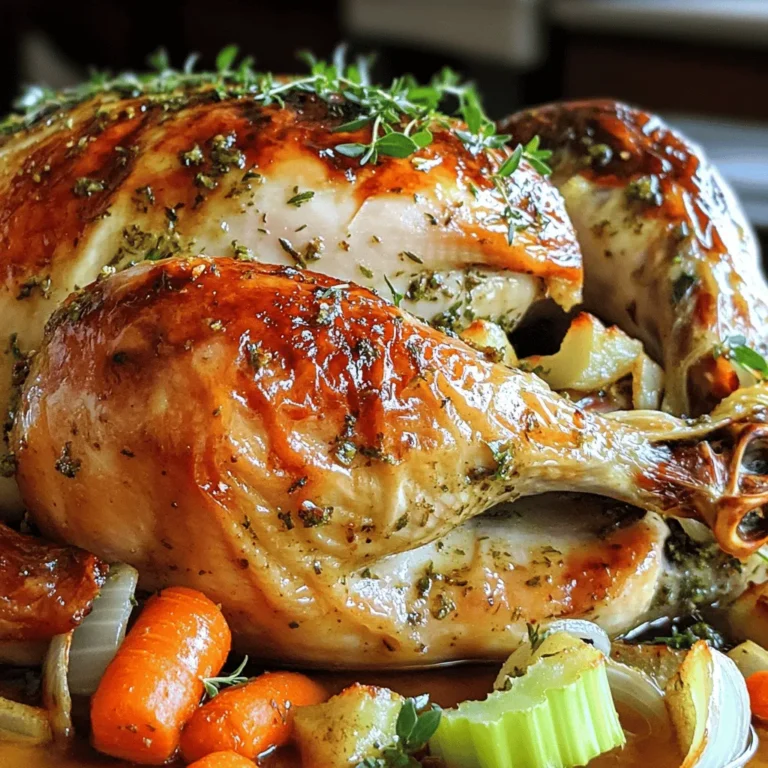
Garlic Herb Butter Roasted Turkey Delightful Recipe

To make the Southwest Quinoa Salad, you will need: - 1 cup quinoa, rinsed and drained - 2 cups vegetable broth - 1 can (15 oz) black beans, drained and rinsed - 1 cup corn, fresh or thawed if frozen - 1 red bell pepper, finely diced - 1 ripe avocado, diced - 1 small red onion, finely chopped - 1/4 cup fresh cilantro, chopped - Juice of 2 fresh limes - 2 tablespoons extra-virgin olive oil - 1 teaspoon ground cumin - 1 teaspoon chili powder - Sea salt and freshly cracked black pepper, to taste You can swap some ingredients based on what you have. If you don’t have quinoa, try brown rice or farro. You could use canned chickpeas instead of black beans. For a different flavor, use frozen corn if fresh corn is not available. If red bell peppers are out, yellow or green peppers work well too. You can skip the onion for a milder taste. Lastly, if you want a creamy dressing, use yogurt instead of olive oil. This salad is packed with nutrients. One serving contains around 300 calories, mainly from healthy fats and proteins. Quinoa is a complete protein, meaning it has all nine essential amino acids. The black beans add fiber, which helps with digestion. The fresh veggies provide vitamins and minerals. The healthy fats from the avocado are good for your heart. Overall, this salad is a healthy choice for lunch or dinner. You can find the full recipe above to make this delicious dish! To start, you need to cook the quinoa. Take a medium saucepan and add the rinsed quinoa and vegetable broth. Bring this mixture to a boil over medium-high heat. Once it boils, reduce the heat to low. Cover the pot with a lid and let it simmer for about 15 minutes. The quinoa will absorb the liquid and become fluffy. After that, remove it from the heat and let it cool for a few minutes. While the quinoa cools, grab a large mixing bowl. Add the drained black beans, corn, diced red bell pepper, and chopped red onion. Stir these ingredients gently to mix them well. This colorful salad base adds great flavor and texture to your dish. It’s a great way to pack in nutrients and get creative. Now, let’s make the dressing. In a small bowl, whisk together the fresh lime juice, olive oil, ground cumin, chili powder, sea salt, and black pepper. Make sure to mix it well so all the flavors blend nicely. This dressing brings a zesty kick to your salad. Once the quinoa has cooled to room temperature, fluff it with a fork. Add it to the bowl with the beans and vegetables. Gently mix everything together. Finally, drizzle the dressing over the salad and toss the ingredients until they are well-coated. Just before serving, fold in the diced avocado and chopped cilantro. This step keeps the textures fresh and vibrant. For the full recipe, check out the details above. Cooking quinoa correctly is key for a great salad. Start by rinsing the quinoa under cold water. This step removes any bitter taste. Use two cups of vegetable broth for every cup of quinoa. Bring the broth to a boil, then lower the heat and cover. Let it simmer for about 15 minutes. When done, fluff it with a fork. Ensure it is light and airy. This method gives you perfect, fluffy quinoa for your salad. Serve your Southwest quinoa salad in a large bowl for sharing. You can also place it in individual bowls for a personal touch. Add some lime wedges on the side for extra flavor. A sprinkle of fresh cilantro on top makes it look inviting. For a fun twist, serve it in avocado halves. This adds color and makes a great presentation. This salad pairs well with many foods. Try it with grilled chicken or shrimp for extra protein. It also goes great with fish tacos or a spicy bean burrito. For a lighter meal, serve it alongside a fresh green salad. You can even enjoy it with baked tortilla chips for a crunchy bite. This salad is flexible and complements many dishes. For the complete recipe, check out the full recipe section. {{image_4}} You can boost your Southwest quinoa salad with protein. Some great choices include grilled chicken, shrimp, or tofu. Each adds flavor and makes your salad more filling. If you want a plant-based option, try chickpeas or edamame. Both offer a nice texture and taste. Adding one cup of your chosen protein will keep the salad balanced. While the lime and olive oil dressing is fresh, you can mix it up. A creamy avocado dressing gives a rich taste. Blend ripe avocado with lime juice, garlic, and a bit of water for smoothness. A zesty cilantro-lime vinaigrette also works well. Just blend fresh cilantro, lime juice, and oil for a tangy kick. You can swap dressings based on your mood or meal. Using seasonal ingredients can make your salad even better. In spring, add fresh peas or asparagus for a crisp bite. In summer, cherry tomatoes and cucumber add color and crunch. Fall brings roasted sweet potatoes, which add warmth and sweetness. In winter, use kale or spinach for added nutrients. Adjusting your ingredients keeps the salad exciting all year round. For the full recipe, check out the Southwest Quinoa Salad. To keep your Southwest Quinoa Salad fresh, store it in an airtight container. This helps prevent moisture loss and keeps flavors intact. Make sure to chill the salad in the fridge right after you make it. If you plan to add avocado later, keep it separate. This way, the avocado remains fresh and does not brown. When stored properly, the Southwest Quinoa Salad lasts about 3 to 5 days in the fridge. After that, the taste and texture may change. Always check for any off smells or signs of spoilage. If you see any mold, it’s best to toss it out. To extend its life, consider freezing the salad without the avocado. This can last up to 3 months. Reheating this salad is simple. You can use a microwave or stovetop. If you choose the microwave, place the salad in a microwave-safe bowl. Heat it on low for 30 seconds, then stir and heat again if needed. If you prefer the stovetop, warm it gently over low heat. Just remember, if you added avocado, it’s best to enjoy the salad cold. Reheating may soften the avocado, changing its texture. For the full recipe, check below! Southwest Quinoa Salad is a vibrant and healthy dish. It combines quinoa with fresh veggies and spices. You get protein from quinoa and black beans. The salad is colorful with red pepper, corn, and avocado. The lime dressing adds a zesty kick. This dish is perfect for a light lunch or dinner. You can enjoy it alone or with a protein. It’s tasty, filling, and packed with nutrients. Yes, you can make this salad ahead of time. Preparing it a day in advance can enhance the flavors. Store it in an airtight container in the fridge. Just remember to add avocado just before serving. This keeps it fresh and green. You can also save the dressing separately. This way, it won’t make the salad soggy. Yes, this salad is completely vegan. All the ingredients are plant-based. Quinoa, black beans, and veggies are all vegan-friendly. The dressing uses olive oil and lime juice, which are also vegan. This makes it a great choice for those who follow a vegan diet. You can enjoy it without any animal products. Plus, it’s delicious and satisfying! For the full recipe, check out the [Full Recipe]. This blog post covered how to create a tasty Southwest Quinoa Salad. You learned about the key ingredients and how to substitute them. I shared step-by-step instructions to make cooking easy. Helpful tips ensure your quinoa turns out perfect every time. You also found variations to keep things fresh and fun. Lastly, we covered storage tips to keep your salad tasty longer. Enjoy making this healthy dish and feel proud of your cooking skills!

Southwest Quinoa Salad Healthy and Fresh Delight

- 2 cups brewed coffee, cooled - 1 cup milk or dairy-free alternative - 1/2 cup sweetened condensed milk or maple syrup - 2 tablespoons unsweetened cocoa powder - 1 teaspoon vanilla extract - A pinch of salt - Optional garnishes: chocolate shavings or espresso beans I love using these simple ingredients to make mocha iced coffee popsicles. First, I brew strong coffee. It gives a rich flavor. Let it cool before mixing. You can use any milk you like. Dairy-free options work great too. Sweetened condensed milk adds a nice touch. If you want a healthier choice, maple syrup is a great substitute. Cocoa powder is key for that chocolate taste. It makes the popsicles feel special. Don't forget the vanilla extract. It enhances all the flavors. A small pinch of salt balances the sweetness. For a fun twist, you can add garnishes. Chocolate shavings make the popsicles look fancy. Espresso beans give a nice crunch. These ingredients blend together to create a delightful treat. You can find the full recipe to make these tasty popsicles in the link above. To start, mix all your ingredients in a big bowl. This includes 2 cups of cooled coffee, 1 cup of milk, 1/2 cup of sweetened condensed milk or maple syrup, 2 tablespoons of cocoa powder, 1 teaspoon of vanilla extract, and a pinch of salt. Whisk until the cocoa fully blends in. Next, taste your mix. If you want it sweeter, add more sweetener and stir once more. Finally, carefully pour this chocolate coffee mixture into popsicle molds. Leave a small gap at the top so they have room to expand while freezing. Now, gently insert popsicle sticks into the molds. Place them right in the center for even freezing. Then, pop the molds into the freezer. Make sure to freeze them for at least 6 to 8 hours. The longer, the better! For best results, avoid opening the freezer too often, as that can slow down the process. Once your popsicles are frozen solid, it's time to release them. Run warm water over the outside of the molds for a few seconds. This will help loosen them up. Then, gently tug on the sticks to free the popsicles. For a nice touch, you can add chocolate shavings or an espresso bean on top for a fancy look. Serve them on a chilled plate or in a cup of iced coffee for an extra special treat. To get creamy popsicles, choose full-fat milk or cream. Full-fat options give a rich taste. If you prefer lighter options, try almond or coconut milk. These alternatives still taste great. You can also adjust sweetness levels. Try sweetened condensed milk for a rich flavor. Or, use pure maple syrup for a lighter touch. Want to boost flavor? Add a splash of hazelnut extract or a hint of cinnamon. These flavors mix well with coffee. For a smoother texture, blend your mixture longer. This helps to fully mix the cocoa powder. You can even strain the mixture for extra smoothness. Serve your popsicles on a chilled plate. This makes a cool display. You can also place them in cups of iced coffee. For a fun twist, sprinkle cocoa powder on top. Adding chocolate shavings or an espresso bean can make each popsicle pop. These small touches make the treats look fancy and taste even better. For the full recipe, check out the details above! {{image_4}} You can play with flavors in your mocha iced coffee popsicles. Adding different extracts can change the taste. Try almond or hazelnut for a new twist. A few drops can make a big difference. Spices also add depth. A sprinkle of cinnamon or nutmeg can enhance the mocha flavor. These warm spices pair well with chocolate. Just a little can turn your popsicle into a cozy treat. If you want to cut down on sugar, you have options. Use sugar-free sweeteners like stevia or erythritol. These will keep your popsicles sweet without the calories. For a vegan version, swap the milk for a plant-based milk. Almond, coconut, or oat milk work great. You can also replace sweetened condensed milk with maple syrup for added flavor. Experimenting with different types of coffee can create unique popsicles. Cold brew can give a smoother taste, while espresso can add a strong kick. Each coffee type brings its own flair. If you want alternatives to traditional milk, try nut or soy milk. These options can alter the creaminess and flavor. They also make your popsicles dairy-free. For the full recipe, check out the Mocha Iced Coffee Popsicles Delight section. To keep your mocha iced coffee popsicles fresh, store them properly. Use airtight containers or freezer bags. This will help keep the popsicles from absorbing other flavors. To prevent freezer burn, wrap each popsicle in plastic wrap. Make sure they are sealed tight. These popsicles taste best within two months. After that, they can lose flavor and texture. Check for icy crystals on the surface. If you see them, the popsicles may not taste great. You should also look for any off smells. If they smell bad, it's best to toss them. Don't let leftover coffee go to waste! Use it for iced coffee drinks or coffee smoothies. You can also mix it into oatmeal for a new twist. If you have extra sweetened condensed milk, try it in desserts like fudge or as a drizzle over pancakes. These ideas help you make the most of your ingredients. Enjoy your mocha iced coffee popsicles and get creative with what’s left! For a detailed recipe, check the Full Recipe section. Yes, you can use decaf coffee. It works well if you want less caffeine. Just brew it as you usually would. The taste remains rich and satisfying. You still get that mocha flavor without the jitters. You should freeze your popsicles for at least 6-8 hours. This ensures they are completely solid. If you want them firm, leave them overnight. It makes a big difference in texture. You can use pure maple syrup instead. It adds sweetness and a nice flavor. Other options include honey or agave syrup. These swaps give you flexibility based on what you have. To keep popsicles from sticking, run warm water over the molds. This helps loosen them. You can also use non-stick spray inside the molds before pouring in the mixture. This trick works well for easy removal. Yes, you can add a splash of alcohol for a fun twist. Try coffee liqueur or whiskey. Just remember to keep the amount small. Too much liquid can make them difficult to freeze. You learned how to make tasty coffee popsicles with simple ingredients. We covered how to mix the base, freeze, and present your treats. Don’t forget tips for creaminess and flavor boosts! You can even try fun variations or adjust for diets. Store them right for the best taste later. Now it’s time to enjoy your creation or share it with friends. Happy popping!

Mocha Iced Coffee Popsicles Refreshing Summer Treat

To make a tasty Fiesta Corn Casserole, you need the following: - 2 cups corn kernels (choose fresh, frozen, or canned based on availability) - 1 cup black beans, thoroughly drained and rinsed - 1 cup diced bell peppers (a vibrant mix of red and yellow) - 1 cup shredded cheddar cheese, divided - 1 cup cream-style corn (for creaminess) - 1/2 cup sour cream (adds a tangy flavor) - 1/4 cup green onions, finely chopped (for a fresh bite) - 1 teaspoon chili powder (spice it up!) - 1/2 teaspoon ground cumin (for warmth) - 1/4 teaspoon garlic powder (for depth) - Salt and pepper to taste - 1 cup crushed tortilla chips (to add crunch) - Fresh cilantro, chopped, for garnish You can use fresh corn if it's in season. Frozen corn works well too. Canned corn is the easiest option and still tastes great. For the beans, always rinse them well. This helps reduce the sodium and improves taste. Bell peppers add color and flavor. Use a mix of red and yellow for the best visual impact. You need a few tools to make this dish easy: - A 9x13-inch baking dish - A large mixing bowl - A spatula or wooden spoon for mixing The baking dish should be deep enough to hold all the ingredients. Make sure to grease it with non-stick spray or butter. This will help the casserole come out cleanly after baking. A large mixing bowl allows you to combine all the ingredients without spilling. A spatula or wooden spoon works best for folding in the cheese and spices. Grab these items, and you're ready to make a delightful Fiesta Corn Casserole! For the full recipe, check out the detailed instructions provided. 1. Preheating the oven: First, set your oven to 350°F (175°C). This heat will cook the casserole evenly. 2. Preparing the baking dish: Grab a 9x13-inch baking dish. Grease it with non-stick spray or butter. This helps the casserole not stick. 1. Mixing the main components: In a large bowl, add the corn kernels, black beans, diced bell peppers, cream-style corn, and sour cream. Stir these ingredients together until they blend well. 2. Folding in seasoning and cheese: Now, fold in 1/2 cup of shredded cheddar cheese, green onions, chili powder, cumin, and garlic powder. Season with salt and pepper. Mix until everything is evenly coated. 1. Cooking time and visual cues: Pour the mixture into the prepared dish. Spread it out evenly. Top with the remaining 1/2 cup of cheddar cheese and crushed tortilla chips. Bake for about 25 to 30 minutes. Look for bubbling and golden cheese. 2. Cooling and setting time: Once baked, carefully take the casserole out. Let it cool for a few minutes. This helps it set before serving. To ensure even cooking, spread the mixture in the baking dish evenly. This helps every part cook at the same rate. I suggest stirring halfway through baking. This way, you give the bottom a chance to get nice and bubbly! For the right texture, use cream-style corn. It keeps the casserole moist. The black beans also add a nice bite. If you prefer a firmer texture, reduce the sour cream slightly. Fiesta Corn Casserole pairs well with grilled chicken or fish. The flavors complement each other nicely. You can also serve it with a fresh salad to balance the meal. For presentation, sprinkle fresh cilantro on top before serving. This adds a bright pop of color. You might also offer lime wedges and sour cream on the side. This allows guests to add their own twist! For extra flavor, try adding smoked paprika or cayenne pepper. These spices add a warm kick that many enjoy. If you want to tone down the heat, reduce the amount of chili powder. You can also adjust the spice level by mixing in diced jalapeños. These add a fresh heat that can be mild or strong. Just remember to taste as you go! For the full recipe, check out the [Full Recipe]. {{image_4}} If you want to swap ingredients, you can easily do that. For the cheese, try using Monterey Jack or pepper jack for a kick. If you're looking for a dairy-free option, use vegan cheese. This works well in our casserole. For the beans, black beans add great flavor. You can replace them with pinto beans or chickpeas. Both options work well and keep the dish hearty. You can also make this casserole gluten-free. Just choose gluten-free tortilla chips. They add the same crunch without the gluten. Mixing in other vegetables can take this dish to new heights. Try adding diced zucchini or corn. They add great texture and flavor. You can also experiment with different cheeses. Cream cheese will make it extra creamy. Feta cheese can add a nice tang. Don't be afraid to get creative! If you want a low-calorie version, reduce the cheese and sour cream. You can also use plain Greek yogurt instead of sour cream. This keeps it creamy while cutting calories. For a heart-healthy option, use less cheese and add more veggies. This adds fiber and nutrients. You can replace sour cream with a non-fat version or omit it entirely. Enjoy a tasty dish without the guilt! For the full recipe, check out the [Full Recipe]. To keep your Fiesta Corn Casserole fresh, place leftovers in an airtight container. Cool the casserole before sealing. This helps maintain its flavor and texture. You can store it in the fridge for up to three days. When reheating, the best method is the oven. Preheat your oven to 350°F (175°C). Place the casserole in a baking dish and cover it with foil. Heat for about 15 to 20 minutes. This keeps the cheese melted and the casserole warm. If you want to freeze leftovers, make sure it’s cool first. Wrap it tightly in plastic wrap and then in foil. It will last up to three months in the freezer. To thaw, place it in the fridge overnight before reheating. You can prepare Fiesta Corn Casserole ahead of time. Mix all the ingredients and place them in a baking dish. Cover it tightly and keep it in the fridge for up to two days. When you are ready to bake, just pop it in the oven as usual. For meal prep, I recommend serving sizes of about one cup. This makes it easy to pack for lunch or dinner. Fiesta Corn Casserole is a baked dish with corn, black beans, and peppers. It is creamy, cheesy, and full of flavor. You mix all the ingredients and bake until golden. This dish is colorful and great for gatherings or family dinners. Yes, you can prepare Fiesta Corn Casserole ahead of time. Mix the ingredients and place them in the baking dish. Cover it well and store it in the fridge. When you are ready, just bake it. This saves time on busy days. Absolutely! Fiesta Corn Casserole uses only plant-based ingredients. Corn, beans, and peppers make it a great vegetarian dish. Just ensure that your cheese is vegetarian if you are serving to strict vegetarians. To add heat, try these ideas: - Add diced jalapeños for a kick. - Use spicy cheese instead of regular. - Mix in some hot sauce before baking. These changes make the dish exciting and full of zest! Fiesta Corn Casserole pairs well with many dishes: - Serve it with grilled chicken or beef for a heartier meal. - Add a side salad for freshness. - Pair it with tortilla chips and guacamole for a fun twist. These sides complement the casserole and enhance your dining experience. Fiesta Corn Casserole blends fresh and tasty ingredients for a great dish. You learned about all the elements needed, from mixing to baking. I shared tips for cooking and serving, plus options for variations. Whether you want to add spice or make it vegan, the choices are endless. In the end, this dish is fun and flexible. You can easily adapt it for gatherings or weeknight meals. Happy cooking!

Fiesta Corn Casserole Delightful and Easy to Make

For this dish, you will need: - 1.5 lbs boneless, skinless chicken thighs, chopped into bite-sized pieces - 1/2 cup all-purpose flour - 2 large eggs, beaten until smooth - 1 cup panko breadcrumbs for crunchy texture These main ingredients create a juicy and crispy base that holds the sauce perfectly. To make the sauce, gather: - 1/2 cup freshly squeezed orange juice - 1/4 cup low-sodium soy sauce - 1/4 cup honey - 2 cloves garlic, finely minced - 1 tablespoon fresh ginger, finely grated - 1 tablespoon cornstarch - 1 tablespoon sesame oil - 1 teaspoon red pepper flakes These ingredients blend together to form a sweet, tangy, and sticky sauce that coats the chicken. You can add extra flavor and fun with: - 2 green onions, thinly sliced - Sesame seeds For sides, serve your Sticky Orange Chicken over steamed rice or with stir-fried vegetables. They add color and nutrition to your meal. Want the full recipe? Check out the [Full Recipe]. Start by taking your chicken thighs. Cut them into bite-sized pieces. This will help them cook evenly. In a medium bowl, add the all-purpose flour. Toss the chicken pieces in the flour until they are fully coated. Next, dip each piece into the beaten eggs. Make sure all sides are covered. Finally, roll the chicken in panko breadcrumbs. This gives the chicken a nice crunch. Set the coated chicken aside on a plate while you heat the oil. Grab a large skillet and add vegetable oil. Heat it over medium-high heat. When the oil shimmers, it’s time to fry. Add the breaded chicken pieces in batches. Don’t overcrowd the pan; this ensures even cooking. Fry the chicken for about 5-7 minutes. Turn them occasionally, so they brown nicely. Once golden brown and cooked through, use a slotted spoon to lift them out. Place them on paper towels to drain any extra oil. In a separate bowl, mix the sauce ingredients. Combine freshly squeezed orange juice, soy sauce, honey, minced garlic, grated ginger, cornstarch, sesame oil, and red pepper flakes. Whisk it all together until smooth and the cornstarch dissolves. This mix is what adds flavor to your chicken. Pour the sauce into the same skillet you used for frying. Keep the heat on medium. Stir constantly as it simmers. This prevents the sauce from sticking. Cook it for about 3-5 minutes until it thickens. The sauce should coat the back of a spoon. Return the fried chicken to the skillet. Toss it gently in the sauce until every piece is covered. Cook for another 2 minutes to heat everything through. Now it’s time to serve! Transfer the Sticky Orange Chicken onto a serving platter. For a fresh touch, garnish with sliced green onions. A sprinkle of sesame seeds adds a nice crunch. For a complete meal, serve it over fluffy steamed rice. Drizzle any leftover sauce over the rice. You can also add fresh orange slices on the side for a pop of color. Enjoy your culinary creation! To get that ideal sticky sauce, start with the right cornstarch amount. Use one tablespoon for a thick glaze. Mix it well with the other sauce ingredients to avoid lumps. When you heat the sauce, stir it often. This helps prevent sticking and ensures it thickens evenly. Once you combine the chicken with the sauce, let it simmer a bit. This gives the flavors time to blend. Using the right tools makes cooking fun and easy. A large skillet works best for frying the chicken. It gives you space to cook in batches. A slotted spoon helps you lift the chicken out of the hot oil. For mixing the sauce, a whisk is key. It helps combine all the ingredients smoothly. You might also want measuring cups and spoons for accuracy. Sometimes, you may not have all the ingredients on hand. If you don’t have orange juice, try another fruit juice like pineapple. For soy sauce, tamari or coconut aminos can work too. If you want a sweet touch, maple syrup can replace honey. If you’re out of sesame oil, olive oil or peanut oil can add flavor. Don’t hesitate to get creative! For the full recipe, check the details above. {{image_4}} Baking is a great way to make this dish lighter. For baked sticky orange chicken, simply skip the frying step. Coat the chicken pieces in flour, eggs, and panko as usual. Then, place them on a baking sheet lined with parchment paper. Bake them at 400°F (200°C) for about 25 minutes. This method gives you a crispy texture with less oil. If you're looking for a vegetarian twist, try using tofu instead of chicken. Press and drain firm tofu to remove excess water. Cut it into bite-sized cubes. Follow the same coating process with flour, eggs, and panko. Fry or bake the tofu until golden. Toss it in the same orange sauce. It’s just as tasty and satisfying! For those who love spice, add extra heat to your sticky orange chicken. You can increase the red pepper flakes in the sauce. Another option is to mix in sliced fresh jalapeños or chili paste. This will give your dish a nice kick. Adjust the spice level to suit your taste. Enjoy the added warmth in every bite! For the complete recipe, refer to the [Full Recipe]. To keep your Sticky Orange Chicken fresh, store it in an airtight container. Make sure to let it cool down first. Place the chicken in the fridge within two hours of cooking. Proper storage helps keep the flavors intact. Leftovers can last about three to four days in the fridge. To reheat your Sticky Orange Chicken, use the stovetop for best results. Heat a skillet over medium heat and add a splash of water or broth. This keeps the chicken moist. Stir occasionally until it's heated through. You can also use a microwave, but cover the dish to avoid drying it out. Heat in short bursts, checking often. If you want to save Sticky Orange Chicken for later, freezing is a great option. Place the cooled chicken in a freezer-safe bag or container. Remove as much air as possible to prevent freezer burn. It can last up to three months in the freezer. When ready to eat, thaw it in the fridge overnight and reheat as mentioned above. Enjoy that sticky goodness later! To make the sauce thicker, add more cornstarch. Mix one tablespoon of cornstarch with two tablespoons of cold water. Stir this mixture into the sauce as it cooks. Keep stirring until the sauce thickens. This method ensures a nice, sticky texture that clings to the chicken. Yes, you can use chicken breast instead of thighs. Chicken breast is leaner and cooks faster. Just cut it into small pieces, like the thighs. The flavor will be slightly different, but it will still be tasty. Make sure not to overcook it for the best results. Sticky Orange Chicken pairs well with several sides. Here are some great options: - Steamed rice - Stir-fried vegetables - Noodles - Quinoa - A fresh salad These sides balance the sweetness of the chicken and add more color to your plate. Sticky Orange Chicken lasts for about three to four days in the fridge. Make sure to store it in an airtight container to keep it fresh. Reheat it thoroughly before serving to enjoy its full flavor. Yes, you can prepare Sticky Orange Chicken in advance. You can bread and fry the chicken earlier in the day. Just store it separately from the sauce. When ready to serve, heat the sauce and toss the chicken in it. This makes meal prep easy and quick. For the full recipe, check the earlier section. Sticky Orange Chicken is a delicious dish made with simple ingredients. We covered how to prepare the chicken, make the sauce, and combine them for the perfect meal. Tips on achieving the right texture and storage methods help you enjoy this dish over time. For variety, you can try healthier versions, vegetarian options, or spicy twists. With these steps, you can create a meal that impresses and satisfies. Enjoy making this dish your own!

Sticky Orange Chicken Flavorful and Easy Recipe

For this lemon blueberry pound cake, gather these simple ingredients: - 1 ½ cups all-purpose flour - 1 teaspoon baking powder - ½ teaspoon baking soda - ½ teaspoon salt - ¾ cup unsalted butter, softened - 1 cup granulated sugar - 3 large eggs - 2 teaspoons vanilla extract - 2 tablespoons lemon zest (grated from about 1 large lemon) - ½ cup sour cream - 1 cup fresh blueberries (plus additional for garnish) - 2 tablespoons freshly squeezed lemon juice Each ingredient plays a key role. The flour gives structure. The butter adds richness. Eggs bind everything together. The sugar sweetens and helps with browning. The sour cream keeps the cake moist. If you don’t have sour cream, try Greek yogurt. It works well and adds a nice tang. For a dairy-free option, use coconut oil instead of butter. You can also substitute fresh blueberries with frozen ones. Just make sure to add them without thawing. These ingredients create a cake that’s soft, moist, and bursting with flavor. You can find the full recipe above to guide you through the baking process. 1. Preheat your oven to 350°F (175°C). Grease a 9x5 inch loaf pan with butter or cooking spray. This step ensures your cake does not stick. 2. In a medium bowl, mix the dry ingredients. Combine 1 ½ cups of flour, 1 teaspoon of baking powder, ½ teaspoon of baking soda, and ½ teaspoon of salt. Whisk them together well and set aside. 3. In a large bowl, cream together ¾ cup of softened butter and 1 cup of sugar. Use an electric mixer on medium speed for 3-5 minutes. The mix should turn light and fluffy. 4. Add 3 large eggs one at a time. Make sure each egg mixes in fully before the next one. Then stir in 2 teaspoons of vanilla extract and the zest of 1 large lemon. Mix until smooth. 5. Gradually add the dry mix to the wet mix. Alternate this with ½ cup of sour cream and 2 tablespoons of lemon juice. Start and end with the dry mix. Mix just until combined to keep your cake tender. 6. Gently fold in 1 cup of fresh blueberries with a spatula. Be careful not to break the berries. This helps them hold their shape in the cake. 7. Pour the batter into the greased loaf pan. Spread it evenly. Tap the pan on the counter to release any air bubbles. - Bake your cake in the oven for 50-60 minutes. This time helps the cake rise and cook evenly. - To check if the cake is done, insert a toothpick into the center. If it comes out clean, your cake is ready. If the top browns too fast, cover it with aluminum foil for the last 15 minutes. - After removing the cake from the oven, let it cool in the pan for 10 minutes. Then, move it to a wire rack to cool completely before slicing. - For a lovely presentation, slice the cooled cake and place it on a nice platter. Sprinkle powdered sugar on top and add fresh blueberries for a beautiful finish. This makes your lemon blueberry pound cake even more inviting. Enjoy your delicious treat! To make a great lemon blueberry pound cake, start with room temperature ingredients. This includes butter, eggs, and sour cream. Room temperature items blend better. They create a smooth batter. A smooth batter bakes more evenly. Next, focus on mixing techniques. Cream the butter and sugar until light and fluffy. This step adds air to your batter. It helps the cake rise well. Mix in the eggs one at a time. This keeps the mixture stable. Finally, fold in the dry ingredients gently. Over-mixing can make your cake dense. To boost flavor, use a mix of citrus and berries. The tartness of lemon pairs well with blueberries. This mix adds brightness to the cake. You can also try other berries like raspberries or blackberries. Each berry brings a unique taste. Consider adding spices for extra warmth. A pinch of cinnamon or nutmeg can enhance the cake. You might also try adding almond extract for a nutty twist. These small changes can take your cake to the next level. For the full recipe, check out Lemon Blueberry Bliss Pound Cake. {{image_4}} You can switch up the berries in this recipe. Try raspberries or strawberries for a twist. Each berry brings its unique flavor. The tartness of raspberries contrasts nicely with the sweet cake. Strawberries add a juicy sweetness that pairs well with the lemon. For those who need gluten-free options, use a gluten-free flour blend. Just make sure it has xanthan gum for structure. You can also make this cake dairy-free. Swap out sour cream for a dairy-free yogurt or coconut cream. This keeps the cake moist and tasty. Serve this lemon blueberry pound cake warm or at room temperature. Top it with whipped cream or a scoop of vanilla ice cream for extra joy. The cold creaminess balances the bright flavors of the cake. If you have leftover pound cake, get creative! Use it for French toast or as a base for a berry trifle. Layer slices with whipped cream and fresh fruit for a stunning dessert. You can also toast slices for a crunchy treat. To keep your lemon blueberry pound cake fresh, wrap it tightly. I recommend using plastic wrap. This method helps seal in moisture and flavor. You can also place it in an airtight container. Make sure to store it at room temperature. This cake stays good for about three to four days. For longer storage, freeze it. To freeze the pound cake, let it cool completely. Then, wrap it in plastic wrap. After that, place it in a freezer bag. Be sure to squeeze out excess air. This will help keep the cake fresh. You can freeze it for up to three months. When you're ready to enjoy it, take it out of the freezer. Place it in the fridge to thaw overnight. You can also leave it at room temperature for a few hours. This helps maintain the flavor and texture. Enjoy your delicious lemon blueberry pound cake later! For the full recipe, check back to the main recipe section. Why did my pound cake sink in the middle? Your pound cake may sink due to a few reasons. One common cause is underbaking. If the cake is not fully cooked, it can collapse in the middle. Another reason is overmixing the batter. Mixing too long can add too much air, leading to a collapse. Make sure to follow the baking time closely and test for doneness. How do I know if my cake is done? To check if your cake is done, insert a toothpick into the center. If it comes out clean or with a few crumbs, the cake is ready. If the toothpick has wet batter, the cake needs more time. Remember, each oven is different, so check it a few minutes early. How long does the lemon blueberry pound cake last? Lemon blueberry pound cake lasts for about 3-5 days at room temperature. Be sure to keep it in an airtight container to maintain its freshness. If you want it to last longer, consider freezing it. Can I store it in the refrigerator or just at room temperature? You can store the cake at room temperature, but it can also go in the fridge. If you do store it in the fridge, wrap it well. This helps keep the cake moist and prevents it from absorbing other odors. Is this recipe suitable for vegetarians? Yes, this recipe is suitable for vegetarians. It contains no meat or animal by-products, making it a great treat for all. Can I use a different type of flour? Yes, you can try different types of flour. Almond flour can add a nutty flavor. Gluten-free flour is another option if you need it. Just be sure to check the ratios, as they may differ from all-purpose flour. For the complete recipe, see the [Full Recipe]. Enjoy baking! This blog post shared all you need for lemon blueberry pound cake. We covered each ingredient, detailed steps for mixing, and baking tips for success. I provided storage advice and answered common questions to clear doubts. Baking can be fun and rewarding. With these tips, you can create a delicious treat. Feel free to experiment with flavors and share your results! Enjoy each bite and happy baking!

Lemon Blueberry Pound Cake Tasty and Simple Treat

To make your maple glazed carrots, gather these key ingredients: - 1 lb baby carrots (or 4 medium-sized regular carrots, cut into sticks) - 3 tablespoons pure maple syrup - 2 tablespoons unsalted butter - 1 tablespoon extra virgin olive oil - 1 teaspoon ground cinnamon - Salt and freshly ground black pepper to taste - Fresh thyme leaves for garnish (optional) These ingredients blend together to create a sweet and savory flavor that stands out. If you don’t have some ingredients, here are a few swaps: - Use honey instead of maple syrup for a different sweetness. - Substitute coconut oil for butter for a dairy-free option. - Use any mild-flavored oil if you don't have olive oil. - Replace thyme with rosemary or parsley for a new taste. These swaps can help you adapt based on what you have at home. To prepare these tasty carrots, you will need: - A large skillet for cooking - A cutting board and knife for chopping - Measuring spoons for accurate amounts - A spatula or wooden spoon to stir These tools make the cooking process smooth and easy. To start, wash your baby carrots under cold water. If you use regular carrots, peel them first. Cut these carrots into sticks that are about 2-3 inches long. This helps them cook evenly. Once prepared, set the carrots aside while you heat the pan. In a large skillet, add olive oil and butter over medium heat. Let the butter melt until it starts to foam. This mixture forms a tasty base for the carrots. Add the carrots to the skillet and stir well. Sprinkle ground cinnamon, salt, and pepper over them. Mix everything together so the carrots get coated with the flavors. Now, drizzle the maple syrup over the carrots and stir gently. This will make them sweet and sticky. Cook the carrots for about 10 to 15 minutes. Stir them occasionally to avoid burning. The carrots should become tender, and the glaze should thicken. If the glaze gets too thick, add a splash of water to keep it smooth. After cooking, taste the carrots. If they need more flavor, add extra salt or pepper. Once they are just right, remove the skillet from heat. For a special touch, sprinkle fresh thyme leaves over the glazed carrots before serving. This adds color and flavor. Serve them in a nice dish, pouring any leftover glaze over the top. You can find the full recipe for these delicious maple glazed carrots in the previous sections. Enjoy your meal! To create a perfect maple glaze, focus on two main things: heat and timing. Start by melting the butter and olive oil in a skillet over medium heat. This step builds flavor. Add the carrots and let them cook evenly. When you drizzle in the maple syrup, stir gently. You want the carrots covered, but don’t rush. Give the glaze time to thicken. Stir occasionally, as this helps the glaze stick to the carrots. One common mistake is overcooking the carrots. You want them tender but not mushy. Keep an eye on them, especially during the last few minutes of cooking. Another mistake is adding too much maple syrup too soon. If you do this, the glaze won't thicken properly. Instead, add it later in the cooking process for better results. These glazed carrots shine as a side dish for many meals. They pair well with roasted chicken or grilled pork. For a vegetarian option, serve them alongside quinoa or lentils. To make your dish pop, serve the carrots in a shallow bowl. Pour any extra glaze over them and sprinkle fresh thyme on top. This adds both color and flavor. You can find the full recipe [here](#). {{image_4}} You can make maple glazed carrots even more fun by adding herbs and spices. Thyme works well, but you can also use rosemary for a strong flavor. Try adding a pinch of nutmeg for warmth. If you want a little heat, sprinkle in some chili flakes. Don't be afraid to mix and match to find your favorite combo! While pure maple syrup shines in this recipe, other sweeteners can work too. Honey offers a floral note that pairs nicely with carrots. Agave syrup can also be a good choice if you want something lighter. If you prefer a sugar-free option, try using stevia or monk fruit sweetener. Just adjust the amount to taste! Making this dish vegan or dairy-free is simple. Instead of butter, use coconut oil or vegan butter. The rest of the recipe remains the same, and you will still enjoy that rich flavor. This way, everyone can enjoy these tasty carrots, no matter their diet! For more details on making these delicious maple glazed carrots, check out the Full Recipe. To store leftover maple glazed carrots, let them cool first. Place them in an airtight container. Store in the fridge for up to five days. This keeps the flavors fresh. Make sure to seal them well to prevent drying out. When you're ready to enjoy the leftovers, take them out of the fridge. You can reheat them in a skillet over medium heat. Adding a splash of water helps them warm up and stay moist. Stir occasionally until they are heated through. You can also use a microwave. Place them in a microwave-safe dish and cover. Heat for one to two minutes, stirring halfway. You can freeze maple glazed carrots for longer storage. First, cool them completely. Then, place them in a freezer-safe bag. Remove as much air as possible to avoid freezer burn. They can last up to three months in the freezer. When ready to eat, thaw them in the fridge overnight. Reheat them as mentioned before. This way, you'll still enjoy that sweet, sticky glaze! For the full recipe, check the main article. Yes, you can use frozen carrots. They are convenient and save time. Just make sure to thaw them first. They may cook faster than fresh carrots, so watch closely. Adjust the cooking time to avoid mushy carrots. For best results, aim for tender carrots with a nice glaze. To reduce the sweetness, cut back on the maple syrup. You can also add more salt or pepper to balance the flavors. Try adding a splash of lemon juice for a tangy twist. This will create a nice contrast to the carrots' natural sweetness. Taste as you go to get your preferred flavor. Maple glazed carrots go well with many dishes. They complement roasted meats, like chicken or pork. Serve them alongside grains, such as rice or quinoa. They also pair nicely with salads for a fresh touch. These carrots can brighten any meal with their sweet and savory flavors. We covered all you need to make maple glazed carrots. You learned about key ingredients, tools, and steps for cooking. I shared tips to enhance your glaze and avoid common errors. We also discussed fun variations and storage tips. Try these ideas to make your dish shine. Enjoy your cooking and make this recipe your own!

Maple Glazed Carrots Tasteful and Easy Side Dish

To make delicious chili lime shrimp tacos, gather these ingredients: - 1 pound shrimp, peeled and deveined - 2 tablespoons chili powder - 1 tablespoon smoked paprika - 1 teaspoon garlic powder - 1 teaspoon ground cumin - Zest and juice of 2 fresh limes - 2 tablespoons olive oil - Sea salt and freshly cracked black pepper to taste - 8 small corn tortillas - 1 cup red cabbage, finely shredded - 1/2 cup fresh cilantro, roughly chopped - 1 ripe avocado, sliced - Lime wedges for garnish If you want to adjust the spice level, use less chili powder or paprika. You can add more lime juice for extra zest. If you don't have smoked paprika, regular paprika works too. For a lighter version, substitute olive oil with a cooking spray. You can change the amount of red cabbage and cilantro based on your taste. I prefer fresh shrimp for this recipe. Fresh shrimp has a better taste and texture. If fresh shrimp isn't available, frozen shrimp is a good choice. Just remember to thaw them properly. Place frozen shrimp in the fridge overnight or run them under cold water for quick thawing. Always choose shrimp that smell like the ocean, not fishy. This ensures quality in your meal. Using the right shrimp will make your tacos shine! To start, I mix a few simple spices in a bowl. I use chili powder, smoked paprika, garlic powder, and ground cumin. I add the zest and juice of two fresh limes. Then, I pour in two tablespoons of olive oil. I also sprinkle in sea salt and freshly cracked black pepper. I whisk everything until it blends well. This mix makes a tasty marinade. Next, I add one pound of peeled and deveined shrimp. I toss them gently so each shrimp is coated. I cover the bowl and let them chill in the fridge for at least 15 minutes. This step helps the flavors soak in. After marinating, I heat a grill pan or non-stick skillet over medium-high heat. When it's hot, I carefully add the shrimp to the pan. I cook them for about 2-3 minutes on each side. I watch for the shrimp to turn pink and opaque. This shows they are cooked just right. The smell will make your mouth water! While the shrimp cook, I warm eight small corn tortillas in another skillet. I put them over medium heat for about 30 seconds on each side. This makes them soft and slightly toasted. Now, it’s time to assemble the tacos! I take a warm tortilla and place a few pieces of grilled shrimp in the center. I top each taco with a handful of finely shredded red cabbage. Then, I add a few slices of ripe avocado and a sprinkle of fresh cilantro. For the final touch, I serve the tacos with lime wedges on the side. Squeezing fresh lime juice over the tacos brings a bright, tangy flavor. Enjoy your Chili Lime Shrimp Tacos! When picking shrimp, look for large, firm shrimp. Fresh shrimp should smell like the sea, not fishy. If you choose frozen shrimp, make sure they are flash-frozen. This keeps them fresh longer. Always check for signs of freezer burn. I prefer wild-caught shrimp for better flavor and texture. The marinade is key for great flavor. I use chili powder, smoked paprika, garlic powder, and cumin. The lime juice and zest add a bright touch. Make sure to coat each shrimp well. Let them sit for at least 15 minutes. This step helps the flavors soak in deeply. You can even marinate them longer for a stronger taste. Warm your corn tortillas on a skillet before using them. This makes them soft and pliable. Heat them for about 30 seconds on each side. You want them to be slightly toasted but not crispy. This process adds a nice texture and flavor. Soft tortillas hold the shrimp and toppings better. Enjoy the perfect bite! For the full recipe, check out the details above. {{image_4}} If shrimp isn't your thing, try other proteins. Chicken, fish, or tofu work great. For chicken, use bite-sized pieces. Marinate them the same way as shrimp. If you love fish, choose a firm option like tilapia or mahi-mahi. Tofu offers a great meat-free option. Make sure to use extra-firm tofu and press it to remove water. Toppings can change the whole taco experience. Besides red cabbage, try shredded lettuce or diced tomatoes. Fresh mango salsa adds sweetness. You can also use a spicy pico de gallo for a kick. Don't forget about creamy sauces! A drizzle of chipotle mayo can elevate your tacos. Experiment with your favorites! Want more heat? Add diced jalapeños to the shrimp marinade. You can also mix in hot sauce before cooking. If you prefer milder flavors, reduce the chili powder. Remember, you can always add heat later. A squeeze of lime can balance out strong spices. It’s all about finding your perfect flavor! For the full recipe, check back to the main steps for all the details you need. If you have leftover shrimp, store them in an airtight container. Place the shrimp in the fridge. They will stay fresh for about three days. Before using, check for any off smells or changes in texture. If the shrimp seems fine, you can reheat it. It’s best to keep the shrimp separate from other ingredients. You can freeze shrimp tacos for later. Wrap the assembled tacos in plastic wrap. Place them in a freezer-safe bag. They can last up to three months in the freezer. For best results, freeze the shrimp and tortillas separately. Place the shrimp in a freezer-safe container. They will stay good for up to six months. Just remember to thaw the shrimp in the fridge before cooking. To reheat shrimp, use a skillet over medium heat. Add a splash of olive oil to prevent sticking. Heat the shrimp for about five minutes until warmed through. For tortillas, warm them in a dry skillet. Heat for about 30 seconds on each side. This keeps them soft and pliable. Enjoy your flavorful meal again! For the full recipe, check above. Yes, you can make these tacos ahead of time. You can marinate the shrimp a few hours before you cook them. This will let the flavors soak in. Just keep the shrimp in the fridge until you’re ready to cook. You can also prepare your toppings, like cabbage and avocado, in advance. Just store them in sealed containers. This way, you can enjoy fresh tacos with less work later. If you cannot find corn tortillas, you have some great options. You can use flour tortillas instead. They are soft and work well with shrimp. Lettuce wraps are another fun choice. They are fresh and low in carbs. You can even try crispy taco shells for a crunchy bite. Choose what fits your taste best! Yes, this recipe is gluten-free! The key ingredients, like shrimp and corn tortillas, do not contain gluten. Always check the labels on your tortillas to be sure. If you use flour tortillas, they may not be gluten-free. You can stick with corn tortillas for a safe and tasty option. For the full recipe, you can find all the details you need to make Chili Lime Shrimp Tacos. This dish serves about four people and takes just 30 minutes to prepare. It combines fresh shrimp with vibrant spices and toppings. You’ll get a nice mix of protein, healthy fats, and fiber. Try it out, and I promise it will impress your family and friends! In this blog post, we covered how to make delicious Chili Lime Shrimp Tacos. We explored essential ingredients, provided step-by-step cooking instructions, and offered tips for selecting shrimp and perfecting tortilla texture. You can also try tasty variations for different toppings and proteins. Remember, proper storage helps keep your leftovers fresh. Enjoy your tacos with confidence, knowing you have all the tools to make them great. Making these tacos is fun and easy, and I hope you try it soon!

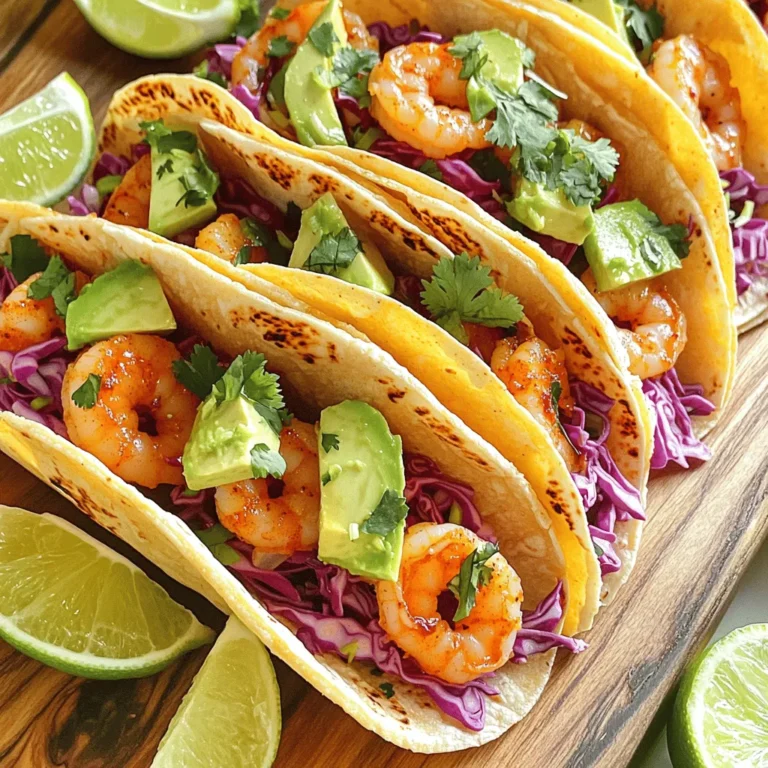
Chili Lime Shrimp Tacos Flavorful and Easy Recipe

To make Sriracha honey glazed salmon, gather these key ingredients: - 4 salmon fillets (approximately 6 oz each) - 1/4 cup honey - 2 tablespoons Sriracha sauce - 2 tablespoons low-sodium soy sauce - 1 tablespoon freshly squeezed lime juice - 2 cloves garlic, finely minced - 1 teaspoon fresh ginger, grated - Salt and black pepper to taste These ingredients create a perfect balance of sweet and spicy flavors. The salmon fillets are rich and tender, while the glaze adds a punch. You can elevate the dish with these optional garnishes: - Sesame seeds - Sliced green onions These add a nice crunch and fresh taste. They also make your dish look beautiful. Pair your salmon with these tasty sides: - Steamed broccoli or asparagus - Jasmine rice or quinoa - A fresh green salad These options will round out your meal. They balance the sweet and spicy notes of the salmon. For more details, check the Full Recipe. Start with a small bowl. Add 1/4 cup of honey. Then, mix in 2 tablespoons of Sriracha sauce. Next, add 2 tablespoons of low-sodium soy sauce. Squeeze in 1 tablespoon of freshly squeezed lime juice. Add 2 cloves of minced garlic and 1 teaspoon of grated ginger. Whisk it all together until it's smooth. Grab a shallow dish or a resealable bag. Place your 4 salmon fillets inside. Pour the marinade over the salmon. Make sure each fillet gets a good coat. Cover the dish or seal the bag. Refrigerate for at least 30 minutes. For even better flavor, you can let it marinate for up to 2 hours. Preheat your oven to 375°F (190°C). Line a baking sheet with parchment paper for easy cleanup. Take the salmon out of the marinade, but save the marinade for later. Place the fillets skin-side down on the baking sheet. Lightly season with salt and black pepper. Using a brush, glaze the salmon with some of the reserved marinade. Bake for 12 to 15 minutes. The salmon is done when it flakes easily with a fork. For extra flavor, switch to broil for the last 2-3 minutes. Keep an eye on it to avoid burning. After baking, let the salmon rest for a few minutes. Drizzle any remaining marinade over the top. Garnish with sesame seeds and sliced green onions. Enjoy your Sriracha honey glazed salmon! To get that mouthwatering glaze, use a brush to apply the marinade. This coats the salmon well and gives it a shiny finish. Be sure to save some marinade for later. A little extra glaze right before serving adds flavor and a nice look. Cook the salmon at 375°F (190°C) for 12 to 15 minutes. Check for doneness by gently flaking it with a fork. It should be opaque and flake easily. If you like a crispier top, broil for 2-3 minutes at the end. Watch it closely so it doesn’t burn. You can tweak the flavors to match your taste. If you want more heat, add a bit more Sriracha. For sweetness, add extra honey. Want a citrus kick? A splash of lemon juice works wonders. Experiment to find your perfect balance. For the full recipe, check out the detailed steps above. Enjoy your cooking! {{image_4}} If you want to switch up the heat, try other sauces. You can use chili garlic sauce for a milder flavor. For a smoky touch, chipotle sauce works well too. If you like it sweet, try sweet chili sauce. Each option gives a new taste twist to your dish. Not a salmon fan? No problem! You can use trout or tilapia instead. Both fish absorb flavors well and cook quickly. If you want a healthier option, try baked chicken breasts. They can soak up the glaze just like salmon. To make this dish gluten-free, swap soy sauce for tamari. This keeps the same great flavor without gluten. Always check labels to ensure your honey and Sriracha sauce are gluten-free. Making these small changes lets everyone enjoy your meal! For the full recipe, check out Sriracha Honey Glazed Salmon! After you enjoy your Sriracha honey glazed salmon, store any leftovers in an airtight container. This keeps the salmon fresh. Place it in the fridge. Your leftovers will stay good for about three days. If you have extra glaze, save it in a small jar. To reheat your salmon, use the oven for the best results. Preheat your oven to 350°F (175°C). Place the salmon on a baking sheet. Heat it for about 10 minutes. This keeps it moist and tasty. You can also microwave it, but be careful. Microwaving can dry out the fish. Heat in short bursts of 30 seconds until warm. If you have more salmon than you can eat, freezing is a great option. Wrap each fillet tightly in plastic wrap. Then, place them in a freezer bag. Label the bag with the date. Frozen salmon can last up to three months. When you are ready to eat it, thaw it in the fridge overnight. Reheat as mentioned above for the best taste. For more cooking ideas and tips, check out the full recipe of Sriracha honey glazed salmon! You should marinate salmon for at least 30 minutes. This gives the fish time to soak up the flavors. For a stronger taste, you can marinate it for up to 2 hours. Just remember, don't marinate too long, or the fish may become mushy. Yes, fresh salmon fillets work great for this recipe. Fresh fish gives the best texture and taste. If you find frozen salmon, make sure to thaw it properly before marinating. You can serve Sriracha honey glazed salmon with many sides, like rice or vegetables. Here are some great options: - Steamed broccoli - Grilled asparagus - Jasmine rice - Quinoa salad - Coleslaw These sides balance the sweet and spicy flavors of the salmon. Try mixing and matching to find your favorite combinations. For the full recipe, check the detailed instructions above. This article covered how to prepare Sriracha honey glazed salmon, from its key ingredients to cooking tips. You learned how to make a flavorful marinade and achieve that perfect glaze. We explored variations for different diets and how to store leftovers properly. In short, this dish is simple, tasty, and adaptable. Now, you can impress anyone at dinner with a dish that bursts with flavor. Enjoy your cooking and make this meal a new favorite!

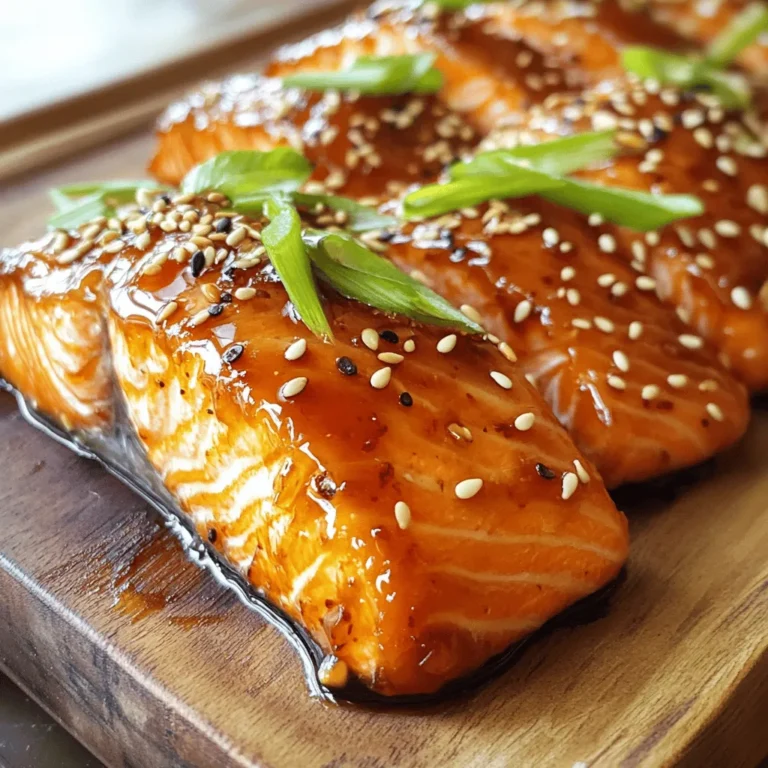
Sriracha Honey Glazed Salmon Tasty Dinner Delight

1 2 NEXT
homedishhaven

explore

DessertsDinnerAppetizersDrinks

Our Policies

  • Cookie Policy
  • Copyright Policy
  • Disclaimer
  • GDPR Policy
  • Terms Of Use
Back to Top
  • About
  • Contact Us
  • Privacy Policy
© 2025 homedishhaven