FREE DINNER EBOOK! Get your copy!
  • Cookie Policy
  • GDPR Policy
  • Disclaimer
  • Terms Of Use
  • Visit my other site: Fun Cookie Recipes
homedishhaven
  • Home
  • Dinner
  • Desserts
  • Drinks
  • Appetizers
  • Contact
  • About
  • Privacy Policy
  • Home
  • Dinner
  • Desserts
  • Drinks
  • Appetizers
  • Contact
  • About
  • Privacy Policy
  • Cookie Policy
  • GDPR Policy
  • Disclaimer
  • Terms Of Use
Visit my other site: Fun Cookie Recipes

HOME / CATEGORIES /

Latest

- 8 oz linguine pasta - 1 lb large shrimp, peeled and deveined - 6 tablespoons unsalted butter The main ingredients for Minute Garlic Butter Shrimp Linguine create a simple yet tasty dish. Linguine pasta provides a nice base, while large shrimp add protein. Unsalted butter brings richness and flavor to the sauce. - 4 cloves garlic, minced - 1/2 teaspoon red pepper flakes (adjust according to your spice preference) - 2 tablespoons fresh lemon juice Garlic is key for that aromatic kick. Red pepper flakes add a touch of heat, which you can adjust. Fresh lemon juice brightens the dish, balancing the rich butter. - 1/4 cup chicken broth - 2 tablespoons fresh parsley, chopped (for garnish) - Grated Parmesan cheese (for serving, optional) Chicken broth can enhance the sauce's depth, making it even richer. Fresh parsley adds color and a fresh taste. Grated Parmesan cheese is a nice touch for serving, but it’s not a must. To start, fill a large pot with water. Add a good amount of salt to it. Bring the water to a rolling boil. Once it’s boiling, add 8 oz of linguine. Cook the pasta according to the package instructions until it is al dente. Before you drain the pasta, remember to reserve 1/2 cup of the pasta water. This water will help your sauce later. After reserving it, drain the linguine in a colander and set it aside. Now, grab a large skillet and heat 2 tablespoons of butter over medium heat. Once the butter melts, add 4 cloves of minced garlic and 1/2 teaspoon of red pepper flakes. Sauté this mix for about 30 seconds. The garlic should smell great but not turn brown. Next, raise the heat to medium-high and add 1 lb of cleaned shrimp to the skillet. Season with salt and pepper. Cook the shrimp for 2-3 minutes on each side. You will know they are done when they turn pink and opaque. Once the shrimp are cooked, it’s time to create your sauce. Pour in 1/4 cup of chicken broth and 2 tablespoons of fresh lemon juice. Stir this mixture and bring it to a gentle simmer. Now add the remaining 4 tablespoons of butter. Let it melt into the sauce. This will give you a rich and tasty base. Next, take the cooked linguine and toss it into the skillet. Mix everything gently to coat the pasta in that buttery sauce. If it looks a bit dry, add some of that reserved pasta water. Stir until you reach the right consistency. Taste it and adjust the seasoning with more salt and pepper if needed. To make the garlic butter sauce shine, you must control the heat. Start with medium heat when melting the butter. This keeps the garlic from burning. Burnt garlic tastes bitter and ruins the sauce. Once the garlic is fragrant, raise the heat to medium-high for the shrimp. Using fresh ingredients can elevate your dish. Fresh garlic brings a bright flavor. Fresh lemon juice adds a zesty kick. Always pick the best quality shrimp. This will make your meal taste amazing. Perfectly cooked shrimp should be pink and opaque. They should curl slightly but not be tight. Watch them closely; they cook fast. If you see them turning white, it's time to take them off the heat. Timing is key when multitasking. Start cooking the shrimp as the pasta nears doneness. This way, both will be ready at the same time. Plating is an art that can make your meal pop. Use shallow bowls for the linguine. Arrange the shrimp on top in a neat pattern. This makes it look fancy and inviting. For garnishing ideas, sprinkle fresh parsley on top. A light drizzle of olive oil adds shine. If you like, add a sprinkle of Parmesan cheese. These small touches can turn a simple meal into a showstopper. {{image_4}} You can add fresh veggies to your Minute Garlic Butter Shrimp Linguine. This boosts flavor and nutrition. Some great options include: - Spinach: Toss in fresh spinach just before serving. It wilts quickly and adds a lovely green color. - Cherry Tomatoes: Halve them and add during the last few minutes of cooking. They add sweetness. - Zucchini: Slice zucchini into thin rounds. Sauté them with the shrimp for a crunchy texture. Seasonal vegetables also work well. In spring, use asparagus or peas. In fall, try butternut squash or kale. This keeps the dish vibrant all year long. If you don’t have shrimp, you can swap it for chicken or tofu. Each protein has its own cooking needs. - Chicken: Use boneless, skinless chicken breasts. Cut them into bite-sized pieces. Cook for about 5-7 minutes until no longer pink. - Tofu: Use firm or extra-firm tofu. Press it to remove excess water, then cube it. Sauté it until golden, about 4-5 minutes. Adjust the cooking time based on the protein you choose. Ensure everything cooks evenly for the best flavor. Feel free to play with the taste of your dish. Herbs and spices can add a unique twist. - Herbs: Try fresh basil or thyme for a fragrant touch. Add them near the end of cooking to keep their flavor bright. - Spices: Experiment with smoked paprika or curry powder for a different zest. Start with a little, then taste and adjust. You can also explore regional sauces. For an Italian twist, add capers and olives. For a spicy kick, mix in some sriracha or chili paste. Each change offers a new spin on this classic dish. To store leftovers, place the shrimp linguine in an airtight container. Let it cool before sealing. You can keep it in the fridge for 2-3 days. Make sure to label the container with the date. This helps you remember when you made it. When you are ready to eat, reheat the linguine in a skillet. Add a splash of chicken broth or water to keep it moist. Heat it on low, stirring often. This helps avoid sogginess. You want it warm, not overcooked. If you want to freeze the cooked linguine, let it cool completely. Place it in a freezer-safe container. You can freeze it for up to 2 months. To thaw, move it to the fridge for several hours or overnight. Reheat it in a skillet, adding a bit of broth or water to help it revive. It takes 15 minutes to make garlic butter shrimp linguine. The prep time is just 5 minutes. You will spend 10 minutes cooking. This quick meal fits perfectly into busy weeknights. Yes, you can use frozen shrimp. First, thaw the shrimp by placing them in cold water for about 15 minutes. You can also leave them in the fridge overnight. Once thawed, pat them dry before cooking. This helps the shrimp cook evenly and prevents excess water in the pan. You can serve garlic butter shrimp linguine with many sides. Here are a few ideas: - Garlic bread for a crunchy bite - A fresh green salad for lightness - Steamed vegetables like broccoli or asparagus for added color - Roasted potatoes for a hearty option These sides will enhance your meal and impress your guests. This blog post highlights the key ingredients and steps to make garlic butter shrimp linguine. You learned how to prepare the best pasta and perfectly sauté shrimp. I shared tips to enhance flavors and amp up your dish's presentation. With options for variations and storage, you can enjoy this meal again. Try new ingredients or adjust cooking times to make it your own. Enjoy this dish with friends or family, and it will impress them every time. Happy cooking!

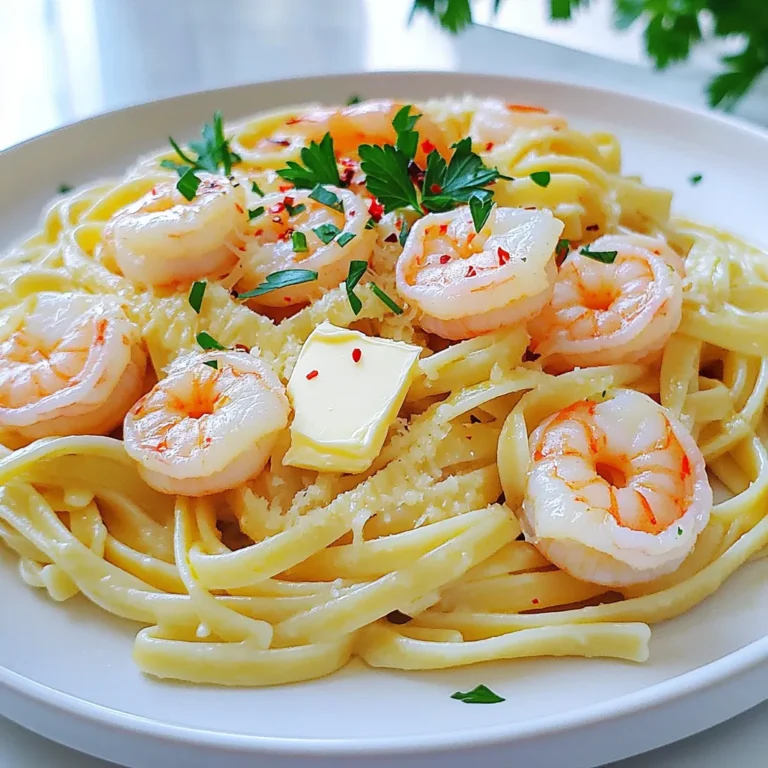
Minute Garlic Butter Shrimp Linguine Easy Weeknight Meal

- 1 can (14 oz) artichoke hearts, drained and roughly chopped - 4 cups fresh spinach, roughly chopped - 1 medium onion, finely diced - 3 cloves garlic, minced - 4 cups vegetable broth - 1 cup heavy cream - 1 cup cream cheese, softened at room temperature - 1 cup freshly grated Parmesan cheese - 1 teaspoon dried oregano - 1 teaspoon dried thyme - Salt and freshly cracked pepper to taste To make this soup, gather the main ingredients first. The artichoke hearts bring a unique flavor and texture. Fresh spinach adds a vibrant green color and nutrients. Onion and garlic give depth to the taste. Vegetable broth serves as a flavorful base. Heavy cream and cream cheese create that rich, creamy texture. Finally, Parmesan cheese adds a salty, savory touch. Don't forget the spices and seasonings to enhance the dish. - Croutons - Additional Parmesan For a fun twist, add some optional garnishes. Croutons offer a nice crunch. Extra Parmesan on top adds flavor and elegance. These little touches can elevate your soup and make it more enjoyable. First, gather your artichoke hearts and fresh spinach. - Use one can of artichoke hearts, drain and chop them. - Take four cups of fresh spinach and roughly chop it. Next, dice one medium onion into small pieces. - Mince three cloves of garlic until fine. Now, put all your chopped ingredients into the slow cooker. - Combine the artichokes, spinach, onion, and garlic. Pour in four cups of vegetable broth for flavor. - Stir well to mix everything together. Add one teaspoon of dried oregano, one teaspoon of dried thyme, - and season with salt and freshly cracked pepper. Cover the slow cooker and choose a cooking time. - Set to low for four hours or high for two hours. Once the cooking time is done, it's time for the creaminess. - Add one cup of softened cream cheese into the pot. - Then, pour in one cup of heavy cream. Mix well with a whisk or spoon until creamy. Next, fold in one cup of freshly grated Parmesan cheese. - Stir until it melts and thickens the soup. Taste the soup and add more salt or pepper if needed. If you want a smoother soup, blend a portion of it. - You can use an immersion blender or a regular blender. Serve hot with croutons and extra Parmesan on top if you like. To get that smooth, creamy texture, mix the soup well. After cooking, add cream cheese and heavy cream. Use a whisk to blend them in. This creates a rich base. For an even smoother soup, try an immersion blender. Blend a portion of the soup right in the slow cooker. This adds a nice creaminess without losing all the chunks. Seasoning is key for great taste. After mixing in the cream cheese, taste the soup. Add more salt or pepper if needed. You can also adjust the spices. If you want a kick, add a pinch of cayenne pepper. If you love herbs, try fresh basil or parsley for a fresh twist. This soup pairs well with bread or crackers. Serve it with crusty bread for a filling meal. You can also use crackers for a crunchy touch. For toppings, sprinkle extra Parmesan on top. Add crunchy croutons for texture. These little touches make each bowl special! {{image_4}} You can easily use frozen spinach instead of fresh. It saves time and still tastes great. Just thaw it first and squeeze out excess water. If you want to change the creaminess, try different cheeses. You can swap cream cheese with Greek yogurt for a lighter option. Want to make your soup heartier? You can add cooked chicken or sausage. Just chop it and stir it in when you add the cream. For a vegetarian twist, add beans or lentils. They pack a protein punch without meat. To change up the flavor, add herbs or spices. A hint of cayenne pepper gives a nice kick. You can also toss in vegetables like leeks or mushrooms. They add depth and texture, making your soup even more enjoyable. To store leftovers, let the soup cool down first. Then, pour it into airtight containers. I recommend using glass or BPA-free plastic containers. These keep the soup fresh and tasty. Make sure to leave some space at the top for expansion. Seal the containers tightly to avoid spills or odors. To freeze the soup, first cool it completely. Use freezer-safe containers or heavy-duty freezer bags. Make sure to remove excess air from bags before sealing. Label each container with the date. When you're ready to enjoy it, thaw the soup overnight in the fridge. For reheating, put it on low heat in a pot. Stir it often to keep it from sticking. In the fridge, the soup lasts about 3 to 4 days. If frozen, it can stay good for up to 3 months. Always check for any signs of spoilage before eating. When in doubt, throw it out to stay safe! Yes, you can make this soup ahead of time. Prepare the soup and store it in the fridge. It will stay fresh for about three days. Just reheat it on the stove or in the microwave when you’re ready to enjoy it. If you want to swap cream cheese, try using Greek yogurt or cashew cream. These options will keep the soup creamy while adding a different flavor. You can also use a non-dairy cream cheese for a lighter version. To make more servings, simply double the ingredients. Use two cans of artichokes and more spinach. Increase the broth, cream, and cheese as well. Be sure to adjust the cooking time if needed. Yes, you can make this soup vegan. Use plant-based cream cheese and non-dairy heavy cream. Replace the chicken broth with vegetable broth. This will keep the flavors rich and delicious. You can easily swap chicken broth for vegetable broth. This change will work well and still give you a tasty soup. The flavor may differ slightly, but it will still be good. This blog post shared a simple, creamy spinach artichoke soup recipe. We discussed the key ingredients, step-by-step instructions, and helpful tips for perfecting the dish. You learned various ways to customize the soup, store it properly, and even answered common questions. Make this recipe your own, experiment with flavors, and enjoy cooking. This soup can nourish your body and delight your taste buds. Happy cooking!

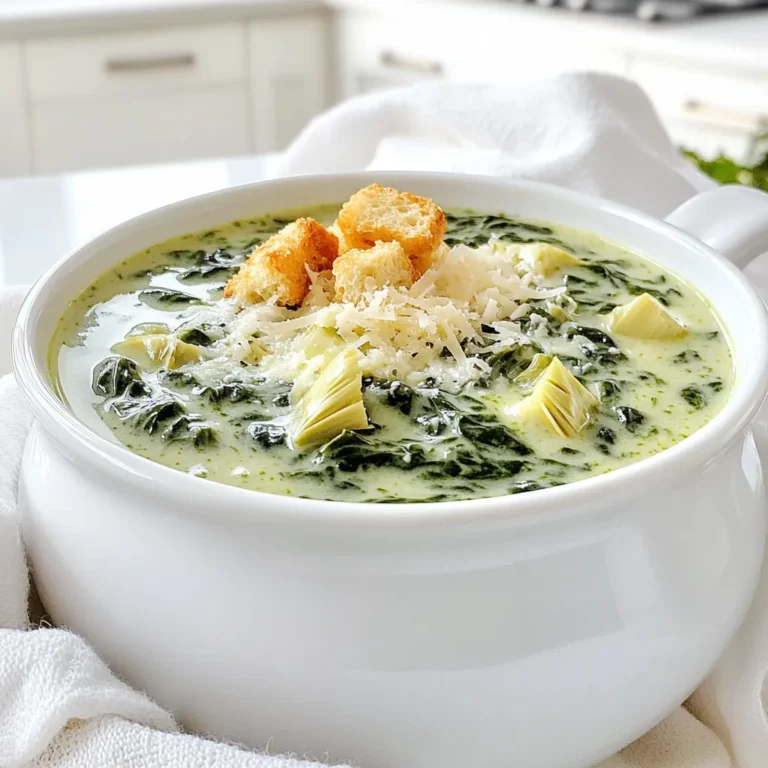
Slow Cooker Creamy Spinach Artichoke Soup Delight

- Apples: Use 3 large apples, like Granny Smith or Honeycrisp. These types give a great balance of sweet and tart flavors. Peel, core, and slice them before use. This makes the filling nice and easy to work with. - Sweeteners: I recommend using 1 cup of packed brown sugar. It adds a deep, rich flavor. If you prefer alternatives, try coconut sugar or maple syrup for a twist. - Spices: You need 1 teaspoon of ground cinnamon and a pinch of grated nutmeg (1/4 teaspoon). Cinnamon gives warmth and aroma, while nutmeg adds a lovely depth to the pie. - Crust Options: You can go for a pre-made pie crust to save time or make your own from scratch. A homemade crust often has a fresher taste and flaky texture. - Caramel Sauce: Use 1/2 cup of caramel sauce. You can choose store-bought for convenience or make your own for that special touch. Homemade caramel is easy and full of flavor. - Combining Ingredients for the Filling Start by peeling, coring, and slicing three large apples. I like using Granny Smith or Honeycrisp for their great taste. In a big bowl, mix these apples with 1 cup of brown sugar, 1 tablespoon of lemon juice, 1 teaspoon of cinnamon, 1/4 teaspoon of nutmeg, 1 tablespoon of cornstarch, and a pinch of salt. Toss until the apples are well coated. This mix will not only taste great but will also help thicken the pie filling. - Letting the Apple Mixture Rest After mixing, let the apple mixture rest for about 10 minutes. This step is key because it allows the apples to release their juices. This juice will blend with the sugar and spices, creating a rich filling. - Rolling Out the Crust On a lightly floured surface, roll out your pie crust. If you’re using a store-bought crust, just unroll it carefully. Aim for a circle about 12 inches wide. This size will fit into a 9-inch pie dish nicely. - Fitting the Crust in the Pie Dish Gently place the rolled crust into your pie dish. Press it down lightly to avoid air bubbles. Trim any excess dough hanging over the edges. This will make your pie look neat and tidy. - Layering the Apple Mixture Pour the apple mixture into the prepared crust. Spread it out evenly. This ensures every slice has a good amount of filling. - Adding Butter and Caramel Cut 2 tablespoons of butter into small cubes and scatter them over the apples. Then, drizzle half of your caramel sauce over the filling. This adds richness and a sweet, sticky layer that everyone loves. - Egg Wash for a Beautiful Finish In a small bowl, beat one egg to create an egg wash. Brush this over the top crust. This will help it turn a beautiful golden brown as it bakes. - Ideal Baking Time and Temperature Preheat your oven to 425°F (220°C). Bake the pie for 45-50 minutes. You want the crust to be deep golden brown and the filling to bubble through the slits. - Cooling and Serving Suggestions Once baked, let the pie cool for 15-20 minutes. This allows the filling to set and makes slicing easier. Serve each warm slice with a drizzle of the remaining caramel sauce. For extra delight, add a scoop of vanilla ice cream on the side. - Avoiding a Soggy Bottom To prevent a soggy crust, you can pre-bake it for about 10 minutes before adding the filling. This helps create a barrier against moisture. Also, make sure to use cornstarch in your apple mixture. It absorbs excess juice and keeps the bottom crisp. - Achieving Flakiness For a flaky crust, keep your butter cold. Use small cubes of butter and mix them into the flour quickly. Do not overwork the dough. Less handling keeps the butter from melting and creates a flakier texture. - Adjusting Sugar Levels Taste your apple filling before baking. If your apples are tart, add a bit more brown sugar. If they are sweet, you can cut back. This step helps you find the right balance for your pie. - Balancing Spices Cinnamon and nutmeg are key in this pie. If you want a deeper flavor, try adding a pinch of ginger or allspice. Start with small amounts and adjust to your taste. This adds a nice twist to the classic apple pie. - Pairing with Ice Cream Serve warm slices with a scoop of vanilla ice cream. The cold ice cream melts into the warm pie, creating a delightful mix. This contrast makes each bite even better. - Creative Presentation Ideas For a fancy look, drizzle caramel sauce over each slice. You can also sprinkle cinnamon on top. Adding a sprig of mint can make the dish pop with color. These small touches impress your guests. {{image_4}} Adding Other Fruits You can add a twist to your apple pie. Try mixing in some berries, like blueberries or raspberries. They add a nice tart flavor that pairs well with the sweet apples. You can also use pears or peaches for extra sweetness. Just remember to adjust your sugar if you do! Incorporating Nuts Nuts can give your pie a great crunch. Chopped walnuts or pecans work well. They add texture and flavor. Sprinkle them on top of the apple filling before you add the crust. This adds a surprise in every bite! Gluten-Free Options If you need a gluten-free option, use almond flour or gluten-free all-purpose flour. Both work well in pie crusts. Just follow the same steps as with regular flour. Your pie will still be delicious! Alternative Flavors for Homemade Crust You can change the flavor of your crust, too. Add a pinch of cinnamon or nutmeg to the dough. This gives your crust a unique taste that matches your filling. It’s a fun way to add a little twist to your pie! Homemade Caramel Recipe Making your own caramel is easy! Just heat 1 cup of sugar in a pan on low heat. Stir until it melts and turns golden brown. Then, add 1/2 cup of heavy cream slowly. Mix well and let it cool. This homemade caramel takes your pie to the next level! Using Different Sauces If you want to switch things up, try using chocolate sauce or fruit sauce. A rich chocolate drizzle can make it feel fancy. A berry sauce adds a fresh twist. Get creative and find your favorite combination! To keep your pie fresh, store it properly. Here are the best practices: - Best Practices for Refrigeration Place leftover pie in the fridge. Cover it with plastic wrap or foil. This helps keep the crust crispy and the filling fresh. It will stay good for about 3 to 4 days. - Freezing Instructions If you want to save it longer, freeze the pie. First, let it cool completely. Then, wrap it tightly in plastic wrap and foil. Label it with the date. It can last up to 3 months in the freezer. To eat, thaw it overnight in the fridge. To enjoy your pie again, reheating is key: - How to Reheat for Best Taste Preheat your oven to 350°F (175°C). Place slices of pie on a baking sheet. Cover them with foil to keep moisture in. Heat for about 15-20 minutes. This makes the crust warm and flaky. If you want it extra special, drizzle some caramel on top before serving. To keep your pie crust crisp, pre-bake it. Start by rolling out the crust and fitting it into your pie dish. Use a fork to poke holes in the bottom. This helps steam escape. Preheat your oven to 425°F (220°C). Bake the crust for about 10 minutes until it is lightly golden. Let it cool before adding the apple filling. This step prevents sogginess and keeps the crust flaky. Yes! Using a mix of sweet and tart apples works great. Granny Smith apples are tart and hold their shape well. Honeycrisp apples add sweetness and crunch. You can also try Fuji or Braeburn apples for a different flavor. Mixing apples gives great taste and texture to your pie. Cinnamon Apple Pie with Caramel can last up to four days in the fridge. Cover it with plastic wrap or foil to keep it fresh. If you want to store it longer, freeze it. It can stay in the freezer for up to three months. Just make sure to wrap it tightly for best results. This pie pairs wonderfully with vanilla ice cream. The cold ice cream melts into the warm pie, creating a delightful treat. You can also serve it with whipped cream for a light touch. For a twist, try adding a sprinkle of cinnamon on top. Each bite becomes even more delicious! This post covered how to make a delicious cinnamon apple pie with caramel. We explored the key ingredients, from apple types to crust options. I shared step-by-step instructions for prepping, assembling, and baking your pie. You learned useful tips for the perfect crust and flavor adjustments. Variations offer fun twists, and the storage info helps keep leftovers fresh. Now you can create your own tasty apple pie. Enjoy sharing it with family and friends!

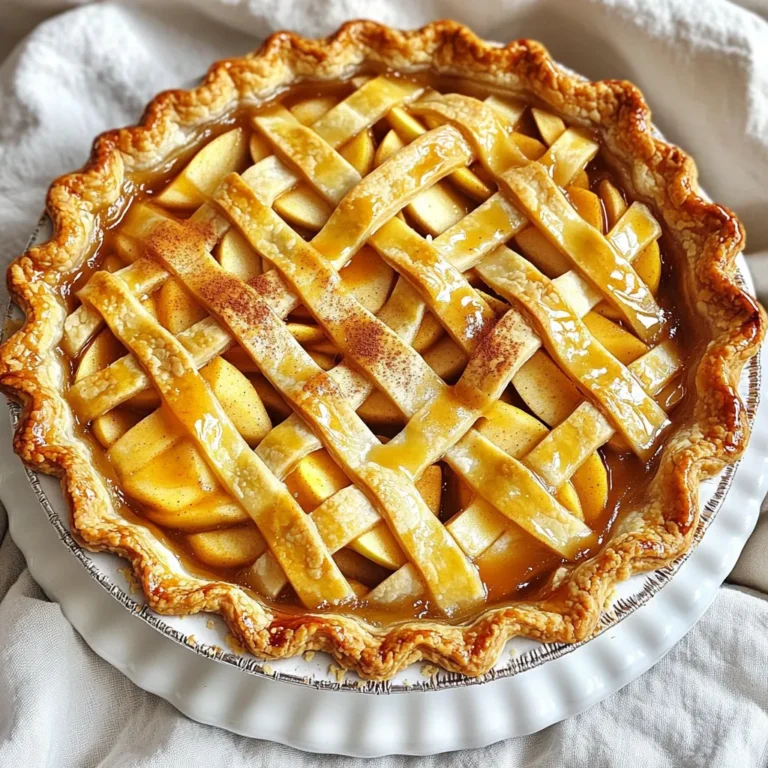
Cinnamon Apple Pie with Caramel Irresistible Treat

- 1 ½ cups chocolate graham cracker crumbs - ½ cup unsalted butter, melted - 1 cup cream cheese, softened to room temperature - 1 cup creamy peanut butter - ¾ cup powdered sugar - 1 teaspoon pure vanilla extract - 1 cup heavy whipping cream, chilled - ½ cup semi-sweet chocolate chips - ¼ cup chopped peanuts - 9-inch round springform pan - Mixing bowls - Electric mixer - Whisk Gather these ingredients and tools. They are key to making this rich, no-bake cheesecake. The chocolate graham cracker crumbs create a perfect base. They give a sweet and crunchy flavor. The unsalted butter helps the crust stick together. Cream cheese and creamy peanut butter make the filling smooth and rich. Adding powdered sugar gives just the right sweetness. The pure vanilla extract adds a lovely aroma and taste. Chilled heavy whipping cream is essential. It makes the cheesecake light and fluffy. If you want to add extra flavor, use semi-sweet chocolate chips and chopped peanuts as toppings. Make sure to have a 9-inch round springform pan. This pan allows easy removal of the cheesecake. You will also need mixing bowls for combining ingredients. The electric mixer helps beat the cream cheese and peanut butter smoothly. A whisk is helpful for whipping the cream. With these ingredients and tools ready, you're set to create a dessert that delights everyone! To start, grab a medium mixing bowl. Combine 1 ½ cups of chocolate graham cracker crumbs with ½ cup of melted unsalted butter. Stir well until the mix looks like wet sand. This helps the crumbs stick together. Next, take a 9-inch round springform pan. Firmly press the crumb mixture into the bottom of the pan. Make sure it is even and compact. Now, place the pan in the freezer. This chills the crust and makes it firm. Now we will make the cheesecake filling. In a large mixing bowl, beat 1 cup of softened cream cheese with 1 cup of creamy peanut butter using an electric mixer. Keep mixing until it is smooth. Then, gradually add in ¾ cup of powdered sugar and 1 teaspoon of pure vanilla extract. Beat until the mixture is creamy and lump-free. In a separate bowl, whip 1 cup of chilled heavy cream. Whip until stiff peaks form. Gently fold this whipped cream into the peanut butter mix in thirds. This keeps the mixture light and airy. Once your filling is ready, take the springform pan out of the freezer. Pour the cheesecake filling over the chilled crust. Use a spatula to smooth the top. For extra chocolate flavor, sprinkle ½ cup of semi-sweet chocolate chips evenly over the filling. Now, cover the cheesecake with plastic wrap or aluminum foil. Place it in the fridge for at least 4 hours to set. For the best taste, let it chill overnight. To make a smooth cheesecake, beat the cream cheese well. Start with softened cream cheese. Use an electric mixer for the best results. Mix until the cream cheese is fluffy and free of lumps. Next, fold in the whipped cream gently. This keeps the texture light and airy. Add the whipped cream in thirds, mixing carefully. Overmixing can make the filling dense, which we want to avoid. For an elegant touch, serve the cheesecake on individual dessert plates. This makes each serving special. You can add melted chocolate drizzles for flair. A dollop of whipped cream adds creaminess. Top with chocolate shavings or chopped peanuts for extra crunch. This makes each bite delightful and adds visual appeal. Plan ahead to save time. You can make the cheesecake a day before serving. This gives it time to set and develop flavors. If you need a quick prep, use store-bought whipped topping instead of making your own. This shortcut cuts down on time without losing flavor. {{image_4}} You can make this cheesecake your own! Try using different nut butters, like almond or cashew. Each nut butter adds a unique taste and texture. You can also swap the chocolate. Use dark chocolate for a rich flavor or white chocolate for something sweet and creamy. Experiment to find your favorite mix! Want to make this cheesecake fit your diet? Use gluten-free graham crackers for the crust. This keeps it tasty for those who avoid gluten. For a vegan option, try using vegan cream cheese. It works well and still tastes great. These small changes let everyone enjoy this dessert! Make your cheesecake pop with fun presentations! Layer fresh fruit like strawberries or bananas on top. They add color and freshness. You can also drizzle melted chocolate or caramel sauce for flair. This not only looks beautiful but also adds extra flavor. Get creative and impress your guests! Store your cheesecake in the fridge. Use an airtight container to keep it fresh. You can also cover the cheesecake with plastic wrap if you prefer. This helps keep out moisture and odors. If you want to freeze it, slice it first. Wrap each slice in plastic wrap, then place them in a freezer bag. This way, you can enjoy a piece anytime! The cheesecake lasts about five days in the fridge. After that, it may lose flavor and texture. If you notice any mold or an off smell, it's best to throw it away. Always check before you dig in! To defrost, place the cheesecake in the fridge overnight. This method keeps it from getting too soft. Avoid using a microwave, as it can change the texture. If you refreeze, make sure to wrap it well. This helps keep the taste and texture nice. Just remember, the more you freeze and thaw, the more the quality may drop. Enjoy every bite! Yes, you can use low-fat cream cheese. It will change the taste and feel. Low-fat cream cheese has less fat, so it might taste less rich. The cheesecake may not be as creamy or smooth. I suggest using regular cream cheese for the best flavor. Chill the cheesecake for at least 4 hours. However, I recommend letting it sit overnight. This time helps the flavors blend well. It also makes the cheesecake firmer. A longer chill time gives you a better texture. You can use regular graham cracker crumbs if you must. You could also try vanilla wafers for a different taste. If you're feeling adventurous, crushed Oreos can add a fun twist. Just remember that each crust will change the flavor a bit. This blog post covered how to make a delicious cheesecake using simple ingredients and equipment. We discussed the main components like chocolate graham cracker crumbs, cream cheese, and peanut butter. You learned tips for the perfect texture and tempting variations that fit special diets. Remember, proper storage keeps your cheesecake fresh. With these steps, you can impress anyone with your baking skills. Enjoy creating and sharing this treat!

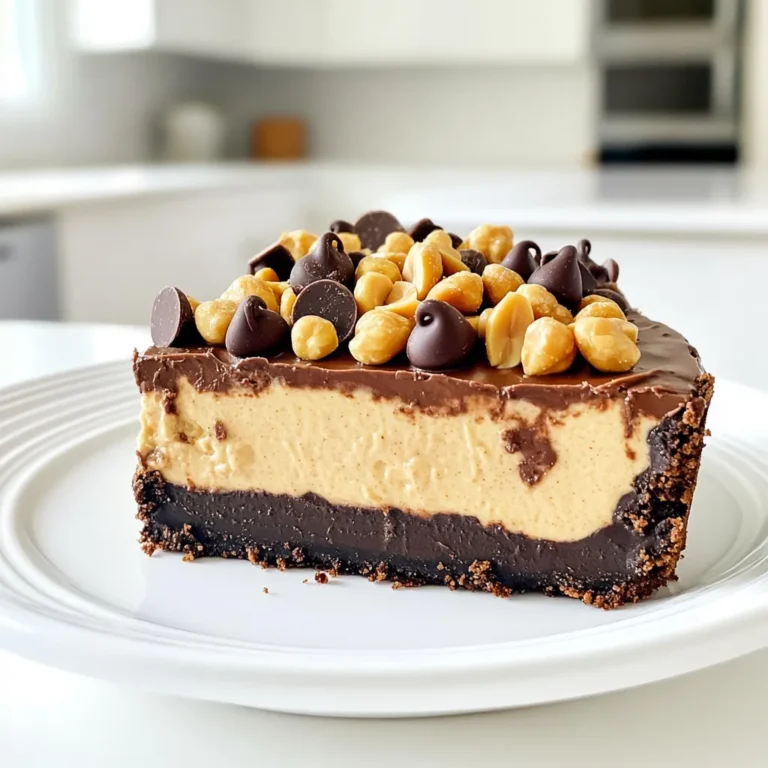
Chocolate Peanut Butter Cheesecake No Bake Delight

- 1 cup rolled oats - 1 cup unsweetened almond milk - ½ cup pure pumpkin puree - 2 tablespoons maple syrup - 1 teaspoon pumpkin pie spice - ¼ teaspoon salt - ½ teaspoon vanilla extract - ⅓ cup chopped pecans (preferably toasted for enhanced flavor) - Optional toppings: whipped coconut cream, extra chopped pecans, or a dusting of cinnamon You can swap rolled oats for quick oats. Quick oats will soften faster. If you want a nut-free option, use soy or oat milk instead of almond milk. For a sweeter taste, honey can replace maple syrup. If you cannot find pumpkin pie spice, mix cinnamon, nutmeg, and ginger for a similar flavor. - Rolled oats provide fiber. This helps with digestion and keeps you full. - Almond milk is lower in calories than cow's milk. It adds a nice, nutty flavor. - Pumpkin puree is rich in vitamins A and C. It boosts your immune system. - Maple syrup contains antioxidants. It adds sweetness without refined sugar. - Pumpkin pie spice brings warmth and flavor. It can boost your mood. - Salt enhances all the flavors in your dish. - Vanilla extract adds a rich depth of flavor. It makes the dish more enjoyable. - Pecans offer healthy fats and protein. They also add a delightful crunch. This simple mix of ingredients creates a tasty, nutritious breakfast. Each bite brings the warmth of pumpkin pie to your morning routine. 1. First, grab a medium mixing bowl. Add 1 cup of rolled oats and 1 cup of unsweetened almond milk. Stir well to soak the oats evenly. 2. Next, add ½ cup of pure pumpkin puree, 2 tablespoons of maple syrup, 1 teaspoon of pumpkin pie spice, and ¼ teaspoon of salt. Add ½ teaspoon of vanilla extract too. Mix everything thoroughly until smooth. 3. Now, it’s time for the pecans! Gently fold in ⅓ cup of chopped pecans. This step gives your oats a tasty crunch. 4. Once mixed, divide the oat mixture into two jars or airtight containers. This makes breakfast easy for busy mornings. 5. Seal the jars tightly and place them in the fridge overnight. You want the oats to soak up the almond milk and flavors. 6. When morning comes, take the jars out. Give them a good stir. If they seem too thick, add a splash of almond milk to loosen them up. 7. Finally, top your oats with a dollop of whipped coconut cream, extra chopped pecans, and a sprinkle of cinnamon. This adds a warm, cozy touch. - Make sure your oats are soaked well in the almond milk. This step is key for soft oats. - Mix the pumpkin puree and spices well. You want every bite to have that pumpkin pie flavor. - When folding in the pecans, be gentle. You don’t want to break them up too much. - If you like sweeter oats, adjust the maple syrup to your taste. - Serve the oats right in the jars for a fun, rustic look. - If you prefer bowls, pour the oats into bowls and drizzle with maple syrup. - Don’t forget to add your favorite toppings! Whipped coconut cream or extra pecans work great. - Enjoy this dish warm or cold, based on your mood. To get the best texture for your overnight oats, choose rolled oats. They soak up the almond milk well and stay chewy. When mixing, stir gently so each oat is coated with the pumpkin mix. Letting the oats sit overnight helps them absorb flavors. If they are too thick in the morning, add a splash of almond milk. This keeps your oats creamy, not dry. You can make this recipe your own with simple changes. Try adding different spices like cinnamon or ginger for a warm kick. Use honey or agave syrup instead of maple syrup for sweetness. For a nutty twist, add sunflower seeds or chia seeds along with the pecans. You can also swap pumpkin puree with sweet potato or banana puree for different flavors. Make your breakfast easy by prepping ahead. Store the overnight oats in jars or containers with lids. They last up to five days in the fridge. This way, you can grab one each morning. If you want to freeze them, fill containers but leave space for expansion. Thaw them overnight in the fridge before eating. This makes breakfast quick and stress-free. {{image_4}} You can mix up flavors easily. Try using different nuts like walnuts or almonds. Add spices like cinnamon or ginger for a new twist. For a sweeter taste, consider a spoonful of honey or agave syrup. You can also switch the pumpkin puree with mashed banana or applesauce. This keeps it fun and fresh! If you're gluten-free, choose certified gluten-free oats. For a vegan option, use maple syrup and coconut cream. Almond milk is already dairy-free, which makes it perfect. You can also try other plant-based milk like oat or soy milk. These options keep the dish tasty for everyone. In fall, you can add fresh apples or pears for a fruity touch. Try adding a pinch of nutmeg for a warm flavor. You might also consider using pecan butter instead of chopped pecans for a creamy texture. Top with cranberry sauce for a festive feel! Each option gives a new vibe to your breakfast. To keep your Pumpkin Pecan Pie Overnight Oats fresh, store them in airtight jars or containers. This helps seal in the flavors and moisture. Make sure the lids fit snugly. Keeping them in the fridge is key to maintaining their taste and texture. Avoid adding toppings until you are ready to eat. This keeps them crisp and fresh. These tasty oats can stay fresh in the fridge for up to five days. I recommend enjoying them within three days for the best flavor. As time goes on, the oats may soak up more liquid and become thicker. If this happens, just stir in a splash of almond milk to loosen them up. You want them creamy and delicious! You can freeze Pumpkin Pecan Pie Overnight Oats for longer storage. Portion them into freezer-safe jars or containers. Leave some space at the top because the oats will expand when frozen. They can last up to three months in the freezer. When you're ready to eat, move them to the fridge overnight to thaw. You might want to add a little almond milk when serving for the best texture. Enjoy your tasty breakfast anytime! Yes, you can use quick oats. They cook faster and absorb liquid more quickly. This means your oats may be softer and creamier. If you prefer a firmer texture, rolled oats are the way to go. To make it nut-free, swap almond milk for oat milk or coconut milk. You can leave out the pecans or replace them with seeds like pumpkin or sunflower seeds. This keeps the flavor rich and tasty, without any nuts. Absolutely! You can double or triple the recipe easily. Just keep the same ratios. This way, you can have more jars ready in your fridge for quick and easy breakfasts. Enjoying them throughout the week is a great idea! This blog post covered key ingredients and helpful substitutions to enhance your dishes. We explored nutritional benefits and provided clear steps to prepare and serve. I shared tips for texture and flavor, along with storage advice to keep your oats fresh. Try different flavor combos or make adjustments for diets. Remember, cooking is fun and personal. Experiment with the tips and recipes shared here to find your favorites. Enjoy the journey of making delicious meals that suit you best!

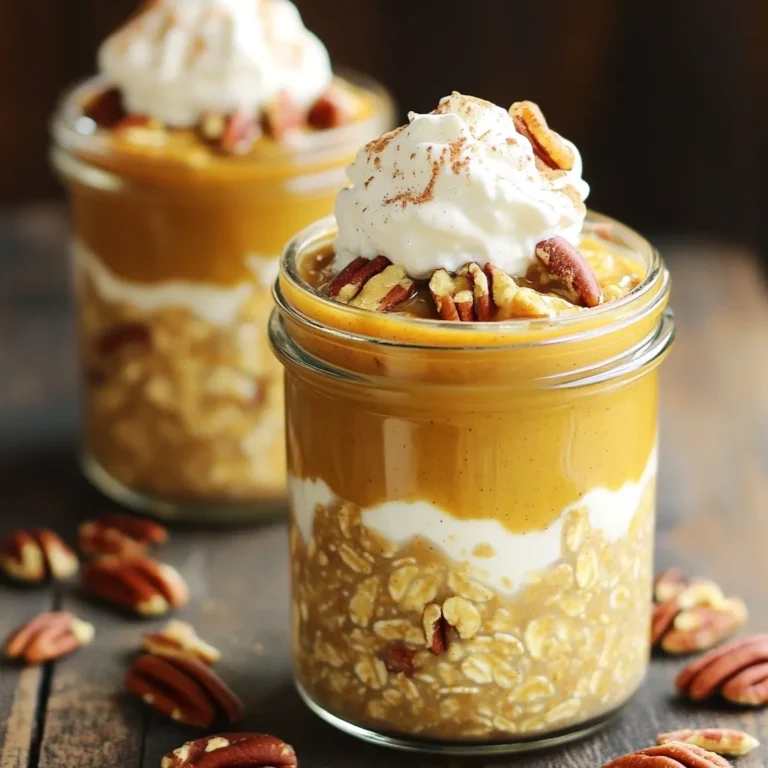
Pumpkin Pecan Pie Overnight Oats Simple and Tasty

To create the No-Bake Peppermint Bark Oreo Cheesecake, you will need the following items: - 24 Oreo cookies, finely crushed - ½ cup unsalted butter, melted - 16 oz cream cheese, softened to room temperature - ½ cup powdered sugar - 1 teaspoon vanilla extract - 1 cup heavy whipping cream - ½ cup crushed peppermint candies or candy canes (plus extra for topping) - 1 cup semi-sweet chocolate chips - ½ cup white chocolate chips - A pinch of sea salt These ingredients work together to create a rich and creamy dessert. The Oreo cookies form a delicious crust, while the cream cheese gives a smooth texture. The peppermint candies add a festive crunch, and the chocolate layers make it extra special. Each bite feels like a holiday treat, perfect for gatherings. 1. Combine crushed Oreo cookies and melted butter. Start by placing your crushed Oreo cookies into a medium bowl. Pour in the melted butter. Mix them well until the crumbs look like wet sand. 2. Press mixture into the springform pan. Take the Oreo mix and press it firmly into a 9-inch springform pan. Make sure it is even and compact. 3. Chill the crust. Place the pan in the fridge. Let it chill while you make the cheesecake filling. 1. Beat cream cheese until smooth. In a large bowl, add softened cream cheese. Use an electric mixer to beat it until completely smooth. 2. Add powdered sugar and vanilla extract. Gradually mix in powdered sugar and vanilla extract. Blend well until you have a velvety texture. 3. Whip heavy cream and fold it into the cream cheese mixture. In a separate bowl, whip the heavy cream until stiff peaks form. Carefully fold this whipped cream into the cream cheese mix. Do this gently to keep it light. 1. Fold in crushed peppermint candies. Add the crushed peppermint candies to the filling. Save a little for the top. Gently fold it in. 2. Pour and smooth cheesecake filling over the crust. Take the cheesecake filling and pour it over the chilled Oreo crust. Use a spatula to smooth the top. 3. Melt and drizzle chocolate layers on top. Melt the semi-sweet chocolate chips in the microwave. Drizzle this over the cheesecake. Then melt the white chocolate chips. Drizzle this on top as well for a lovely look. 1. Cover and refrigerate. Cover the cheesecake with plastic wrap. Place it in the fridge to chill. 2. Recommended chilling time. Let it set for at least 4 hours, or overnight for the best flavor and texture. To get a smooth cheesecake, start with softened cream cheese. Cold cream cheese clumps up. Let it sit out for about 30 minutes before mixing. When mixing, use a hand mixer for the best results. This helps the cream cheese blend well with the sugar. Next, use gentle folding techniques. After whipping the cream, fold it into the cream cheese mix carefully. This keeps the mixture light and fluffy. Use a spatula and scoop from the bottom. Turn the bowl as you mix to combine without losing air. Melting chocolate can be tricky. Use a microwave-safe bowl for this. Start with semi-sweet chocolate chips in 30-second bursts. Stir after each interval. Stop once the chocolate is mostly melted, then stir until smooth. This prevents overheating. If you burn the chocolate, it turns hard and grainy. If that happens, you can’t save it. Be patient and keep an eye on it. Presentation matters for any dessert. Top your cheesecake with whipped cream. This adds extra creaminess and looks great. Use a piping bag for nice swirls. Finish with peppermint sprinkles on top. They give a festive touch and a crunch. You can also add chocolate shavings for a rich look. A drizzle of melted chocolate can make it shine even more! {{image_4}} You can easily change the flavor of your cheesecake. Try using different cookie bases. Instead of Oreos, use chocolate wafers or graham crackers. Each will give a unique taste and texture. For toppings, switch it up! Use crushed cookies, nuts, or even mini candies. This gives your cheesecake a fun twist. Want to make your cheesecake even more fun? Add layers! You can incorporate fruit layers like strawberries or raspberries. This adds a fresh taste and color. Another great idea is to introduce a chocolate ganache layer. Melt dark chocolate and pour it over the cheesecake before chilling. It adds richness and depth. You can make this dessert vegan or dairy-free with simple swaps. Use coconut cream instead of cream cheese. It gives a rich texture and flavor. For cookies, choose vegan Oreos or other dairy-free cookies. These changes make this treat friendly for everyone! Store your No-Bake Peppermint Bark Oreo Cheesecake in the fridge. Use an airtight container or cover it with plastic wrap. This keeps it fresh and tasty. It lasts for about 5 days in the fridge. If you love cheesecake, it’s best to enjoy it within this time. You can freeze this cheesecake for longer storage. First, slice the cheesecake into portions. Wrap each slice tightly in plastic wrap. Then, place the slices in a freezer-safe bag. This helps prevent freezer burn. The cheesecake stays good for up to 2 months in the freezer. To thaw, move the cheesecake to the fridge for several hours or overnight. This keeps the texture smooth. Never thaw it at room temperature. It may lose its creamy goodness. Enjoy your delicious cheesecake anytime! Yes, you can make this cheesecake ahead of time. I suggest making it a day or two before you want to serve it. This way, it has time to chill and set properly. Store it in the fridge, covered tightly with plastic wrap. If you don't have Oreos, you can use other cookies. Try chocolate wafer cookies or even graham crackers. Both options work well and add a nice flavor to the crust. The cheesecake needs to chill for at least 4 hours. Chilling helps it firm up and makes it easier to slice. For the best flavor and texture, let it set overnight. Yes, flavored cream cheese can add a fun twist. Cream cheese with hints of vanilla or chocolate can enhance the taste. Just be mindful that it may change the overall flavor of the cheesecake. This blog post guides you through making a delicious cheesecake. We covered ingredients, steps, and helpful tips. Preparing an Oreo crust and a creamy filling is easy. You can even add layers or make it vegan. Remember, proper chilling keeps your cheesecake fresh and tasty. This dessert can be a fun project for you. Enjoy experimenting with flavors and toppings. Your cheesecake will impress everyone who tries it.

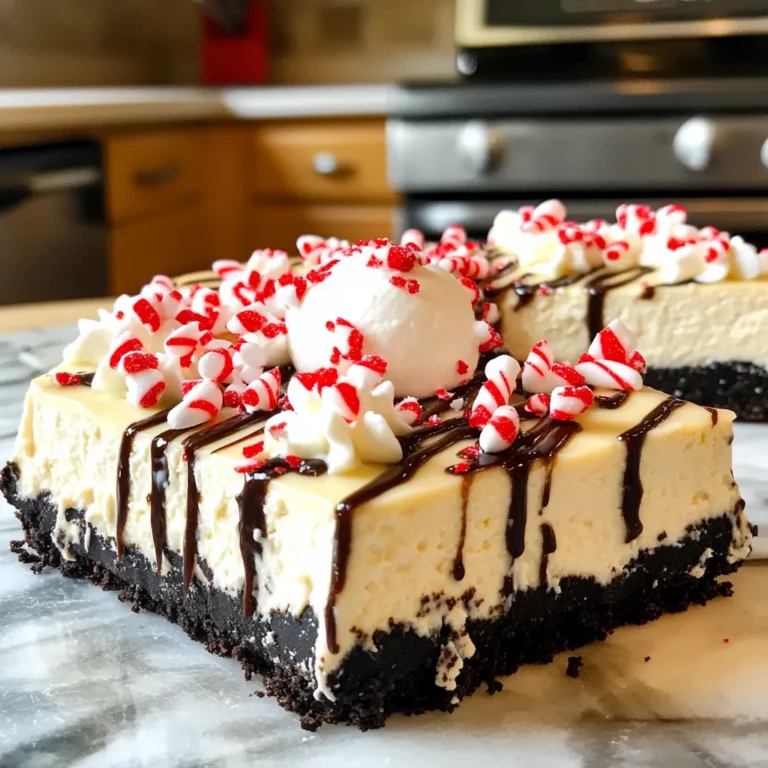
No-Bake Peppermint Bark Oreo Cheesecake Delight

You need fresh and vibrant veggies for this dish. Here’s what you will need: - 4 medium zucchinis - 1 cup carrots, julienned - 1 red bell pepper, thinly sliced - 1/2 cup green onions, thinly sliced - 1/2 cup roasted peanuts, roughly chopped - 1/4 cup fresh cilantro, chopped (for garnish) - 2 tablespoons sesame oil These ingredients provide a colorful base. The zucchinis give a soft bite. The carrots and bell pepper add crunch and sweetness. The peanut sauce is the star of this dish. It adds rich flavor. Gather these ingredients: - 1/3 cup creamy peanut butter - 3 tablespoons low-sodium soy sauce - 2 tablespoons fresh lime juice - 1 tablespoon honey or maple syrup - 1 tablespoon fresh ginger, grated - 2 garlic cloves, minced - 1-2 tablespoons water (to thin the sauce, as needed) The creamy peanut butter makes the sauce smooth. Lime juice adds a nice tang. Honey or maple syrup balances the flavors. Garnishes make your dish look pretty and inviting. Here are my top picks: - Sliced green onions - Rough-chopped peanuts - Fresh cilantro These toppings add texture and flavor. They also make your meal pop with color. You can also add a lime wedge for an extra splash of zest. To start, wash the zucchinis well and cut off the ends. Then, use a spiralizer to make long noodle-like strands. If you don’t have a spiralizer, a vegetable peeler can help you create flat ribbons. Place the zucchini noodles in a large mixing bowl and set them aside. In a medium bowl, mix together the creamy peanut butter, low-sodium soy sauce, lime juice, honey or maple syrup, grated ginger, and minced garlic. Whisk until the mixture is smooth and well combined. If the sauce is too thick, add 1 to 2 tablespoons of water to make it easier to pour. Heat 2 tablespoons of sesame oil in a large skillet over medium heat. Once the oil shimmers, add the julienned carrots and thinly sliced red bell pepper. Sauté the veggies for about 3 to 4 minutes. You want them soft but still crunchy. Carefully add the zucchini noodles to the skillet with the cooked vegetables. Pour the peanut sauce over everything. Gently toss to coat the noodles and veggies in the sauce. Cook for an additional 2 to 3 minutes, just enough to warm it all through. Make sure the zucchini stays al dente. When you're done, transfer the noodles to bowls. Top with sliced green onions, rough-chopped peanuts, and fresh cilantro for garnish. Enjoy your colorful and tasty dish! To make great zucchini noodles, start by picking fresh zucchinis. Look for firm ones with smooth skin. Wash them well and cut off the ends. A spiralizer works best for creating long noodles. If you don't have one, a vegetable peeler will do. Just slice thin ribbons. After spiraling or peeling, place the noodles in a bowl and set aside. This helps them stay crisp and fresh. Getting the right peanut sauce texture is key. Start with creamy peanut butter in a bowl. Mix in soy sauce, lime juice, honey, ginger, and garlic. Whisk until smooth. If it feels too thick, add water bit by bit. This helps you reach a pourable sauce. A good sauce coats the noodles well without being runny. When cooking the vegetables, don't rush it. Heat sesame oil in a skillet until it shimmers. Add carrots and bell peppers first. Sauté for 3 to 4 minutes. They should be soft but still crunchy. Next, add the zucchini noodles. Toss everything together gently to coat with sauce. Cook for just 2 to 3 more minutes. You want the zucchini to stay firm and not mushy. Enjoy your dish warm and fresh! {{image_4}} You can add protein to make this dish heartier. If you like chicken, use thin strips of cooked chicken breast. For a plant-based option, tofu works great. Just press the tofu to remove water, then cube and sauté until golden. Shrimp is another tasty choice. Sauté shrimp until pink and tender. Mix your chosen protein in with the noodles and veggies for a complete meal. Feel free to play with veggies. Broccoli florets add crunch and color. Snap peas bring a sweet taste and bright green look. You could also add sliced mushrooms for an earthy flavor. Toss in baby spinach for a fresh touch. Remember, the more colorful your plate, the more appealing it looks! If you have allergies, don't worry! You can swap peanut butter for sunflower seed butter if you're nut-free. For soy sauce, consider coconut aminos for a soy-free option. Honey can be replaced with agave syrup for a vegan choice. Always read labels to ensure your substitutes are safe for your needs. To keep your Thai peanut zucchini noodles fresh, place them in an airtight container. Make sure to cool them to room temperature first. Store in the fridge for up to three days. This helps maintain the taste and texture. While freezing is an option, it can change the texture of the zucchini noodles. If you want to freeze them, store the noodles and sauce separately. Use freezer-safe bags or containers. They can last for up to two months in the freezer. Just remember to label them clearly. To reheat, use a skillet over medium heat. Add a splash of water or oil to keep them moist. Heat for about five minutes or until warm. You can also microwave them in a bowl covered with a damp paper towel. Heat in short bursts of 30 seconds, stirring in between, until hot. Yes, you can make this dish vegan. Simply swap honey for maple syrup. Use low-sodium soy sauce that is vegan. Ensure your peanut butter has no added animal products. To enhance flavors, add lime zest for freshness. Consider adding a splash of rice vinegar for tang. You can also mix in a bit of sriracha for heat or fresh herbs like mint. Yes, meal prepping is easy with this recipe. Prepare the zucchini noodles and sauce in advance. Store them separately in airtight containers. Combine them just before serving for best taste and texture. Zucchini noodles are low in calories and high in fiber. They provide vitamins A and C, which support eye health and immunity. Zucchini also contains antioxidants, making it a healthy choice. To adjust spiciness, add more or less sriracha to the sauce. You can also sprinkle red pepper flakes on top for extra heat. If you prefer less spice, reduce the amount of garlic or ginger. This blog covered how to make tasty Thai peanut zucchini noodles. You learned about key ingredients, step-by-step instructions, and helpful tips. Variations let you add protein or customize flavors. Proper storage keeps leftovers fresh. These noodles are healthy, fun, and easy to change. Experiment with your favorite veggies or spices. Enjoy your cooking and impress your taste buds!

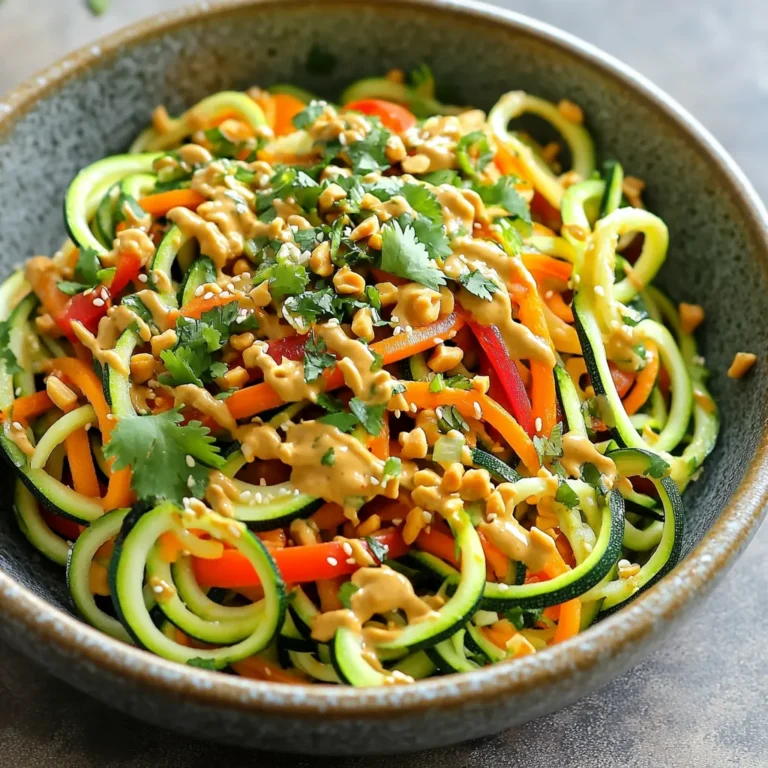
Thai Peanut Zucchini Noodles Flavorful and Easy Recipe

Here’s what you need to make this tasty Mediterranean Chickpea Salad: - 1 can (15 oz) chickpeas, drained and thoroughly rinsed - 1 cup cherry tomatoes, halved - 1 medium cucumber, diced into bite-sized pieces - 1 bell pepper (choose red or yellow for sweetness), diced - 1/2 medium red onion, finely chopped - 1/4 cup pitted Kalamata olives, halved - 1/4 cup feta cheese, crumbled - 2 tablespoons fresh parsley, finely chopped - 3 tablespoons high-quality olive oil - 2 tablespoons freshly squeezed lemon juice - 1 teaspoon dried oregano - Salt and black pepper to taste You can swap some items if needed: - Use canned or cooked dried chickpeas for a different texture. - Replace cherry tomatoes with diced regular tomatoes. - Swap cucumber for zucchini if you want a twist. - Try a different cheese, like goat cheese, instead of feta. - If you don’t like olives, leave them out altogether. - Use lime juice instead of lemon for a zesty change. This salad is not just tasty; it’s also good for you. Each serving has: - Calories: About 220 - Protein: 7 grams - Carbohydrates: 20 grams - Fat: 12 grams - Fiber: 6 grams This dish is rich in vitamins, minerals, and healthy fats. It’s perfect for a light meal or a side dish. Enjoy the fresh flavors and the healthy benefits! To make this Mediterranean chickpea salad, you need only 15 minutes. Start with a large bowl. Gather your ingredients: chickpeas, tomatoes, cucumber, bell pepper, onion, olives, feta, parsley, olive oil, lemon juice, oregano, salt, and pepper. Rinse the chickpeas well and drain them. Halve the cherry tomatoes and dice the cucumber and bell pepper. Chop the onion finely for less bite. 1. In your mixing bowl, add the drained chickpeas. 2. Next, toss in the halved cherry tomatoes. 3. Add the diced cucumber and bell pepper for crunch. 4. Then, mix in the finely chopped red onion. 5. Include the halved Kalamata olives for a briny taste. 6. Crumble the feta cheese over the mix for creaminess. 7. Finally, add the freshly chopped parsley for a bright note. In a small bowl, whisk the olive oil, lemon juice, oregano, salt, and pepper. Drizzle this dressing over your salad. Use a large spoon to toss everything gently. Make sure all the ingredients get coated. Before serving, taste the salad. Adjust the salt, pepper, or lemon juice to suit your taste. To keep this salad fresh, enjoy it right away. If you want to make it ahead, store it in the fridge. Place it in an airtight container to keep it crisp. The salad tastes even better after chilling for 30 minutes. For longer storage, keep the dressing separate until serving. This prevents the salad from getting soggy. Use fresh ingredients for the best flavor and texture. You can easily change this salad to fit your taste. Like more crunch? Add some radishes or sliced carrots. Want more protein? Toss in some grilled chicken or tuna. You can also swap the feta cheese for avocado for a creamy twist. If you love heat, add a pinch of red pepper flakes or some jalapeños. The key is to mix flavors you enjoy. This salad is great for making ahead. You can chop the veggies and store them in the fridge for up to two days. Keep the dressing separate until you’re ready to eat. This way, the salad stays fresh and crisp. When you are ready, drizzle on the dressing and mix it up. You can also chill the salad for about 30 minutes to enhance its flavor. Serve this salad as a light lunch or a side dish at dinner. It pairs well with grilled meats or fish. You can also enjoy it with pita bread or flatbreads. For a full meal, add some quinoa or couscous to the salad. This adds texture and makes it more filling. Don’t forget to garnish with extra parsley and a lemon wedge for a nice touch! {{image_4}} You can make your Mediterranean chickpea salad more filling by adding grains. Quinoa is a great option. It adds a nutty flavor and boosts protein. Brown rice also works well and adds a chewy texture. Just cook the grains before mixing them in. A half cup of cooked quinoa or rice will do the trick. This salad is already vegetarian, but you can easily make it vegan. Just leave out the feta cheese. You can substitute it with avocado for creaminess. Silken tofu is another good option for a soft texture. Both give a nice taste without dairy. While olive oil and lemon juice create a tasty dressing, you can switch things up. Try balsamic vinegar for a sweet touch. A tahini dressing adds a rich, nutty flavor. For spice lovers, mix in some hot sauce or chili flakes. Each dressing gives the salad a new twist. To store your chickpea salad, place it in an airtight container. Make sure to cover it tightly. This keeps the salad fresh and safe to eat. If you plan to keep it for longer, add a layer of plastic wrap before sealing. Always refrigerate your leftovers promptly after serving. Reheating is not needed for this salad. Chickpea salad is best enjoyed cold. If you prefer it warm, gently heat it on the stove. Use low heat to avoid cooking the veggies. Stir often to ensure even heating without making the salad mushy. The salad stays fresh in the fridge for about three days. After that, the veggies may start to lose their crunch. For the best taste, eat it within the first two days. Always check for any changes in smell or texture before eating leftovers. Yes, you can use dried chickpeas. First, soak them overnight in water. The next day, boil them until they are soft. This process takes time but enhances the flavor. Plus, you control the texture and salt levels. If you want a tastier option, use dried chickpeas for this salad. To boost protein, consider adding grilled chicken or shrimp. They both pair well with the salad. You can also include hard-boiled eggs or diced tofu. These options will make your salad more filling and satisfying. The salad lasts up to four days in the fridge. Store it in an airtight container to keep it fresh. However, if you have added feta cheese or olives, the flavors may intensify. This can be a good thing, but be sure to check for freshness before serving. We covered everything you need to make a great salad. You learned about key ingredients and how to customize your dish. We shared tips for keeping your salad fresh and tasty. I also provided ways to store leftovers and answers to common questions. Use this knowledge to make your salad fun and unique. Enjoy experimenting with different flavors and textures. With these tips, you’ll create meals that everyone loves!

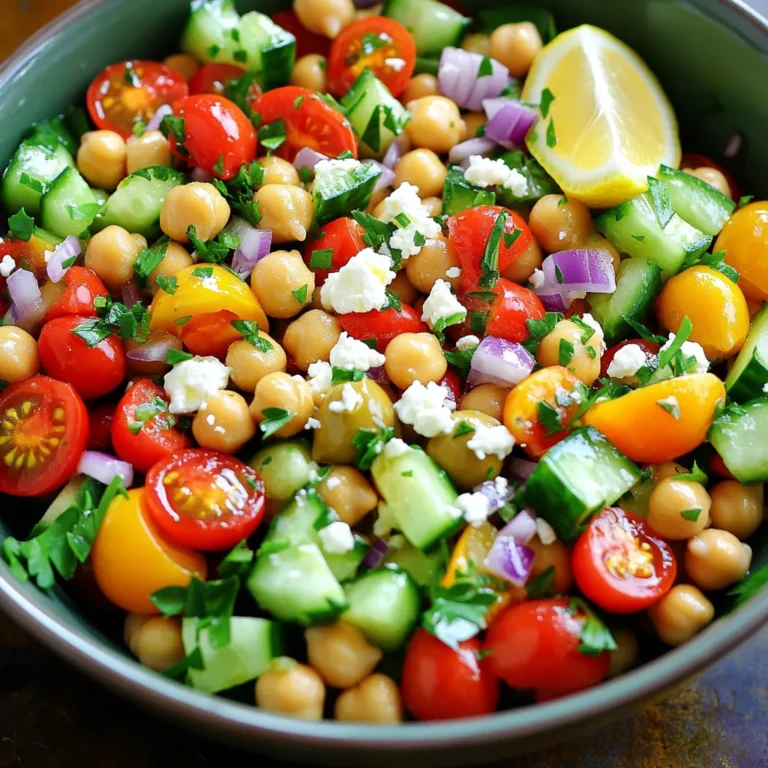
Mediterranean Chickpea Salad Fresh and Flavorful Dish

- 8 oz (225 g) noodles (udon or spaghetti) - 3 tablespoons sesame oil - 4 cloves garlic, finely minced - 1 tablespoon fresh ginger, grated - 1/4 cup soy sauce (low sodium is best) - 2 tablespoons rice vinegar - 1 tablespoon honey or maple syrup - 1 cup mixed vegetables (like bell peppers, broccoli, or snap peas) - 2 green onions, finely chopped - 1 tablespoon toasted sesame seeds - Fresh cilantro leaves for garnish The main ingredients for this dish are simple yet flavorful. Udon or spaghetti noodles form the base. I love using sesame oil for its nutty taste. Garlic is a must since it adds a strong aroma. Fresh ginger gives a nice kick and depth to the dish. Soy sauce and rice vinegar balance the flavors perfectly, making each bite delicious. You can add honey or maple syrup to give a hint of sweetness. Mixed vegetables not only add color but also nutrition. For garnishing, chopped green onions and toasted sesame seeds enhance the look and taste. Fresh cilantro leaves offer a light, herbal finish. This dish is versatile, so you can mix and match based on what you enjoy or have on hand. First, bring a large pot of salted water to a boil. Add 8 oz of noodles, like udon or spaghetti. Cook them until they are al dente, as per package instructions. This usually takes about 8-10 minutes. Once done, drain the noodles and let the excess water drip off. Set them aside for later. In a small bowl, mix together the sauce ingredients. Combine 1/4 cup of soy sauce, 2 tablespoons of rice vinegar, 1 tablespoon of honey, and 1 teaspoon of chili flakes. You can add more chili if you like it spicy. Whisk the mixture well until it's smooth. Set it aside to let the flavors blend. Heat 3 tablespoons of sesame oil in a large pan over medium heat. Once hot, add 4 cloves of minced garlic. Sauté the garlic for 1-2 minutes until it smells great. Be sure to stir often so it does not burn. If you want to add mixed vegetables, toss them in now. Cook for about 3-4 minutes until they are tender but still colorful. Next, add the drained noodles to the pan. Gently toss them with the garlic and oil mixture. Make sure every noodle gets coated well. Then, drizzle the sauce over the noodles. Stir everything together for 2-3 minutes. This will heat the noodles and let the flavors mix. Once cooked, take the pan off the heat. Sprinkle 2 chopped green onions, 1 tablespoon of toasted sesame seeds, and fresh cilantro leaves on top. Toss it all lightly to blend. Now, plate the noodles in serving dishes. For extra flair, add more sesame seeds and green onions on top. Enjoy your tasty sesame garlic noodles! To get the best texture, cook the noodles until they are al dente. This means they should be firm when you bite into them. Follow these steps: - Bring a large pot of salted water to a rolling boil. - Add the noodles and cook as per the package instructions. - Taste them about a minute before the time is up. They should have a slight bite. - Drain the noodles and let them sit. This helps remove extra water, so they do not become soggy. You can adjust the flavors in your sesame garlic noodles easily. Here are some tips: - If you like it spicy, add more chili flakes to the sauce. Start with one teaspoon and increase as needed. - For sweetness, you can add more honey or maple syrup. This balances the salty soy sauce. - Taste the sauce before adding it to the noodles. Adjust it to fit your taste buds. Sautéing garlic can be tricky. Follow these tips to avoid burning it: - Heat the sesame oil on medium heat before adding garlic. - Add minced garlic and stir it constantly for 1-2 minutes. - If it starts to brown quickly, lower the heat. You want it golden, not burnt. - If you add vegetables, do so after the garlic is fragrant. This way, the garlic stays perfect while the veggies cook. {{image_4}} If you want a plant-based version, replace honey with maple syrup. This swap keeps the sweetness while making the dish vegan-friendly. Maple syrup adds a rich flavor that blends well with the garlic and soy sauce. You won’t miss the honey at all! To add protein, you can incorporate tofu, chicken, or shrimp. For tofu, use firm or extra-firm. Cut it into cubes and sauté it until golden. If you choose chicken, slice it thinly and cook it in the pan before adding the garlic. For shrimp, toss them in after the garlic cooks until they turn pink. Each option enhances the dish with texture and flavor. Using different vegetables can add variety and color. Bell peppers, broccoli, and snap peas work well. Sauté bell peppers for about 2-3 minutes. Broccoli takes about 4 minutes to become tender. Snap peas need only 2 minutes to keep their crunch. Mix and match to find your favorite combo! To store your Sesame Garlic Noodles, let them cool first. Place the noodles in an airtight container. You can refrigerate them for up to three days. If you want to keep them longer, freeze the noodles. Use a freezer-safe bag and remove as much air as possible. They will last in the freezer for about one month. When you're ready to eat the leftovers, you have a few options. The best way is to reheat them in a pan. Add a splash of water or sesame oil to keep them moist. Heat over medium heat, stirring often. You can also use the microwave. Place the noodles in a microwave-safe bowl, cover, and heat in short bursts. Stir and check to avoid overcooking. Your Sesame Garlic Noodles can last in the fridge for three days. After that, they may lose flavor and texture. If stored in the freezer, they can stay fresh for one month. Always check for any off smells or changes in texture before eating leftovers. Enjoy your meal with confidence! I recommend using udon or spaghetti noodles. These noodles have a nice chew. They hold the sauce well. You can also try rice noodles for a different texture. Just cook according to the package instructions. Yes, you can make this dish gluten-free! Use gluten-free noodles, like rice noodles or zoodles. For the sauce, swap soy sauce with gluten-free tamari. This keeps the flavor strong without gluten. The spice level depends on your taste. The chili flakes add a nice kick. If you prefer less heat, use fewer flakes. You can also skip them entirely for a mild dish. These noodles pair well with many dishes. Try serving them with a side salad for freshness. You can also add grilled chicken or tofu for protein. Steamed veggies make a great side too! You now have all the key ingredients and steps to make delicious Sesame Garlic Noodles. From choosing the right noodles to mixing the perfect sauce and adding tasty vegetables, this dish is simple yet full of flavor. Don't be afraid to try different veggies or proteins to suit your taste. Remember to store leftovers properly to keep them fresh. Cooking can be fun and creative. Enjoy your tasty meal and share it with friends!

Savory Sesame Garlic Noodles Quick and Easy Recipe

- 4 medium sweet potatoes, peeled and cut into bite-sized cubes - 1/2 cup pecans, coarsely chopped - 1/4 cup pure maple syrup - 3 tablespoons unsalted butter, melted - 1 teaspoon ground cinnamon - 1/2 teaspoon ground nutmeg - Salt and freshly ground black pepper, to taste - Fresh parsley, chopped (for garnish, optional) Sweet potatoes are the star here. They bring a sweet, earthy taste. Pecans add a nice crunch and nutty flavor. Pure maple syrup gives a rich sweetness. Unsalted butter helps to coat the sweet potatoes. Ground cinnamon and nutmeg add warmth and spice. Using salt and pepper balances the flavors. Fresh parsley brightens the dish and adds color. When choosing sweet potatoes, look for firm ones with smooth skin. Avoid any with soft spots or blemishes. For pecans, fresh nuts have a better taste. Check for a rich smell without any off odors. Pure maple syrup should be your first choice for the best flavor. Avoid imitation syrups, as they lack depth. Fresh spices, like cinnamon and nutmeg, provide the best flavor. Check expiration dates to ensure quality. First, preheat your oven to 400°F (200°C). This step is key for perfect roasting. Next, take four medium sweet potatoes. Peel them and cut them into bite-sized cubes. You want them even for cooking. Bring a large pot of salted water to a boil. Carefully add the sweet potato cubes to the boiling water. Cook for about 10-15 minutes or until they are fork-tender. Drain the potatoes well and let them cool slightly in a bowl. In a separate mixing bowl, combine 3 tablespoons of melted butter and 1/4 cup of pure maple syrup. Add 1 teaspoon of ground cinnamon and 1/2 teaspoon of ground nutmeg. Don't forget a pinch of salt and a few cracks of black pepper. Mix these ingredients until smooth. Now, gently fold the sweet potato cubes into the maple mixture. Make sure each piece is coated well, but be careful not to mash them. Line a baking sheet with parchment paper to prevent sticking. Spread the sweet potatoes evenly on the sheet in a single layer. This helps them roast properly. Now, sprinkle 1/2 cup of coarsely chopped pecans over the sweet potatoes. This adds great flavor and crunch. Place the baking sheet in your preheated oven. Roast the sweet potatoes for about 25-30 minutes. Remember to stir them halfway through cooking. This helps them caramelize evenly and gives them a nice golden color. Once the sweet potatoes are done, take them out of the oven and let them cool slightly. This resting time lets all the flavors develop. For a beautiful presentation, you can garnish the dish with fresh parsley if you like. This adds color and freshness to your dish. Serve the sweet potatoes in a rustic bowl or on a decorative platter. Drizzle any leftover maple mixture from the baking sheet over the top. It makes for a sweet and shiny finish that everyone will love. To get the best results, roast the sweet potatoes at 400°F (200°C). This heat gives a nice caramelization. Boil the sweet potatoes first. This step makes them tender. When you mix them with the maple syrup, they coat better. Spread the sweet potatoes on the baking sheet. Avoid crowding them, so they roast evenly. Stir them halfway through cooking. This helps them brown on all sides. Maple syrup adds sweetness, but you can boost the flavor more. Try adding a pinch of cayenne for warmth. A dash of vanilla extract gives a nice twist too. You can also mix in other spices. Cardamom or ginger pairs well with sweet potatoes. Don’t forget the salt and pepper. They balance the dish perfectly. Presentation is key for any dish. Serve the sweet potatoes in a rustic bowl. A decorative platter also works well. Drizzle the leftover maple mixture from the baking sheet over the potatoes. It adds shine and extra sweetness. For a pop of color, sprinkle fresh parsley on top. This makes the dish look fresh and inviting. {{image_4}} You can change the sweet taste of this dish. If you want less sugar, try using honey or agave syrup. Both add great flavor. You can also use coconut sugar for a richer taste. Each option gives a unique twist to your sweet potatoes. While pecans are tasty, other nuts work well too. Walnuts or almonds can add crunch and flavor. If you like spice, consider adding ginger or allspice. These can give your dish a warm, cozy feel. Experiment with different nuts and spices to find your favorite mix. To make this dish vegan, swap the butter for coconut oil or vegan butter. This keeps it creamy and rich. For gluten-free, you can rest easy. All the ingredients are already gluten-free. Enjoy this dish without worry, and it will still taste amazing! After enjoying your Maple Pecan Sweet Potatoes, store any leftovers in an airtight container. Keep them in the fridge for up to four days. This helps preserve their taste and texture. Make sure they cool to room temperature before sealing. This step helps prevent moisture buildup, which can make them soggy. To reheat your sweet potatoes, preheat your oven to 350°F (175°C). Spread the sweet potatoes on a baking sheet. Heat them for 15-20 minutes, or until warm. Stir halfway through to ensure even heating. If you prefer the microwave, place a portion in a bowl. Heat for 1-2 minutes, stirring once. If you want to freeze your sweet potatoes, first let them cool completely. Place them in a freezer-safe bag or container. Remove as much air as possible to prevent freezer burn. They can stay fresh in the freezer for up to three months. To enjoy later, just thaw in the fridge overnight before reheating. You can prepare Maple Pecan Sweet Potatoes a day before serving. First, cook the sweet potatoes and mix them with the maple mixture. Place them in a baking dish and cover tightly with foil. Store in the fridge overnight. When you are ready to serve, just bake them in the oven. You may need to adjust the baking time if they are cold from the fridge. Yes, you can use other nuts. Walnuts or almonds work well. Each nut gives a different flavor. Just chop them coarsely like the pecans. This way, they will mix nicely with the sweet potatoes. Toast the nuts before adding for an extra crunch. Maple Pecan Sweet Potatoes pair well with many dishes. Try serving them with roasted chicken or turkey. They also go great with pork chops. For a vegetarian meal, serve them with a hearty salad. The sweet and nutty flavor complements savory proteins perfectly. This guide covered all you need for Maple Pecan Sweet Potatoes. We explored the complete ingredient list, preparation steps, and roasting techniques. I shared tips on flavor, presentation, and variations. Storing tips and FAQs help you manage leftovers and make planning easy. Remember, mastering this dish adds warmth to your meal. Enjoy experimenting with flavors and ingredients! Happy cooking!

Maple Pecan Sweet Potatoes for a Flavorful Side

PREV 1 2 3 4 … 20 NEXT
homedishhaven

explore

DessertsDinnerAppetizersDrinks

Our Policies

  • Cookie Policy
  • Copyright Policy
  • Disclaimer
  • GDPR Policy
  • Terms Of Use
Back to Top
  • About
  • Contact Us
  • Privacy Policy
© 2025 homedishhaven