FREE DINNER EBOOK! Get your copy!
  • Cookie Policy
  • GDPR Policy
  • Disclaimer
  • Terms Of Use
  • Visit my other site: Fun Cookie Recipes
homedishhaven
  • Home
  • Dinner
  • Desserts
  • Drinks
  • Appetizers
  • Contact
  • About
  • Privacy Policy
  • Home
  • Dinner
  • Desserts
  • Drinks
  • Appetizers
  • Contact
  • About
  • Privacy Policy
  • Cookie Policy
  • GDPR Policy
  • Disclaimer
  • Terms Of Use
Visit my other site: Fun Cookie Recipes

HOME / CATEGORIES /

Latest

To make Philly cheesesteak quesadillas, gather these simple ingredients: - 1 lb beef steak (sirloin or ribeye), thinly sliced - 1 medium onion, thinly sliced - 1 bell pepper (choose green or red), thinly sliced - 2 cups shredded provolone cheese - 4 large flour tortillas - 2 tablespoons olive oil, divided - 1 teaspoon garlic powder - 1 teaspoon Worcestershire sauce (optional) - Salt and freshly ground black pepper to taste Each ingredient plays a role in creating that classic cheesesteak flavor. The beef gives it a hearty base, while the cheese adds creaminess. Onions and peppers bring sweetness and crunch. Flour tortillas hold everything together and make it easy to eat. Olive oil keeps things cooking smoothly, and seasonings boost the taste. You can adjust ingredients based on your likes or what you have at home. Enjoy mixing and matching to find your perfect blend! {{ingredient_image_2}} Start by heating a skillet over medium-high heat. Add 1 tablespoon of olive oil. When the oil shimmers, add your thinly sliced beef steak. Season it with salt, pepper, and garlic powder. Sear the beef for 3 to 4 minutes. Stir occasionally until it's browned but still tender. Once done, take the beef out of the skillet and set it aside on a plate. In the same skillet, add the remaining tablespoon of olive oil. Toss in the sliced onions and bell peppers. Sauté them for about 5 minutes. Cook until they soften and become fragrant. If you like, you can drizzle Worcestershire sauce over the veggies for more flavor. Once your vegetables are ready, return the cooked beef to the skillet. Stir everything together well. Cook for another 1 to 2 minutes. This helps the flavors mix nicely. When finished, take the skillet off the heat. Grab one flour tortilla and lay it flat. Sprinkle half of it with a good amount of shredded provolone cheese. On top of the cheese, add a portion of the beef and vegetable mix. Then, sprinkle a bit more cheese on top. Fold the tortilla in half, covering the filling. Repeat this step with the other tortillas and filling. Wipe the skillet clean with a paper towel and put it back on medium heat. Carefully place your assembled quesadilla in the skillet. Cook each side for about 3 to 4 minutes. You want the tortilla to be golden and crispy, and the cheese inside to melt. If they stick, add a bit more olive oil. Once they’re cooked to a perfect golden color, take the quesadillas out of the skillet. Let them rest for a minute. This helps the cheese set a little. Cut each quesadilla into wedges for easy serving. Enjoy them with salsa or sour cream! To make great quesadillas, cooking time matters. Cook the beef just enough to brown it. Overcooking makes it tough. Aim for 3 to 4 minutes on medium-high heat. Stir the beef often. This helps it cook evenly. After cooking, let it rest. This keeps the juices locked in. For the veggies, sauté them until soft. Five minutes is usually perfect. Make sure they smell great! Selecting the right beef is key. Sirloin and ribeye are both tasty choices. Sirloin is leaner, while ribeye is richer and more flavorful. Thinly slice the beef against the grain. This helps keep it tender. If you have a choice, ribeye adds extra juiciness. The right cheese makes a big difference. Provolone melts beautifully and adds great flavor. Use shredded cheese for quick melting. Spread it evenly in your quesadilla. For extra creaminess, mix in some mozzarella or cheddar. When cooking, keep the heat medium. Too high will burn the tortillas before the cheese melts. Flip the quesadilla carefully, and let it cook until golden. Enjoy that perfect cheesy pull when you slice it! Pro Tips Choose the Right Cut: For the best flavor and tenderness, use sirloin or ribeye steak. These cuts are perfect for quick cooking and give a juicy bite. Don’t Overcrowd the Skillet: When cooking the beef and vegetables, ensure the skillet isn't overcrowded. This allows for even cooking and prevents steaming. Let it Rest: After cooking, let the quesadillas rest for a minute before slicing. This helps the cheese set and makes for cleaner cuts. Experiment with Cheese: While provolone is traditional, feel free to mix in other cheeses like mozzarella or cheddar for a unique flavor profile! {{image_4}} You can switch up the cheese in your quesadillas. Provolone is great, but try mozzarella for a milder taste. Cheddar brings sharpness, while pepper jack adds a spicy kick. Each cheese melts well and changes the flavor. Feel free to mix cheeses for a unique twist. Want to add more veggies? Mushrooms, zucchini, or spinach work well in this recipe. They add nutrition and flavor. If you prefer, skip the onion or bell pepper. You can use any vegetable you enjoy. Just sauté until they are soft before mixing with the beef. If you love heat, add hot peppers to your filling. Jalapeños or banana peppers can bring extra spice. Chop them finely and mix them with the beef and veggies. For a milder option, use roasted red peppers. They give flavor without the heat. You can keep leftover quesadillas in the fridge. Place them in an airtight container. They stay fresh for up to three days. To prevent sogginess, separate layers with parchment paper. This helps keep the quesadillas crisp. To freeze quesadillas, let them cool completely. Wrap each one in plastic wrap or aluminum foil. Then, place them in a freezer bag. They can last for up to three months. When you're ready to eat, thaw them in the fridge overnight. Reheat quesadillas in a skillet for best results. Heat the skillet over medium heat. Place the quesadilla in the skillet and cover it with a lid. Cook for about 3-4 minutes on each side. The cheese should melt and the tortilla should crisp up. You can also use a microwave. Just heat for 30 seconds to 1 minute, but the texture won’t be as good. You can serve these quesadillas with many tasty sides. Try salsa for a fresh kick. A dollop of sour cream adds creaminess. Guacamole brings a rich flavor too. You can also pair them with a simple salad. A side of chips adds crunch and fun. To make these quesadillas healthier, use lean meat like chicken or turkey. You can add more veggies, like spinach or mushrooms, to boost nutrients. Choose whole grain tortillas for extra fiber. Using less cheese or a lighter cheese can cut down fat. Yes, you can use corn tortillas instead of flour. They will add a different texture and flavor. Just make sure to heat them slightly before filling. This helps them stay flexible and prevents cracking when you fold them. To prevent sticking, use a non-stick skillet if possible. Preheat the skillet well before adding the quesadillas. Adding a little olive oil helps create a barrier. If they start to stick, add more oil as needed. Always use a spatula to carefully flip them. You learned how to make delicious Philly cheesesteak quesadillas from scratch. We covered ingredients, step-by-step cooking, and tips for great results. You also discovered fun variations to customize your dish. Remember, using quality beef and cheese makes a big difference in taste. Enjoy your homemade meal and don’t forget to share with friends! These quesadillas are sure to impress.

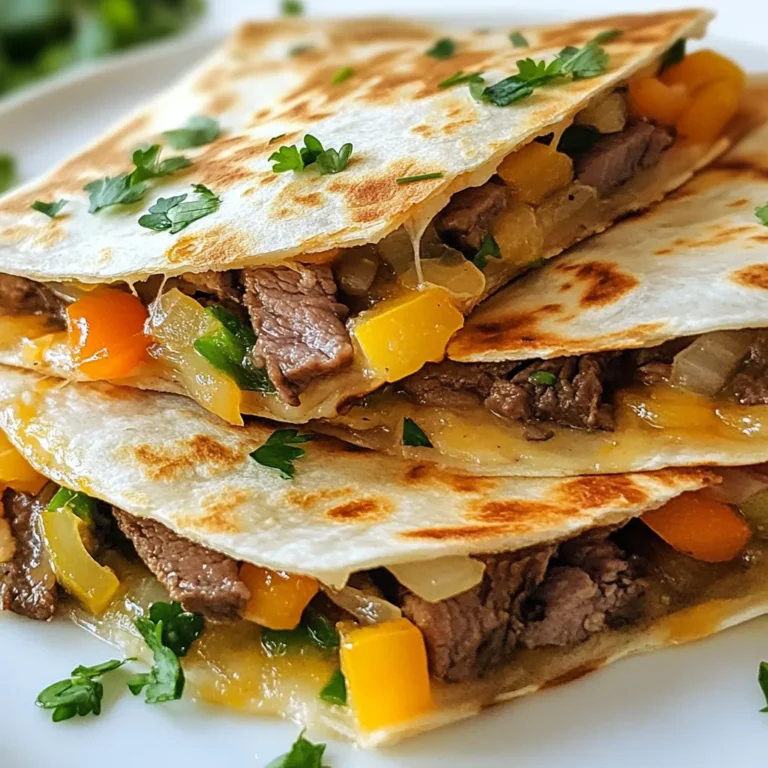
Philly Cheesesteak Quesadillas Quick and Tasty Meal

- 2 cups all-purpose flour - 1 tablespoon baking powder - 1 teaspoon ground cinnamon - 1/2 teaspoon salt - 1 cup unsweetened applesauce - 1/2 cup granulated sugar - 2 large eggs - 1/4 cup milk - 1 teaspoon vanilla extract - 2 medium apples (preferably Granny Smith) - 1/2 cup chopped walnuts or pecans - Cooking spray or oil for the waffle iron - Glaze: 1 cup powdered sugar and 2-3 tablespoons milk These ingredients blend together to make a tasty treat. The applesauce adds moisture, while the apples bring a fresh crunch. You can use Granny Smith apples for their tartness. If you like nuts, add chopped walnuts or pecans for extra flavor. The glaze of powdered sugar and milk gives a sweet finish that makes these waffle donuts even better. Gather these ingredients and get ready for a fun cooking adventure! You will love how simple it is to create this delightful snack. {{ingredient_image_2}} - Preheat the waffle iron. - Prepare the cooking surface with cooking spray or oil. - In a large bowl, combine: - 2 cups all-purpose flour - 1 tablespoon baking powder - 1 teaspoon ground cinnamon - 1/2 teaspoon salt - Whisk these dry ingredients together until mixed well. - In another bowl, blend: - 1 cup unsweetened applesauce - 1/2 cup granulated sugar - 2 large eggs - 1/4 cup milk - 1 teaspoon vanilla extract - Whisk the wet mixture until it is smooth and uniform. - Gradually pour the wet mix into the dry mix. - Stir gently until just combined. Avoid overmixing for fluffiness. - Carefully fold in: - 2 medium apples, peeled, cored, and diced - Optional: 1/2 cup chopped walnuts or pecans - Make sure they are evenly mixed without overworking. - Pour about 1/4 to 1/3 cup of batter into the preheated waffle iron. - Close the lid and cook until golden brown, about 4-5 minutes. - Check the indicator on your waffle iron for readiness. - Remove the waffle donuts gently and place them on a wire rack. - Repeat with the remaining batter until all are cooked. To make great waffle donuts, avoid overmixing the batter. Mix the wet and dry ingredients until just combined. This helps keep your donuts light and fluffy. Remember, a few lumps are okay! They will bake out as they cook. You want a tender texture, so handle the batter gently. Set your waffle iron to medium heat for best results. If it’s too hot, your donuts may burn on the outside but stay raw inside. To prevent sticking, always coat the waffle plates with cooking spray or oil. This makes it easy to lift your donuts out when they are done. If you find a donut sticking, wait a moment before trying to remove it. The glaze should be thick but pourable. Mix powdered sugar with milk until smooth. If it’s too thick, add a bit more milk. If it’s too thin, add more powdered sugar. You can choose to drizzle or dip the donuts in glaze. Drizzling gives a nice look, while dipping covers them more fully. Both methods taste great! Pro Tips Use Fresh Apples: For the best flavor and texture, opt for fresh Granny Smith apples. Their tartness balances the sweetness of the glaze beautifully. Don’t Overmix: To ensure your waffle donuts are light and fluffy, mix the wet and dry ingredients until just combined. Overmixing can lead to dense donuts. Customize Your Nuts: Feel free to substitute walnuts or pecans with your favorite nuts, or even omit them altogether for a nut-free version. Glaze Variations: Experiment with the glaze by adding a pinch of cinnamon or a splash of vanilla extract for extra flavor. You can also try different milk alternatives for a unique twist. {{image_4}} You can make spiced apple fritter waffle donuts by adding more warm spices. Try adding nutmeg or ginger for extra flavor. This gives a cozy taste, perfect for fall. Another fun twist is to mix in chocolate chips. They melt and create a sweet surprise in every bite. Kids love this addition! For gluten-free options, swap the all-purpose flour with a gluten-free blend. Make sure the blend has xanthan gum for best results. If you want vegan substitutions, replace eggs with flax eggs. Mix one tablespoon of ground flaxseed with three tablespoons of water and let it sit for a few minutes. Use plant-based milk instead of regular milk too. You can change up the glaze for more fun. Try a maple or caramel glaze instead of the basic one. This adds a rich taste that pairs well with apples. For creative toppings, consider chopped nuts or a drizzle of chocolate. These toppings not only look great but also add a nice crunch! To keep your Apple Fritter Waffle Donuts fresh, store them in an airtight container. This helps lock in moisture and flavor. You can use a plastic or glass container for best results. Line the bottom of the container with paper towels to absorb any extra moisture. Place the donuts in a single layer if possible. If you need to stack them, add more paper towels between layers. This keeps them from getting soggy. You can freeze these waffle donuts for up to two months. To freeze, first let them cool completely. Wrap each donut tightly in plastic wrap or aluminum foil. Place the wrapped donuts in a freezer-safe bag or container. When you're ready to enjoy them, simply remove them from the freezer. Thaw them in the fridge overnight or at room temperature for a few hours. To reheat, pop them in a toaster oven or microwave. Heat at low power until warm. This keeps them soft and tasty. At room temperature, these donuts last about two days. After that, they may start to stale. You can tell they are spoiled if they smell off or feel dry. Always check for any signs of mold before eating. If stored properly, they stay delicious for longer. Yes, you can use different types of apples. The best options include: - Honeycrisp - Fuji - Gala These apples provide a nice balance of sweetness and tartness. They also hold their shape well during cooking. Granny Smith apples work great, but feel free to experiment with your favorites. These waffle donuts have some healthy aspects, but they are still a treat. Here are some points to consider: - Apples provide fiber and vitamins. - Using applesauce cuts down on fat. - You can reduce sugar for a lighter option. However, they do contain sugar and flour, which can add calories. Enjoy them in moderation as a fun dessert. Yes, you can make these waffle donuts in advance. Here’s how: - Making Ahead: Prepare the batter and cook the waffles. - Storing: Let them cool completely. Store in an airtight container in the fridge for up to two days. - Reheating: Warm them in the toaster or oven for a fresh taste. This way, you have a delicious treat ready whenever you want! This blog post guides you in making delicious waffle donuts. You learned the main ingredients, step-by-step instructions, and helpful tips. We explored tasty variations and smart storage methods, too. These insights will help you create perfect treats every time. Remember, baking is about fun and creativity. Enjoy trying different flavors and sharing your results with friends and family! Keep experimenting, and you’ll soon be a waffle donut expert.

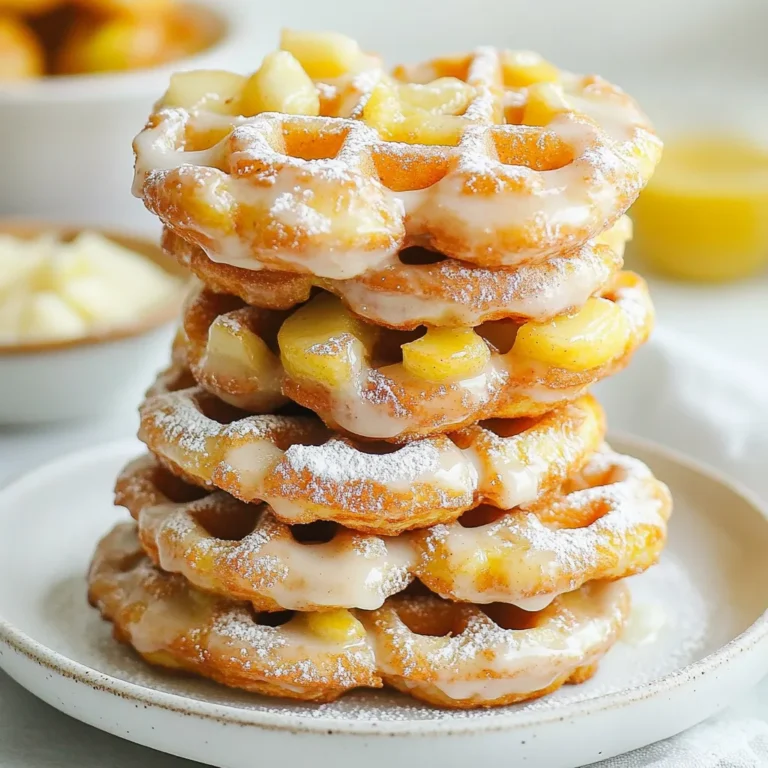
Apple Fritter Waffle Donuts Irresistible Treat Recipe

- 2 cups cooked white rice - 1 lb chicken breast, diced - 1 cup corn kernels - 1 red bell pepper, diced - 1/2 cup red onion, finely chopped - 1 ripe avocado, sliced - 1 cup cotija cheese, crumbled - Fresh cilantro leaves - 1/4 cup mayonnaise - 2 tablespoons freshly squeezed lime juice - 1 teaspoon smoked paprika - 1 teaspoon chili powder - Salt and pepper - 1 tablespoon olive oil In this recipe, we start with simple yet vital ingredients. The base is 2 cups of cooked white rice. It holds everything together and adds a nice texture. Next, we have 1 pound of chicken breast, diced into bite-sized pieces. This chicken brings protein and flavor. We also use 1 cup of corn kernels. Fresh or frozen works well and adds sweetness. For the vegetables and toppings, we include 1 diced red bell pepper and 1/2 cup of finely chopped red onion. These add color and crunch. A sliced ripe avocado gives creaminess to the dish. We finish with 1 cup of crumbled cotija cheese for a salty kick and some fresh cilantro leaves for a bright touch. To bring it all together, we add seasonings and dressings. Use 1/4 cup of mayonnaise mixed with 2 tablespoons of lime juice for a zesty sauce. A teaspoon each of smoked paprika and chili powder adds depth. Don’t forget salt and pepper to taste, along with 1 tablespoon of olive oil for cooking. These ingredients combine to create a colorful and tasty meal. Each bite is packed with flavor and texture. {{ingredient_image_2}} Heat a tablespoon of olive oil in a large skillet over medium heat. Once hot, add one pound of diced chicken breast. Season the chicken with smoked paprika, chili powder, salt, and pepper. Cook it for eight to ten minutes. Stir occasionally until the chicken turns golden brown and is fully cooked. Remove the skillet from the heat and set the chicken aside. In the same skillet, add one cup of corn kernels and one diced red bell pepper. Sauté them for about three to four minutes. Stir gently until the corn has a slight char and the peppers are tender. Once cooked, take the skillet off the heat. In a small bowl, whisk together a quarter cup of mayonnaise and two tablespoons of freshly squeezed lime juice. This creamy lime sauce will bring a bright flavor to the bowls. Start by putting two cups of cooked white rice at the bottom of each serving bowl. Next, layer on the cooked chicken. Add the sautéed corn and peppers, followed by attractive slices of avocado on top. Drizzle the creamy lime sauce generously over each bowl. Then, sprinkle crumbled cotija cheese for added flavor. If you like, garnish with fresh cilantro leaves to make the dish pop. Serve the Street Corn Chicken Bowls while they are warm and fresh. This will ensure you enjoy the best flavors and textures. You can also add lime wedges for an extra zing! To cook chicken just right, start with fresh meat. Cut your chicken into bite-sized pieces for even cooking. Heat olive oil in a skillet over medium heat. When the oil is hot, add your seasoned chicken. Use smoked paprika and chili powder for great flavor. Stir the chicken often. Cook it for about 8-10 minutes. Look for a golden brown color and ensure it’s cooked through. Always check the thickest part to avoid any pink. Once done, set it aside to rest. This helps keep it juicy. To get that charred flavor in corn, use high heat. You can use fresh corn or frozen kernels. If using frozen, let them thaw first. After cooking your chicken, use the same skillet. This adds flavor from the chicken bits left behind. Add the corn and diced red bell pepper. Sauté them for about 3-4 minutes. Stir gently to avoid breaking the corn. Look for a slight char on the corn. This gives that smoky taste we love in street corn. To keep your Street Corn Chicken Bowls fresh, store each part separately. Place rice, chicken, and veggies in different containers. This keeps textures nice. Make sure the lids are tight to avoid drying out. In the fridge, they should last for about 3-4 days. When reheating, use the microwave or stovetop. Add a splash of water to keep things moist. Heat gently to avoid overcooking. Enjoy your leftovers warm and tasty! Pro Tips Perfectly Cooked Chicken: To ensure your chicken remains juicy, avoid overcooking it. Remove it from the heat once it reaches an internal temperature of 165°F (74°C). Fresh Corn Flavor: If using fresh corn, grill the ears for a few minutes before cutting the kernels off to enhance the sweetness and add a smoky flavor. Customize Your Toppings: Feel free to add extra toppings like pickled jalapeños, black beans, or even a drizzle of hot sauce for additional flavor and texture. Make-Ahead Rice: Prepare the rice in advance and store it in the refrigerator. This will save you time when assembling the bowls and help keep everything fresh. {{image_4}} For a vegetarian twist, you can swap out chicken for plant-based protein. This change keeps the dish hearty and satisfying. Try using tofu or tempeh for a protein boost. You can marinate the tofu with lime juice and spices to add flavor. Sauté it until golden for that nice texture. If you love heat, add some jalapeños or spicy sauce. You can chop fresh jalapeños and mix them in with the corn and peppers. This gives your bowls a nice kick. For those who enjoy heat, drizzle some hot sauce over the top. It enhances the flavors and adds excitement. To make this dish gluten-free, ensure that your sauces and ingredients are safe. Use gluten-free mayonnaise or skip the mayo completely. You can also check the labels on the corn and spices. Most ingredients in this recipe are naturally gluten-free, making it easy to adapt. Enjoy your bowls without worry! To store your assembled Street Corn Chicken Bowls, let them cool first. Place them in airtight containers. You can keep them in the fridge for up to three days. Make sure to separate the avocado slices if you want them fresh longer. It’s best to add the lime sauce just before you eat. If you want to freeze the components, do it separately. Freeze the cooked chicken and corn in freezer-safe bags. You can store them for up to three months. Cooked rice can also be frozen. Just make sure to cool it before putting it in the freezer. Store the toppings like avocado and cheese in the fridge, as they do not freeze well. To reheat the chicken and corn, use a skillet over medium heat. Add a splash of water to keep them moist. Heat until warm, but not dry. For rice, add a little water, cover, and heat in the microwave. Stir occasionally. This will help keep the flavor and texture just right. Reheat the lime sauce separately, if you want it warm, or use it cold. You can use many proteins instead of chicken. Try grilled shrimp or tofu for a veggie option. Black beans or chickpeas add protein and flavor. Each choice gives a nice twist to the dish. Yes, you can prepare this dish in advance. Cook the chicken, corn, and peppers, and store them separately. Keep the rice in a closed container. Mix it all together when you're ready to serve. You can add more toppings to suit your taste. Try diced tomatoes, jalapeños, or sour cream for extra creaminess. Fresh lime wedges give a zesty kick. These additions boost flavor and make your bowl unique. Leftovers stay fresh for about three to four days in the fridge. Store them in airtight containers. Reheat in the microwave, but be careful not to overcook. Enjoy your tasty meal again! These Street Corn Chicken Bowls are a fun and easy meal. You learned about the key ingredients, seasoning, and step-by-step instructions. I shared tips for cooking chicken and achieving great flavors. With variations for different diets, everyone can enjoy this dish. Don’t forget the storage tips to keep leftovers fresh. Try out these ideas, and customize your bowls to your liking. I hope you feel inspired to make this tasty recipe for you and your family. Enjoy each bite!

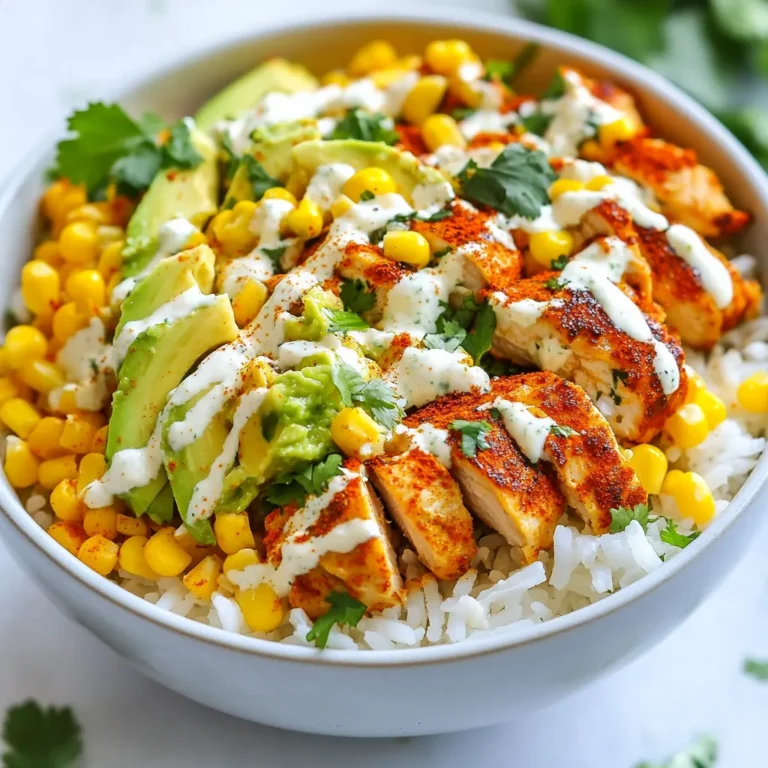
Street Corn Chicken Bowls Tasty and Fresh Dish

- 4 boneless, skinless chicken breasts - 1/2 cup pure honey - 1/4 cup soy sauce (or tamari for gluten-free) I use boneless, skinless chicken breasts for this dish. They cook evenly and soak up flavors well. Pure honey brings natural sweetness that balances the saltiness of soy sauce. For a gluten-free option, tamari works just as well. - 4 cloves garlic, finely minced - 1 teaspoon fresh ginger, finely grated - 1 tablespoon toasted sesame oil Minced garlic adds depth to the sauce. Fresh ginger gives it a nice spice. I use toasted sesame oil for a nutty flavor that enhances the dish. - 1 cup fresh broccoli florets - 1 cup bell peppers, sliced - Sesame seeds and thinly sliced green onions for garnish Fresh broccoli florets add color and crunch. I like using a mix of bell peppers for a vibrant look. Finally, sprinkle sesame seeds and green onions on top for a burst of flavor and a pretty finish. {{ingredient_image_2}} Start by taking a medium bowl. Add the following ingredients: - 1/2 cup pure honey - 1/4 cup soy sauce (or tamari for gluten-free) - 4 cloves garlic, finely minced - 1 teaspoon fresh ginger, finely grated - 1 tablespoon toasted sesame oil - 1/2 teaspoon freshly ground black pepper - 1 teaspoon sea salt Now, whisk these ingredients together. Make sure to mix well until everything is smooth. A good mix helps the flavors blend nicely. Next, grab your slow cooker. Place 4 boneless, skinless chicken breasts inside. Pour the honey garlic mixture over the chicken. Make sure each piece is well coated. This will keep the chicken juicy and flavorful as it cooks. Cover the slow cooker with its lid. Set it to cook on low for 4-6 hours or on high for 2-3 hours. Cooking time may vary based on your slow cooker model. About 30 minutes before the cooking time ends, add 1 cup of fresh broccoli florets and 1 cup of sliced bell peppers to the slow cooker. Gently stir to mix the vegetables with the chicken and sauce. This adds color and nutrition to your dish. To thicken the sauce, mix 1 tablespoon of cornstarch with 2 tablespoons of cool water in a small bowl. This is your cornstarch slurry. Add this slurry to the slow cooker in the last 15 minutes of cooking. Stir well to combine it with the sauce. This will give your dish a nice, thick texture. To make sure your chicken is just right, aim for an internal temperature of 165°F (75°C). This ensures it is safe to eat. You can serve the chicken whole if you want a nice presentation. If you shred it, the sauce soaks in more. Shredding makes it easier to eat too. Want to take the flavor up a notch? Try adding a pinch of red pepper flakes or some fresh herbs like cilantro or basil. You can also swap soy sauce for coconut aminos for a different taste. If your slow cooker runs hot or cold, adjust the cooking time. Check at 4 hours on low or 2 hours on high. Each slow cooker is a bit different! Garnishing makes your dish pop! Sprinkle sesame seeds and sliced green onions on top just before serving. For a lovely meal, serve the chicken and veggies on a bed of fluffy rice or hearty quinoa. The colorful veggies will make your plate look very inviting! Pro Tips Marinate for Maximum Flavor: For an even richer taste, consider marinating the chicken in the honey garlic mixture for at least an hour or overnight in the refrigerator before slow cooking. Add More Veggies: Feel free to include additional vegetables like snap peas, carrots, or mushrooms for a more colorful and nutritious dish. Use Chicken Thighs: For a juicier and more flavorful option, substitute chicken breasts with boneless, skinless chicken thighs. Storage Tips: Leftovers can be stored in an airtight container in the refrigerator for up to 3 days, and they can be easily reheated on the stove or in the microwave. {{image_4}} You can easily swap proteins in this recipe. Try using tofu for a vegetarian option. If you prefer pork, it works well with the honey garlic sauce too. For vegetables, feel free to mix things up. Add carrots or snap peas for extra crunch. You can even try adding zucchini or cauliflower for a different taste and texture. Want to boost the flavor? Add spices like red pepper flakes for some heat. Fresh herbs like cilantro or basil can brighten the dish. You can also experiment with sauces. Try hoisin or teriyaki for a unique twist. These will change the flavor while keeping it sweet and savory. If you're gluten-free, use tamari instead of soy sauce. This simple swap keeps the taste while making it safe for your diet. For low-sugar options, consider using monk fruit sweetener or agave instead of honey. These substitutes can reduce sugar without losing sweetness. To store leftovers properly, let the honey garlic chicken cool first. Place it in an airtight container. Keep it in the fridge for up to three days. This helps prevent spoilage and keeps flavors fresh. Always label the container with the date. This way, you know when to eat it. For meal prep, you can freeze portions of honey garlic chicken. Use freezer-safe bags or containers. Make sure to remove as much air as possible to avoid freezer burn. It can last up to three months in the freezer. To thaw, place it in the fridge overnight. Reheat it in a pan or microwave until hot. Check for spoilage before eating leftovers. Look for off smells, changes in color, or mold. If you notice any of these signs, discard the chicken. Always practice good food safety by washing hands and surfaces. This helps prevent foodborne illnesses. Yes, you can use an oven or stovetop. For the oven, preheat it to 375°F (190°C). Place the chicken in a baking dish. Pour the honey garlic mixture over the chicken. Cover with foil and bake for 30-40 minutes. Check the chicken's internal temperature to ensure it reaches 165°F (75°C). For the stovetop, heat a skillet over medium heat. Add the chicken and sauce, cooking for about 20-25 minutes. Flip the chicken halfway through for even cooking. To add heat, try these simple tricks: - Add red pepper flakes. Start with a pinch and adjust to taste. - Mix in some fresh chopped chili peppers. Jalapeños or serranos work well. - Use a spicier soy sauce, like sriracha soy sauce. - Add a dash of hot sauce to the honey garlic mixture. This dish pairs well with several sides: - Steamed rice or quinoa for a filling base. - Roasted vegetables to add more flavor and color. - A fresh salad for a light and crunchy contrast. - Noodles tossed in sesame oil for a unique twist. This blog post guides you through making Slow Cooker Honey Garlic Chicken. You learned the main ingredients, like chicken, honey, and soy sauce. We discussed tips for cooking perfect chicken and enhancing flavors. Variations allow you to use different proteins or adjust for diet needs. Storage tips help keep leftovers fresh and safe to eat. I hope you feel excited to try this easy recipe. Enjoy discovering your own twists!

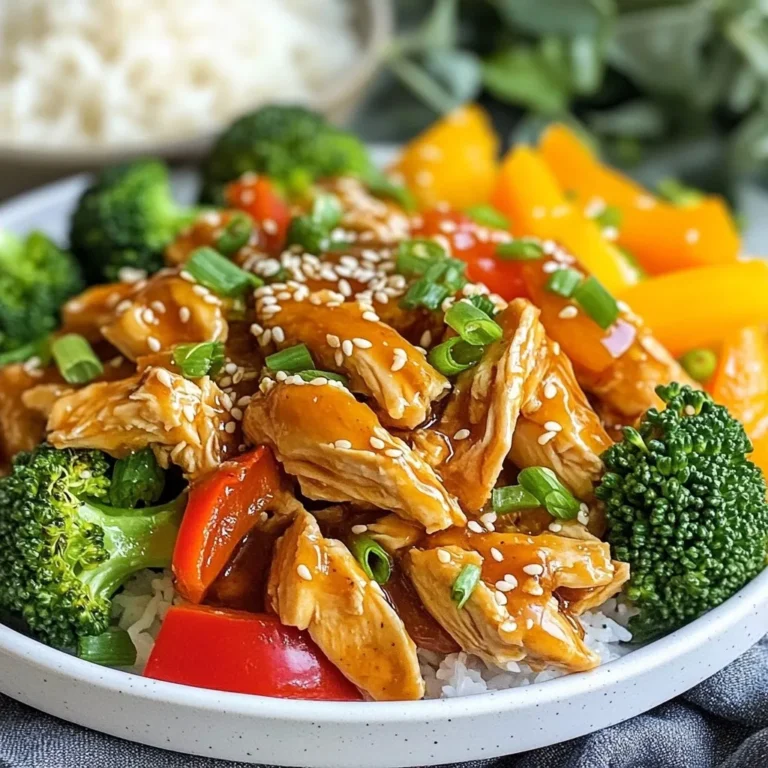
Slow Cooker Honey Garlic Chicken Simple and Tasty Dish

- 1 head of cauliflower, cut into bite-sized florets - 1 cup all-purpose flour - 1 teaspoon garlic powder - 1 teaspoon onion powder - 1 teaspoon smoked paprika - 1/2 teaspoon cayenne pepper (adjust to your spice preference) - 1/2 teaspoon salt - 1 cup water (or more as needed for batter consistency) - 1 cup buffalo sauce The star of the show is the cauliflower. It brings a great texture and absorbs flavors well. I use a head of cauliflower and cut it into bite-sized florets. This makes it easy to cook and eat. The batter combines all-purpose flour with garlic and onion powders, smoked paprika, cayenne pepper, and salt. This mix adds flavor and crunch. Then, we dip the florets in this batter before baking. Finally, we coat the baked florets in buffalo sauce. This sauce packs a punch and makes the dish pop. - 1 cup shredded lettuce - 1/2 cup diced tomatoes - 1/4 cup crumbled blue cheese or feta (optional) - 2 tablespoons fresh cilantro, chopped (for garnish) Toppings add freshness and color. Shredded lettuce and diced tomatoes provide crunch and brightness. I often add crumbled blue cheese or feta for a creamy touch. Fresh cilantro brings a burst of flavor. These toppings balance the heat from the buffalo sauce. - 8 small corn tortillas - Lime wedges I love to serve these tacos in small corn tortillas. They hold everything together nicely. Plus, they have an amazing flavor. Lime wedges are a must-have. A squeeze of lime juice brightens each bite and enhances the flavors. Enjoy your meal with these tasty accessories! {{ingredient_image_2}} 1. First, preheat your oven to 450°F (230°C). This heat helps get the cauliflower crispy. 2. Line a baking sheet with parchment paper. This keeps the cauliflower from sticking. 3. Now, make the batter. In a bowl, mix 1 cup of flour with garlic powder, onion powder, smoked paprika, cayenne pepper, and salt. 4. Gradually add 1 cup of water. Whisk until the mix is smooth and thick, like pancake batter. Adjust the water as needed. 1. Take each cauliflower floret and dip it in the batter. Let the extra batter drip off. 2. Place the coated florets on the baking sheet in a single layer. This helps them cook evenly. 3. Bake them for 20-25 minutes. At the halfway mark, flip the florets for even cooking. They should turn golden and crispy. 1. Once baked, toss the cauliflower in a large bowl with buffalo sauce. Make sure each piece is well-coated. 2. Return the sauced cauliflower to the baking sheet and bake for another 5 minutes. This warms up the sauce. 3. To warm the tortillas, heat them in a skillet or microwave until soft. 4. Fill each tortilla with a few pieces of buffalo cauliflower. Add shredded lettuce, diced tomatoes, and, if you want, crumbled blue cheese or feta. 5. Garnish with fresh cilantro and a squeeze of lime juice. Serve with lime wedges for extra zest. To make the batter just right, start with the flour mix. Mix one cup of all-purpose flour with spices like garlic powder and smoked paprika. Slowly add water until it feels like pancake batter. If the batter is too thick, add a little more water. You want it smooth and easy to coat the cauliflower. You can also play with flavors. Add more cayenne for heat or try a pinch of cumin for a different taste. Each mix gives a new twist to your tacos. For crispy cauliflower, bake at 450°F. This high heat helps create that perfect crunch. Spread the florets on the baking sheet in a single layer. This way, they cook evenly. Halfway through baking, flip the florets carefully. Using tongs helps keep them intact and ensures they brown nicely. When serving, think about the look. Use a colorful platter for your tacos. Arrange lime wedges around the tacos for a bright touch. Add fresh cilantro on top for a pop of green. It makes your dish look fresh and inviting. A great presentation makes the meal even more enjoyable! Pro Tips Adjust the Spice Level: If you prefer milder flavors, reduce the cayenne pepper or omit it altogether. You can also serve with extra buffalo sauce on the side for those who like it hot. Make It Gluten-Free: Substitute all-purpose flour with a gluten-free flour blend to cater to gluten sensitivities while keeping the dish delicious. Extra Crispy Cauliflower: For an even crispier texture, consider air frying the coated cauliflower instead of baking, or briefly pan-fry them after baking. Freshness is Key: Use fresh ingredients for toppings like lettuce and cilantro to enhance the flavor and presentation of your tacos. {{image_4}} You can switch out cauliflower for other veggies. Try using broccoli or Brussels sprouts for a different taste. Both hold up well with the batter and bake nicely. If you want more protein, add beans or meat. Black beans or shredded chicken mix well with the buffalo sauce. These additions make the meal heartier and more filling. For those who need gluten-free meals, swap all-purpose flour with a gluten-free blend. This keeps the batter tasty and safe for gluten-sensitive eaters. You won’t lose any flavor! To make this dish vegan, just skip the cheese. Use vegan cheese or leave it off entirely. This way, everyone can enjoy these tacos without worry. Spice things up by trying different sauces. Chipotle sauce adds a smoky kick, while ranch dressing cools down the heat. Experimenting with flavors keeps meals exciting! Seasonal ingredients can also boost your tacos. In summer, add fresh corn or diced bell peppers. In fall, try roasted sweet potatoes for a sweet contrast to the buffalo sauce. These tweaks keep the dish fresh and fun! To keep your buffalo cauliflower tacos fresh, store leftovers in an airtight container. Place them in the fridge within two hours of cooking. This helps to avoid harmful bacteria. When you're ready to eat, reheat in the oven for the best texture. Set the oven to 350°F (175°C) and warm for about 10 minutes. This keeps the tacos crispy, just like when they were fresh. You can freeze these tacos if you want to save some for later. For best results, freeze the cauliflower and tortillas separately. Place the cooled cauliflower in a freezer-safe bag or container. They will stay fresh for up to three months. When you want to eat them, thaw the cauliflower in the fridge overnight. Reheat in the oven, or microwave until hot. For the tortillas, warm them in a skillet before filling. In the fridge, buffalo cauliflower tacos last about three days. Look out for signs of spoilage. If the cauliflower looks slimy or smells off, it’s time to toss it. Always check for freshness before enjoying your leftovers. Proper storage helps you enjoy these tasty tacos for days! To cook cauliflower for tacos, you want it crispy and full of flavor. Start by cutting the cauliflower into bite-sized florets. Dip each floret in a batter made with flour and spices. Bake at 450°F for 20-25 minutes. Flip the florets halfway to ensure even cooking. For extra crispiness, bake them on a hot baking sheet. - Use a light batter for a crispy texture. - Bake them until they are golden brown. - Flip them halfway to ensure even browning. Yes, you can prepare Buffalo Cauliflower Tacos ahead of time. Cook the cauliflower and toss it in buffalo sauce. Store the cooked cauliflower in an airtight container in the fridge. You can warm it up just before serving. Also, warm the tortillas separately to keep them fresh. - Cook and store the cauliflower in the fridge. - Warm the cauliflower and tortillas before serving. - Assemble the tacos right before eating for the best taste. Buffalo Cauliflower Tacos pair well with various side dishes and drinks. Consider serving them with a fresh salad for crunch. You can also add some rice or beans for extra protein. Cold drinks like lemonade or iced tea complement the heat of the tacos nicely. - Fresh salads add a nice crunch. - Rice or beans boost the meal's protein. - Cold drinks help balance the heat. Buffalo cauliflower tacos are simple and tasty. We discussed the key ingredients: cauliflower, flour, and buffalo sauce. I showed you how to prepare them, bake the florets, and assemble the tacos. We also explored tips for crispiness and creative presentation ideas. You can swap ingredients for different flavors and special diets. Store leftovers properly to enjoy later. Now you're set to create these fun tacos. Dive into cooking and share your delicious results with friends!

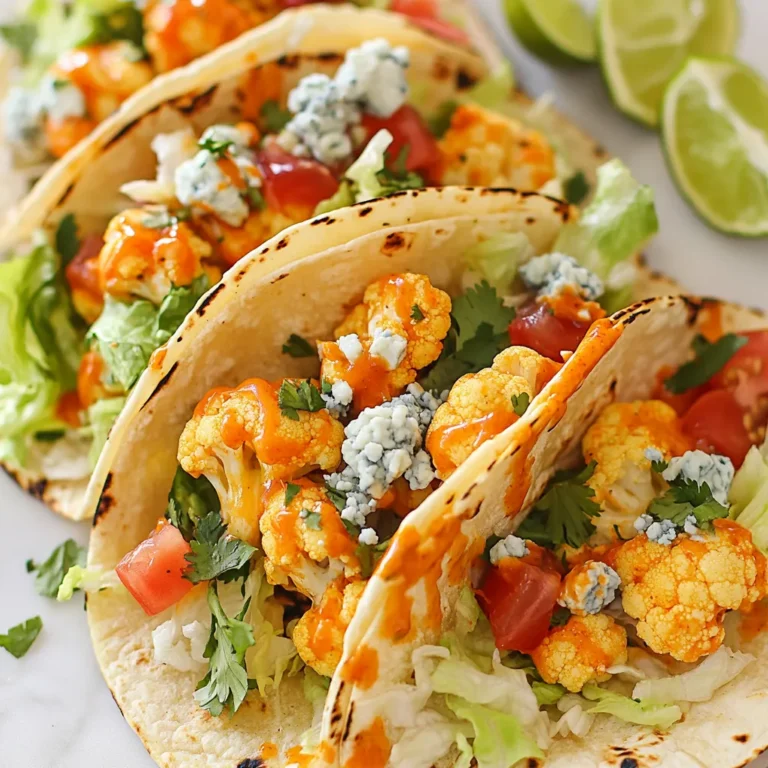
Buffalo Cauliflower Tacos Flavorful and Satisfying Meal

- 4 boneless, skinless chicken breasts - 2 cups marinara sauce - 1 cup shredded mozzarella cheese - 1 cup creamy ricotta cheese - 1/2 cup freshly grated Parmesan cheese - 1 cup fresh spinach, chopped - 1 bell pepper, diced - 1 teaspoon Italian seasoning blend - 2 cloves of garlic, minced - Salt and black pepper to taste When you gather the ingredients for this Italian chicken casserole, you will create a warm and inviting meal. The chicken breasts form a tender base, soaking up the rich marinara sauce. The marinara adds a sweet and tangy depth, making each bite delightful. The creamy ricotta cheese contributes a smooth texture. It blends well with the chicken and sauce. The mozzarella cheese adds a gooey, cheesy layer that melts beautifully on top. The Parmesan cheese gives a nice sharpness to the dish, enhancing the overall flavor. Fresh spinach and bell peppers bring color and nutrition. The spinach wilts down, blending into the mix, while the bell pepper adds crunch. Garlic and Italian seasoning tie everything together, creating a classic Italian taste. Remember to season with salt and pepper to boost the flavors. This combination of ingredients makes the casserole not just filling but also full of flavor. Enjoy the process of preparing this dish as much as the meal itself! {{ingredient_image_2}} 1. Preheat your oven to 375°F (190°C). This step is key for even cooking. 2. In a large bowl, mix the cooked pasta, marinara sauce, spinach, diced bell pepper, minced garlic, and Italian seasoning. Stir well until everything combines. 3. Season the mixture with salt and freshly cracked black pepper to taste. Adjust to your liking. 1. Grease a 9x13 inch baking dish lightly. Spread half of the pasta mixture evenly on the bottom. 2. Place the chicken breasts on top of the pasta layer. Season the chicken with salt and pepper for added flavor. 3. Spoon the creamy ricotta cheese over each chicken breast. Spread it out evenly to cover well. 4. Layer the remaining pasta mixture over the ricotta-covered chicken. Make sure everything is well-covered. 1. Cover the baking dish tightly with aluminum foil. This helps retain moisture while baking. 2. Place the dish in the preheated oven and bake for 25 minutes. 3. After 25 minutes, carefully remove the foil. Bake for an additional 15 minutes until the cheese is bubbling and golden. 4. Allow the casserole to rest for at least 5 minutes before serving. Garnish with fresh basil leaves for extra flavor. - Distribute the ingredients evenly. This helps the casserole cook well. - Use high-quality marinara sauce. It gives the dish rich and tasty flavor. - Garnish your casserole with fresh basil leaves. This adds a pop of color. - Drizzle good olive oil around the dish. It makes the meal look nice. - Add red pepper flakes if you like spice. It gives the dish a nice kick. - Mix in seasonal vegetables. This brings new flavors and colors to your meal. Pro Tips Perfect Chicken: Make sure to pound the chicken breasts to an even thickness for consistent cooking. Flavor Boost: Consider marinating the chicken in olive oil, garlic, and Italian herbs for a few hours before baking for enhanced flavor. Cheese Variations: Feel free to mix different cheeses like provolone or fontina for a unique twist on the classic flavor profile. Make-Ahead Option: This casserole can be assembled a day in advance; just cover it tightly and store it in the fridge until ready to bake. {{image_4}} You can change the chicken to suit your taste. Swap chicken breasts for thighs for a juicier bite. Turkey is another great choice for a leaner option. If you want a vegetarian dish, try using seasoned tofu instead. It soaks up flavors well and adds a nice texture. The pasta you choose can change the dish's feel. Consider using gluten-free pasta if you have dietary needs. Zoodles, or zucchini noodles, are a fun twist that adds veggies. You can also play with different pasta shapes like fusilli for a unique look and bite. Cheese brings creaminess and flavor to the casserole. For a tangy taste, you can substitute goat cheese for ricotta. If you want a dairy-free dish, look for vegan cheese options. They melt well and give you that creamy texture without the dairy. Store leftovers in an airtight container for up to 3 days. This keeps the chicken fresh and tasty. When you want to eat it again, reheat it in the oven or microwave. This will help keep the flavors strong and the cheese nice. You can freeze individual portions in freezer-safe containers. This makes it easy to enjoy the casserole later. Thaw the portions before reheating. Doing this helps keep the texture just right. For the best taste, bake in the oven to regain the crispy cheese topping. This method brings back that delicious crunch. If you need a quick option, use the microwave. Just know that it may soften the texture a bit. Bake at 375°F for a total of 40 minutes, both covered and uncovered. Start by covering it with foil to keep the chicken moist. After 25 minutes, remove the foil. This helps the cheese become bubbly and golden. Yes, you can prepare this casserole ahead of time. Just assemble all the layers, cover it, and refrigerate for up to 24 hours. This lets the flavors blend well. When you’re ready, bake it straight from the fridge. You may need to add a few extra minutes to the baking time. This dish is great on its own, but you can enhance your meal. Serve it with warm garlic bread for dipping. A side salad adds freshness. Steamed vegetables are also a perfect match. Each option makes for a complete meal that everyone will love. This Italian chicken casserole blends juicy chicken, rich marinara, and creamy cheeses. You can easily prep it in steps, ensuring every layer is packed with flavor. Remember, you can swap ingredients or add veggies to suit your taste. Most importantly, store leftovers for quick meals later. Enjoying this dish brings comfort and joy to any dinner table. Happy cooking!

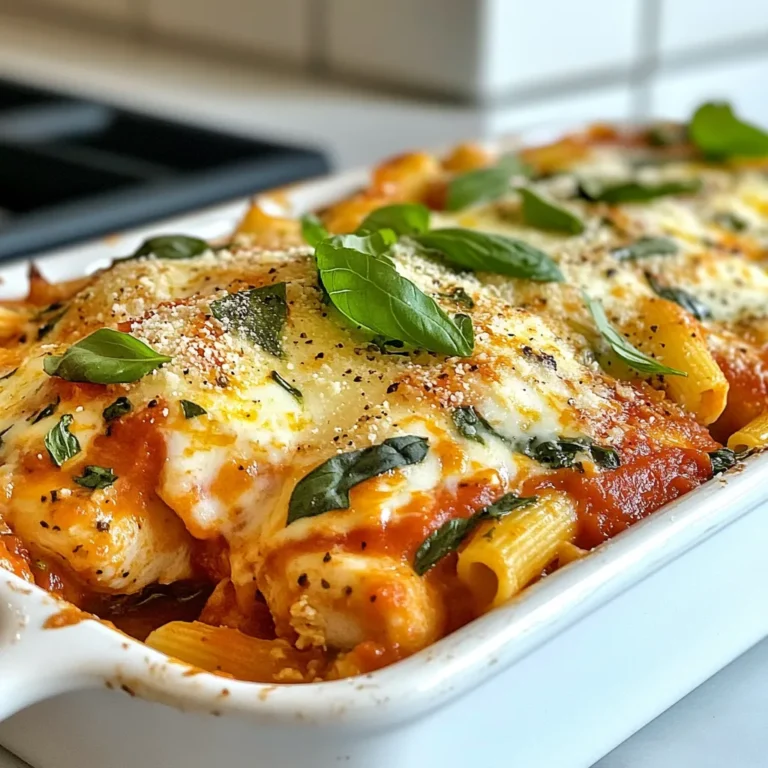
Italian Chicken Casserole Flavorful and Easy Meal

- Feta cheese - Cherry tomatoes - Garlic - Olive oil - Pasta - Seasonings (red pepper flakes, salt, pepper) - Fresh basil and lemon Gather these ingredients to create your TikTok viral baked feta pasta. - Feta cheese: Use 200g of feta. It adds a creamy texture and salty flavor. - Cherry tomatoes: You need 400g. They will burst and add sweetness. - Garlic: Use 3 cloves, minced. Garlic brings aroma and depth. - Olive oil: Measure 3 tablespoons. This keeps everything moist while baking. - Pasta: Choose 300g of your favorite shape. It will mix well with the sauce. - Seasonings: Add 1 teaspoon of red pepper flakes, plus salt and pepper to taste. Adjust the spice to your liking. - Fresh basil: Use leaves for garnish. They brighten the dish. - Lemon: Add zest and juice from 1 lemon. It lifts the flavors. With these items, you can make a dish that is cheesy, savory, and full of flavor. Enjoy cooking! {{ingredient_image_2}} First, preheat your oven to 400°F (200°C). This step is key to getting your dish ready for baking. While the oven heats, grab a sturdy oven-proof skillet or a baking dish. Next, combine 400g of cherry tomatoes and 3 minced garlic cloves in the dish. Drizzle 3 tablespoons of olive oil over them. Season your mix with salt, pepper, and red pepper flakes if you want some heat. Gently stir everything together. Now, create a small well in the center of the tomatoes. Place a block of 200g feta cheese right in that well. Drizzle a bit more olive oil on top of the feta. Add a pinch of salt and pepper to enhance its flavor. Carefully place the dish in the preheated oven. Bake for about 25 to 30 minutes. You’ll know it’s done when the tomatoes are blistered and juicy, and the feta is soft and slightly golden. While the feta and tomatoes bake, bring a pot of salted water to a boil. Cook 300g of your favorite pasta according to the package instructions. You want to aim for al dente, which means it should still have a nice bite. Once cooked, drain the pasta and set it aside while the feta and tomatoes finish baking. After 25 to 30 minutes, take the baked dish out of the oven. Be careful; it will be hot! Use a spoon or spatula to gently stir the tomatoes and melted feta together. This will create a creamy sauce. Now, add the drained pasta directly into the skillet with the creamy sauce. Toss everything together until the pasta is well coated. For extra flavor, stir in 1 tablespoon of lemon juice and 1 tablespoon of lemon zest. Taste your dish and adjust the seasoning with more salt and pepper if needed. Serve hot, garnished with fresh basil leaves for a pop of color. To get the best flavor, bake your feta and tomatoes for 25 to 30 minutes. Look for blistered tomatoes and a soft, golden feta. This step is key for a creamy sauce. When it comes to pasta, choose shapes that hold sauce well, like penne or rotini. These shapes scoop up the creamy sauce, making each bite full of flavor. You can add extra ingredients for a twist. Try spinach, olives, or sun-dried tomatoes. These will give your dish more depth. If you like spice, add more red pepper flakes. Start small, then taste and adjust. This way, you control the heat level. Adding lemon juice and zest brightens the dish too. It adds a fresh, zesty kick that balances the creaminess. Pro Tips Use High-Quality Feta: Opt for a good quality feta cheese for the best flavor. A creamy, rich feta can elevate the dish significantly. Add More Veggies: Feel free to toss in other vegetables like spinach or zucchini to increase the nutritional value and add more flavor. Experiment with Pasta Shapes: Different pasta shapes can change the texture and presentation of the dish. Try using penne, fusilli, or farfalle for variety. Make It Ahead: You can prepare the feta and tomato mixture ahead of time and store it in the fridge. Just bake it fresh when you're ready to serve! {{image_4}} You can change up the cheese for fun. If you want a milder flavor, try using goat cheese. It melts nicely and adds a tangy taste. For a creamier sauce, use ricotta cheese. Just add it at the end and mix it in. You can even add a splash of heavy cream for extra richness. This will make your sauce smooth and dreamy. Making this dish fit your diet is easy. For vegetarians, you can keep the feta cheese. If you are vegan, swap the feta for tofu. Press the tofu to remove water, then season it well. You can also use nutritional yeast for a cheesy flavor. For the pasta, choose whole grain or legume-based options for more nutrients. Make this pasta shine with seasonal veggies. In spring, add asparagus or peas. In summer, toss in zucchini or bell peppers. In fall, roasted butternut squash fits perfectly. Fresh herbs can also elevate the dish. Basil is great in summer, while thyme works well in winter. Just chop them up and stir them in right before serving. After enjoying your baked feta pasta, you may have some leftovers. To keep them fresh, store the pasta in an airtight container. Make sure it cools down first to avoid steam buildup. You can keep it in the fridge for up to three days. When you're ready to enjoy your leftovers, reheating is simple. The best method is to use the stovetop. Add a splash of water or olive oil to the pan. Heat on low to keep it moist. Stir often to avoid sticking or burning. You can also use the microwave, but cover the dish with a damp paper towel. This helps trap moisture and keeps the pasta from drying out. Enjoy your creamy pasta just like the first time! What is the origin of baked feta pasta? Baked feta pasta started in Finland. A home cook made it and shared it on social media. The dish went viral quickly. It became popular worldwide for its creamy texture and flavor. Can I freeze baked feta pasta? Yes, you can freeze baked feta pasta. But, it’s best to store it without the pasta. Freeze the sauce and pasta separately. This keeps the pasta from getting mushy. When you want to eat it, thaw in the fridge overnight. Reheat on the stove with a splash of water for best results. How do I make baked feta pasta spicy? To add spice, use red pepper flakes. Add one teaspoon to the tomatoes before baking. You can also add diced jalapeños or a splash of hot sauce. Adjust the amount to your heat level. What pasta shapes work best for this recipe? You can use any pasta shape you like. Bowtie, penne, or rotini work well. These shapes hold the sauce nicely. Short pasta shapes are great for this dish, as they mix well with the creamy sauce. Baked feta pasta is simple and delicious. We covered the key ingredients like feta, garlic, and fresh basil. I shared steps from prepping the oven to stirring the pasta. You learned valuable tips for choosing pasta and enhancing flavors. Remember, feel free to adapt this recipe. It’s fun to experiment with different cheeses and veggies. Enjoy your tasty dish, and make it your own!

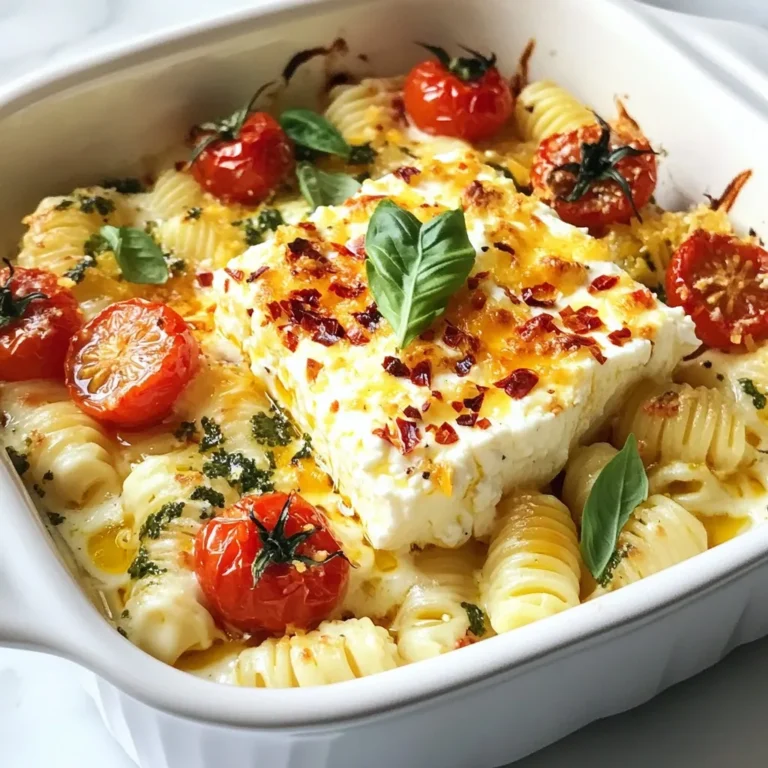
TikTok Viral Baked Feta Pasta Recipe to Try Today

- 4 bone-in, skin-on chicken thighs - 4 cloves of garlic, finely minced - 1/2 cup freshly grated Parmesan cheese - 1/4 cup unsalted butter, melted - 1 tablespoon extra virgin olive oil - 1 tablespoon fresh parsley, finely chopped - 1 teaspoon smoky paprika - Salt and freshly ground black pepper to taste - Lemon wedges for garnish - Fresh herbs for seasoning The main ingredients for this dish are simple yet flavorful. The chicken thighs provide rich taste and moisture. Garlic adds a strong aroma and depth. Parmesan cheese brings a savory kick that makes each bite special. For the additional ingredients, melted butter creates a luscious coating for the chicken. Olive oil helps with browning and adds a fruity note. Fresh parsley gives color and a hint of freshness. Smoky paprika brings warmth and subtle spice. Salt and pepper enhance the overall flavor, making sure each bite is seasoned just right. You can add lemon wedges to brighten the dish. Fresh herbs can also enhance the taste and make it look inviting. Each of these ingredients plays a vital role in creating a delicious Garlic Parmesan Chicken. {{ingredient_image_2}} - Preheat the oven to 400°F (200°C). - Whisk together melted butter, garlic, olive oil, smoky paprika, salt, and pepper. In this first step, you set the stage for great flavor. Preheating the oven helps the chicken cook evenly. Whisking the ingredients combines all the flavors. You want a smooth mixture to coat the chicken well. - Coat chicken thighs in the garlic butter mixture. - Arrange chicken in the baking dish, skin-side up. When you coat the chicken, make sure each piece gets a good amount of the garlic butter. This step is key for flavor. Arranging them skin-side up allows the skin to get crispy as it cooks. - Sprinkle Parmesan cheese on chicken thighs. - Bake for 35-40 minutes until cooked and golden brown. - Broil for the last 5 minutes for crispy topping. Adding Parmesan cheese gives the chicken a nice, rich flavor. Baking it allows the chicken to cook through. The broiling step at the end adds a crispy topping that takes this dish to the next level. Always check the internal temperature; it should reach 165°F (75°C) for safety. To get the best flavor, use fresh garlic. It brings a strong taste. You can also add herbs like thyme or rosemary for extra depth. If you want a kick, add red pepper flakes or more smoky paprika. Adjust the salt and pepper to your taste. Use less salt if you prefer, but keep the balance. Massaging the chicken is key. This helps the flavors soak in well. Take your time when you coat the chicken. Make sure every part is covered in your garlic butter mix. For a great crust, bake the chicken skin-side up. This allows the skin to get nice and crispy. Broiling at the end adds an extra crunch to the cheese. Serve the chicken on a big platter. Drizzle leftover garlic butter over it for added flavor. Garnish with fresh parsley for a nice touch. Pair the chicken with a bright salad or steamed veggies. These sides not only look good but taste great with the chicken too. Pro Tips Choose Quality Chicken: Opt for organic or free-range chicken thighs for better flavor and texture. Use Fresh Garlic: Freshly minced garlic will provide a stronger, more aromatic flavor compared to pre-minced options. Monitor Cooking Time: Keep an eye on the chicken in the last few minutes to avoid over-browning the Parmesan during broiling. Rest Before Serving: Allow the chicken to rest for a few minutes after baking; this helps the juices redistribute for maximum tenderness. {{image_4}} You can change the taste of Garlic Parmesan Chicken easily. Adding lemon zest or juice brings a fresh, bright note. The citrus cuts through the richness and makes it pop. You can also swap out Parmesan cheese. Try Gouda or Cheddar for a new flavor twist. These cheeses melt well and give a different texture. You have options on how to cook this dish. Grilling gives a smoky taste and crispy skin. To grill, marinate the chicken in the garlic mixture. Cook on medium heat until done. Use a meat thermometer to check for 165°F (75°C). If you prefer baking, follow the original recipe. For a slow cooker, cook on low for 4 to 6 hours. This method makes the chicken very tender. Use the same garlic butter mixture to keep the flavor strong. If you need gluten-free options, check your ingredients. Make sure the butter and cheese are gluten-free. You can also use almond flour instead of breadcrumbs for a crunchy topping. For a low-carb version, skip the cheese or use a smaller amount. You can also serve the chicken with non-starchy veggies like zucchini or spinach. This keeps the meal light and healthy. To store leftover Garlic Parmesan Chicken, let it cool first. Place the chicken in an airtight container. It stays fresh for up to three days in the fridge. For best results, keep the skin on; it helps to lock in moisture. Use glass or plastic containers with tight lids. Make sure the containers are clean and dry before use. This prevents any unwanted flavors from mixing in. When reheating, use the oven for the best results. Preheat your oven to 350°F (175°C). Place the chicken on a baking sheet. Cover it loosely with foil to keep it moist. Heat for about 15-20 minutes. Avoid the microwave, as it can dry out the chicken. The oven keeps the skin crispy and the meat juicy. If you must use a microwave, cover the chicken with a damp paper towel. To maintain crispiness, broil for the last 2 minutes of reheating. Watch it closely to prevent burning. This step brings back the crunchy texture of the Parmesan. To freeze Garlic Parmesan Chicken, wrap each piece in plastic wrap. Place the wrapped chicken in a freezer bag. Remove as much air as possible to avoid freezer burn. It can last up to three months in the freezer. Label the bags with the date and contents. This helps you track freshness. Freeze the chicken as soon as possible after cooking for the best quality. To thaw, place the chicken in the fridge overnight. You can also use the microwave’s defrost setting. After thawing, follow the reheating guidelines to warm it up. Always ensure it reaches an internal temperature of 165°F (75°C) before eating. Garlic Parmesan Chicken takes about 50 minutes in total. You need 10 minutes for prep and 35-40 minutes to bake. This timing gives you golden, juicy chicken. Yes, you can use boneless chicken thighs. They cook a bit faster than bone-in thighs. Check for doneness after about 25-30 minutes. Just keep an eye on them to avoid overcooking. You can serve this dish with many sides. Here are a few ideas: - Fresh green salad - Steamed vegetables - Garlic bread - Mashed potatoes - Rice or quinoa For drinks, try a light white wine or sparkling water. These pair well with the rich flavors of the chicken. This blog post provides a simple and tasty recipe for Garlic Parmesan Chicken. We discussed key ingredients, preparation steps, and cooking techniques to ensure your chicken is flavorful and crispy. Remember, seasoning and technique matter for the best results. You can also explore variations and storage tips for leftovers. Enjoy making this dish, knowing it can suit different tastes and dietary needs. Happy cooking!

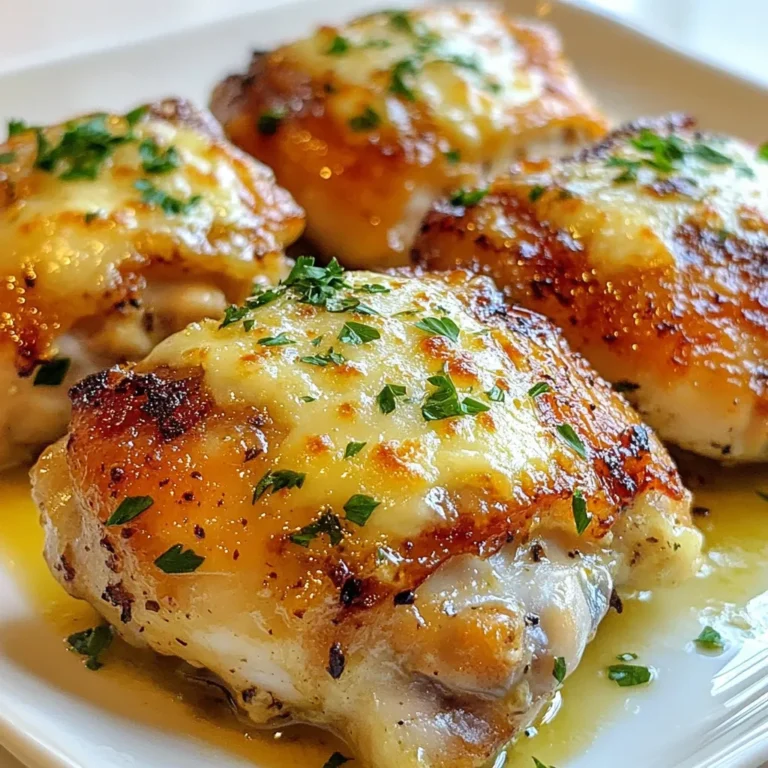
Garlic Parmesan Chicken Simple and Flavorful Dish

For these tasty Bang Bang Chicken Sliders, you need: - 1 lb ground chicken - 1/2 cup panko breadcrumbs - 1/4 cup green onions, finely chopped - 1 teaspoon garlic powder - 1 teaspoon ginger powder - 1/2 teaspoon salt - 1/4 teaspoon black pepper - 1/2 teaspoon red pepper flakes (optional, for extra heat) - Mini slider buns (choose between brioche or whole wheat) The seasonings are key for flavor. The garlic and ginger powder add a nice zing. Salt and black pepper help balance the taste. Red pepper flakes give it a kick if you like heat. Don’t skip the panko breadcrumbs; they keep the sliders juicy and tender. Top your sliders with fresh lettuce leaves for crunch. Pickles add a nice tang. For extra flavor, drizzle on the Bang Bang sauce. You can also serve these sliders with sweet potato fries or a fresh salad. This makes a fun meal for any occasion! {{ingredient_image_2}} First, grab a large mixing bowl. Add 1 pound of ground chicken. Next, toss in 1/2 cup of panko breadcrumbs. Then, add 1/4 cup of finely chopped green onions. Sprinkle in 1 teaspoon of garlic powder and 1 teaspoon of ginger powder. Don’t forget 1/2 teaspoon of salt and 1/4 teaspoon of black pepper. If you like heat, add 1/2 teaspoon of red pepper flakes. Use your hands or a spatula to mix gently. Be careful not to overmix. This helps keep your sliders tender. Now, preheat your grill or a non-stick skillet over medium heat. While it heats, form the chicken mixture into small patties. Aim for patties about 2 inches wide and 1/2 inch thick. Once hot, place your patties on the grill or skillet. Cook each side for about 4-5 minutes. Make sure they reach an internal temperature of 165°F. You want them golden-brown and cooked through. In a small bowl, whisk together 1 tablespoon of mayonnaise, 1 tablespoon of sweet chili sauce, and 1 tablespoon of Sriracha. Taste the sauce and adjust the heat by adding more Sriracha if you want. This spicy Bang Bang sauce adds a great kick to your sliders. To keep your sliders tender, do not overmix the chicken. Mix just until combined. This helps maintain moisture. Use fresh ground chicken for the best taste. You can also add a bit of grated cheese for extra flavor and juiciness. Start with a small amount of Sriracha when making the Bang Bang sauce. You can always add more if you like it spicy. Taste as you go. Sweet chili sauce adds sweetness that balances the heat. If you want a milder sauce, skip the red pepper flakes in the chicken mix. Arrange your sliders on a platter for a fun look. Add some fresh green onions on top for color. You can serve them with sweet potato fries or a light salad. For extra crunch, add crispy pickles on top. This makes each bite even better! Pro Tips Keep It Tender: Avoid overmixing the chicken mixture to ensure your sliders remain juicy and tender. Perfect Patty Size: Form your patties to be slightly smaller than your buns to allow for some shrinkage during cooking. Customize the Heat: Adjust the amount of Sriracha in your Bang Bang sauce to match your desired spice level. Garnish for Appeal: Add extra green onions and pickles on the serving platter for a vibrant and inviting presentation. {{image_4}} You can swap ground chicken for other meats. Ground turkey works well and stays juicy. If you like beef, use ground beef with similar seasonings. For a lighter option, try ground pork. Each choice brings a unique taste to your sliders. To make these sliders vegetarian, use black beans or chickpeas. Mash them and mix in breadcrumbs and spices. For a vegan option, try a store-bought meat substitute. You can also use grilled portobello mushrooms for a hearty option. Just ensure they are well-seasoned for the best flavor. Add different herbs and spices to create new flavors. Try chopped cilantro for a fresh taste. Mix in some diced jalapeños for heat. You can also blend in shredded cheese for creaminess. Experiment with different sauces to find your favorite. A touch of lime juice can brighten the flavors too. To store leftover sliders, place them in an airtight container. This keeps them fresh for up to three days in the fridge. If you have extra Bang Bang sauce, store it separately to keep the sliders from getting soggy. When it’s time to enjoy your leftovers, reheat the sliders in the oven. Set the oven to 350°F (175°C). Place the sliders on a baking sheet and cover them with foil. Heat for about 10-15 minutes until warm. You can also use a microwave, but this might make the buns soft. To freeze sliders, wrap each one tightly in plastic wrap. Then, place them in a freezer bag. They can last up to three months in the freezer. When ready to eat, thaw in the fridge overnight. Reheat in the oven for the best taste! Bang Bang Chicken comes from Chinese cuisine. It is a spicy chicken dish that often uses a sauce made with chili oil. The name "Bang Bang" comes from a wooden stick used to pound the chicken. Sliders are mini sandwiches that make this dish easy to enjoy. The sliders mix the original flavors in a fun way. Yes, you can prepare the chicken mixture a day in advance. Just mix all the ingredients and store them in the fridge. This saves time on the day you plan to serve them. You can also cook the patties ahead and warm them later. Just keep them in an airtight container. You can add more red pepper flakes to the chicken mix for extra heat. Try mixing in diced jalapeños or chili paste for a bolder flavor. For the sauce, use more Sriracha if you want a kick. You can also add fresh herbs like cilantro for a fresh taste. Brioche buns are soft, sweet, and perfect for Bang Bang Chicken Sliders. They pair well with the spicy flavors. Whole wheat buns are a healthier choice and add a nutty taste. Choose buns that are sturdy enough to hold the filling without falling apart. Bang Bang Chicken Sliders are a tasty treat that mix fun flavors with ease. We covered the main ingredients and their importance. You learned how to prepare, cook, and make the sauce for the sliders. Plus, I shared tips to keep them tender and adjust the spice. Various options let you switch proteins or go vegetarian. Lastly, I outlined how to store and reheat leftovers. Now, you're ready to impress friends and family with your delicious sliders! Enjoy your cooking adventure and make it your own!

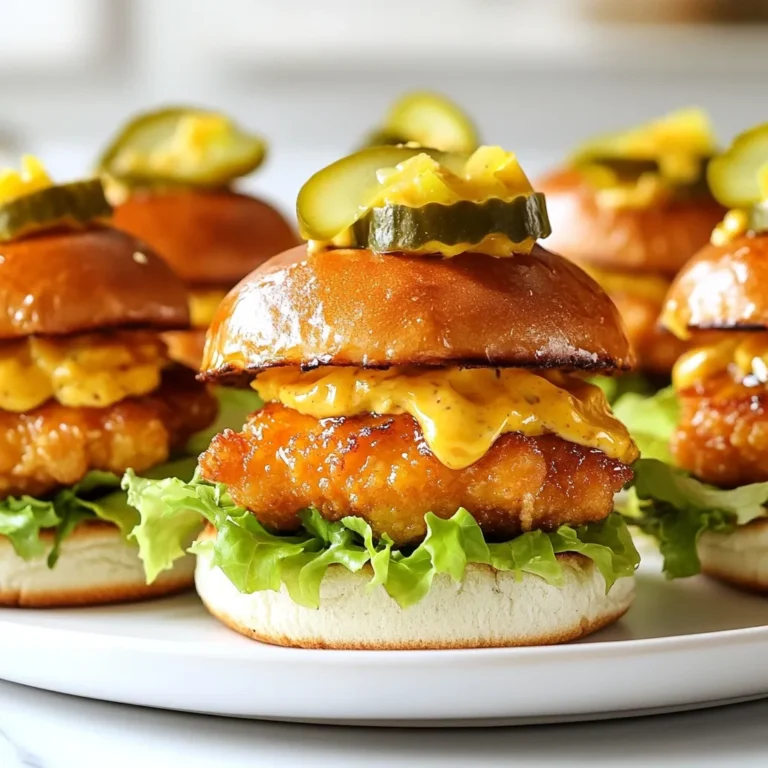
Bang Bang Chicken Sliders Flavorful Easy Recipe

To make creamy tomato soup, you need simple and fresh ingredients. Here's what you will need: - 4 large ripe tomatoes, roughly chopped - 1 medium onion, diced - 2 cloves garlic, finely minced - 1 medium carrot, diced - 1 celery stalk, diced - 1 cup vegetable broth - 1 cup coconut milk - 2 tablespoons extra virgin olive oil - 1 teaspoon dried basil - ½ teaspoon sugar - Salt and freshly cracked black pepper to taste - Fresh basil leaves for garnish These ingredients come together to create a rich and comforting soup. The ripe tomatoes provide sweetness, while the coconut milk adds creaminess. Each bite bursts with flavor and warmth. You can easily find these items at your local store or farmer's market. Fresh herbs enhance the taste, so feel free to use the best quality ingredients you can find. Enjoying this soup can be a cozy experience, especially with a good piece of bread on the side! {{ingredient_image_2}} 1. First, grab a large pot. Heat 2 tablespoons of extra virgin olive oil over medium heat. You want it hot enough to sizzle. 2. Next, add 1 medium diced onion and 2 cloves of finely minced garlic. Stir them often for about 2 minutes. You will smell the garlic begin to cook. 3. Now, add 1 medium diced carrot and 1 diced celery stalk. Keep stirring for about 5 to 7 minutes. The goal is to make all the vegetables tender and a bit caramelized. 1. Time to add the star ingredients! Toss in 4 large ripe tomatoes, roughly chopped. Follow this with 1 teaspoon of dried basil and ½ teaspoon of sugar. The sugar helps balance the acidity of the tomatoes. 2. Stir everything well to mix the flavors. Let the mixture cook for about 5 minutes. You will notice the tomatoes start to soften and release their juices. 1. Pour in 1 cup of vegetable broth. Bring the mixture to a rolling boil. Once it boils, lower the heat and let it simmer uncovered for 15 minutes. This helps all the flavors come together. 2. After simmering, it’s time to blend! Use an immersion blender to blend the soup until smooth. If you don’t have one, carefully transfer the soup to a countertop blender in batches. 3. Once blended, return the soup to the pot. Stir in 1 cup of creamy coconut milk. Season with salt and freshly cracked black pepper to taste. 4. Let the soup simmer for another 5 minutes. This warms it up and blends the flavors perfectly. 5. Finally, remove the pot from heat. Serve it hot, garnished with torn fresh basil leaves for that lovely aroma. To get that perfect smooth texture, I love using an immersion blender. It makes blending easy and keeps the soup warm. If you don’t have one, a countertop blender works too. Just be careful when transferring hot soup. If your soup is too thick, add more vegetable broth. This will help you reach your desired consistency. Adding spices can take your soup to the next level. Try some fresh herbs like thyme or a pinch of red pepper flakes for heat. A little sugar balances the acidity of the tomatoes. This tiny step makes a big difference in flavor. For a beautiful finish, swirl some coconut milk on top of each bowl. It adds creaminess and looks stunning! You can also serve the soup with crusty bread for dipping. It makes for a comforting meal that warms your soul. Pro Tips Use Fresh Tomatoes: For the best flavor, select ripe, in-season tomatoes. They will give your soup a vibrant and rich taste. Balancing Acidity: If your tomatoes are particularly acidic, feel free to add a bit more sugar or even a pinch of baking soda to mellow it out. Texture Variations: For a chunkier soup, reserve some of the sautéed vegetables before blending and stir them back in after pureeing. Serving Suggestions: Pair the soup with a side of garlic bread or a simple green salad for a complete and satisfying meal. {{image_4}} You can easily make this soup vegan and gluten-free. To replace the coconut milk, use almond or oat milk. Both will give a nice creamy texture. Be sure to choose unsweetened versions for a better taste. For a gluten-free soup, check that your vegetable broth is gluten-free. Many store-bought broths are safe, but always read the label. If you can’t find fresh tomatoes, canned tomatoes work great. They save time and still taste good. Just use about two 14-ounce cans. You can also toss in other veggies like bell peppers or zucchini. This adds extra flavor and nutrients to your soup. Feel free to mix and match based on what you have at home. Herbs can change the soup's taste a lot. Using thyme or oregano can add a lovely earthiness. If you like some heat, add red pepper flakes. Start with a pinch and taste as you go. This way, you control how spicy it gets. Each variation lets you explore new flavors, making this soup a fun dish to customize. After making your creamy tomato soup, let it cool down. Pour the soup into an airtight container. Glass or BPA-free plastic containers work best. This keeps the soup fresh and prevents spills. Make sure to store it in the fridge right away. You can enjoy the leftovers within three days. To freeze creamy tomato soup, allow it to cool completely. Pour the soup into freezer-safe bags or containers. Leave some space at the top, as the soup will expand. Seal them tightly and label them with the date. When you want to enjoy it, take the soup out of the freezer. Thaw the soup in the fridge overnight. Reheat it on the stove or in the microwave until hot. In the fridge, your creamy tomato soup lasts about three days. If you freeze it, it will stay good for up to three months. Always check for any off smells or changes in texture before eating. This ensures you enjoy the best soup every time! Yes, you can use other types of milk. Almond milk gives a nutty taste. Cashew milk adds creaminess but is less strong. Regular cow's milk works well too. Each choice changes the soup's flavor and texture slightly. Adjust the salt, as some milks are saltier than others. You can add veggies like spinach or kale. These greens boost vitamins and iron. Legumes, such as lentils or beans, add protein and fiber. Carrots and celery already provide some nutrients. You can also toss in some zucchini for extra texture and health benefits. Absolutely! You can make the soup and store it. Let it cool first, then place it in a container. It stays fresh in the fridge for up to four days. For longer storage, freeze it for up to three months. Just thaw it in the fridge, then reheat before serving. In this blog post, we explored a creamy tomato soup recipe. We noted the fresh ingredients like ripe tomatoes, garlic, and coconut milk. I shared step-by-step instructions to create a delicious base. Tips for consistency and flavor helped enhance your dish. Variations let you customize it to fit your taste. Remember these storage tips to save your soup for later. Enjoy making this soup for yourself or loved ones, and don’t hesitate to experiment with flavors! Your taste buds will thank you.

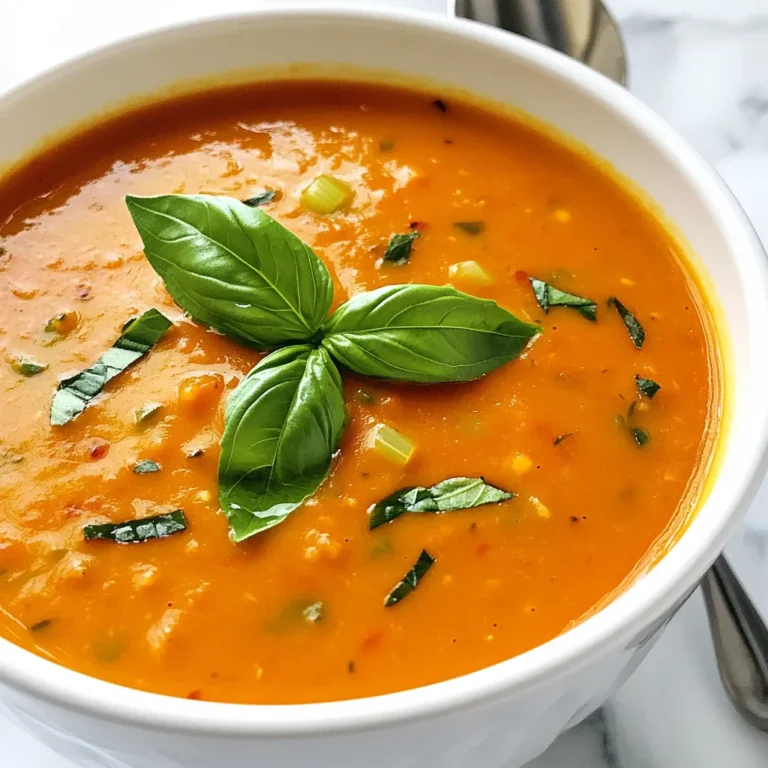
Creamy Tomato Soup Comforting and Flavorful Recipe

PREV 1 … 18 19 20 NEXT
homedishhaven

explore

DessertsDinnerAppetizersDrinks

Our Policies

  • Cookie Policy
  • Copyright Policy
  • Disclaimer
  • GDPR Policy
  • Terms Of Use
Back to Top
  • About
  • Contact Us
  • Privacy Policy
© 2025 homedishhaven