FREE DINNER EBOOK! Get your copy!
  • Cookie Policy
  • GDPR Policy
  • Disclaimer
  • Terms Of Use
  • Visit my other site: Fun Cookie Recipes
homedishhaven
  • Home
  • Dinner
  • Desserts
  • Drinks
  • Appetizers
  • Contact
  • About
  • Privacy Policy
  • Home
  • Dinner
  • Desserts
  • Drinks
  • Appetizers
  • Contact
  • About
  • Privacy Policy
  • Cookie Policy
  • GDPR Policy
  • Disclaimer
  • Terms Of Use
Visit my other site: Fun Cookie Recipes

HOME / CATEGORIES /

Latest

- 1 lb ground chicken - 1/2 cup breadcrumbs - 1/2 cup grated Parmesan cheese - 1/4 cup minced garlic (approximately 8 cloves) - 1 small onion, finely chopped - 1/4 cup fresh parsley, chopped - 1 large egg - 1 tablespoon Worcestershire sauce - 1 teaspoon garlic powder - 1 teaspoon dried oregano - 1 teaspoon salt - 1/2 teaspoon black pepper - 1/4 cup ketchup (for topping) - 1 tablespoon olive oil The ground chicken gives the meatloaf a light taste, making it a great choice. The breadcrumbs help bind the mix and keep it moist. Parmesan cheese adds a rich flavor that makes each bite special. Minced garlic brings a bold taste that pairs well with chicken. The onion adds sweetness, while fresh parsley gives a nice pop of color and freshness. If you lack ground chicken, turkey works well too. Use whole wheat breadcrumbs for a healthier option. For cheese, you can swap Parmesan with Pecorino Romano for a sharper flavor. If garlic is hard to find, garlic powder is a quick alternative. No fresh parsley? Dried parsley will do in a pinch, but use less. {{ingredient_image_2}} Start by preheating your oven to 375°F (190°C). This step is vital. While it heats, take a loaf pan and lightly grease it with olive oil. This helps the meatloaf come out easily later. In a large mixing bowl, combine these ingredients: - 1 lb ground chicken - 1/2 cup breadcrumbs - 1/2 cup grated Parmesan cheese - 1/4 cup minced garlic (about 8 cloves) - 1 small onion, finely chopped - 1/4 cup fresh parsley, chopped Mix these well. Next, in a small bowl, crack one egg. Whisk it with: - 1 tablespoon Worcestershire sauce - 1 teaspoon garlic powder - 1 teaspoon dried oregano - 1 teaspoon salt - 1/2 teaspoon black pepper Make sure this mixture is smooth. Then, pour it over the chicken mix. Use your hands or a spatula to combine everything. Be gentle, so you do not overmix. This keeps the meatloaf tender. Transfer the meat mixture into your greased loaf pan. Shape it into a loaf. Then, spread 1/4 cup of ketchup on top. This gives a nice glaze that tastes sweet and tangy. Place the pan in the oven and bake for 45 to 50 minutes. Check with a meat thermometer. The inside should reach 165°F (74°C) to be safe. Once done, take it out and let it rest for about 10 minutes. This helps keep the meatloaf juicy and tasty. To keep your chicken meatloaf juicy, use ground chicken with some fat. Lean meats can dry out. Mixing in breadcrumbs and minced garlic also helps lock in moisture. Do not overmix the ingredients; this can make the meatloaf tough. Remember to let it rest after baking. This helps the juices spread throughout the loaf. There are many ways to boost flavor in your meatloaf. Add finely chopped bell peppers or carrots for sweetness and crunch. You can also mix in herbs like thyme or basil for a fresh taste. A splash of hot sauce can give it a spicy kick. Try adding sautéed mushrooms for earthiness. Experimenting with different flavors keeps your meatloaf exciting. For making chicken meatloaf, you need a few key tools. Use a large mixing bowl for combining ingredients. A loaf pan is essential for shaping the meatloaf. A meat thermometer ensures it cooks to the right temperature. A spatula helps mix without overworking the meat. Lastly, keep some parchment paper handy for easy cleanup. Pro Tips Use Fresh Garlic: Freshly minced garlic gives a much more vibrant flavor compared to pre-minced or jarred garlic. It enhances the overall taste of your meatloaf. Don't Overmix: When combining the meat mixture, avoid overmixing as it can lead to a dense texture. Mix just until combined for a tender meatloaf. Let it Rest: Allowing the meatloaf to rest for about 10 minutes after baking helps to keep it moist and makes slicing easier. Experiment with Toppings: While ketchup is classic, you can also try BBQ sauce, sriracha, or a mixture of mustard and honey for a different flavor profile. {{image_4}} You can make chicken meatloaf healthier in many ways. First, swap regular breadcrumbs for whole wheat ones. This small change adds fiber and nutrients. You can also replace part of the ground chicken with grated zucchini or carrots. This keeps the meatloaf moist and adds veggies. Another option is to use low-fat cheese. This reduces calories while still giving you that cheesy flavor. If you want to cut back on sodium, use low-sodium Worcestershire sauce and salt. These swaps help you enjoy a tasty meal without guilt. You can boost flavor with different herbs and spices. Italian seasoning works well and adds depth. A teaspoon of smoked paprika gives a lovely smoky taste. You might also try fresh herbs like thyme or basil. Chopped spinach or kale can add greens and flavor too. If you prefer heat, add red pepper flakes for a kick. You can even mix in some chopped sun-dried tomatoes for a burst of flavor. The beauty of chicken meatloaf is that you can tailor it to your taste! For a gluten-free version, use gluten-free breadcrumbs made from rice or cornstarch. You can also crush gluten-free crackers as a substitute. These options still bind the meatloaf while keeping it safe for those with gluten sensitivities. Another great choice is to use oats instead of breadcrumbs. Oats add texture and are naturally gluten-free. Just make sure to check the label for certification. With these substitutions, everyone can enjoy this delicious dish! To keep your chicken meatloaf fresh, allow it to cool first. Wrap it tightly in plastic wrap or foil. You can also place it in an airtight container. Store it in the fridge. It will stay good for about three to four days. If you want to save it longer, consider freezing it. Freezing your chicken meatloaf is simple. First, let it cool completely. Next, slice it into portions. Wrap each slice in plastic wrap, then place them in a freezer bag. Be sure to remove as much air as possible. Label the bag with the date. You can freeze it for up to three months. When you're ready to eat, you can thaw it in the fridge overnight. To reheat your chicken meatloaf, preheat your oven to 350°F (175°C). Place the meatloaf on a baking sheet. Cover it with foil to keep it moist. Heat for about 20-25 minutes. If you prefer the microwave, slice it and place it on a plate. Heat for about 1-2 minutes, checking every 30 seconds. Enjoy your flavorful meatloaf just like it was fresh from the oven! Bake your chicken meatloaf at 375°F (190°C) for 45 to 50 minutes. Use a meat thermometer to check. The inside should reach 165°F (74°C). This ensures it is safe to eat and juicy. Yes, you can make meatloaf ahead of time. Prepare it and place it in the fridge for up to 24 hours. This makes it easy for busy days. You can also freeze it. Wrap it well and store it for up to three months. Just thaw it in the fridge before baking. Chicken meatloaf garlic Parmesan goes well with many sides. Here are some tasty ideas: - Creamy mashed potatoes - Steamed green beans - Roasted carrots - Fresh garden salad - Garlic bread These sides add color and balance to your meal. Enjoy a complete dinner with this delicious meatloaf! This blog covers how to make chicken meatloaf, step-by-step. We explored the key ingredients and highlighted helpful substitutions. You learned how to prepare the pan, mix, and bake your meatloaf. The tips for preventing dryness and enhancing flavor will help you serve a great dish. Plus, I shared variations for different diets and ideal storage practices. With this guide, you can now create a tasty chicken meatloaf that everyone will enjoy. Happy cooking!

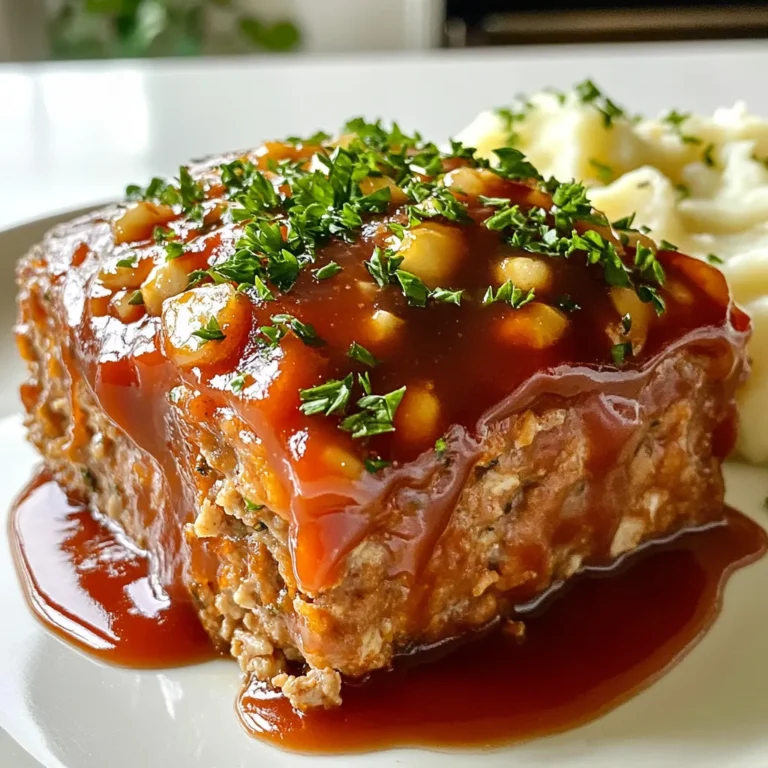
Chicken Meatloaf Garlic Parmesan Flavorful Delight

To make this delightful salad, gather these key ingredients: - 8 oz rotini pasta - 4 cups fresh spinach, thoroughly washed and dried - 1 cup strawberries, hulled and sliced - ½ cup feta cheese, crumbled into bite-sized pieces - ¼ cup walnuts, coarsely chopped - 3 tablespoons extra virgin olive oil - 2 tablespoons balsamic vinegar - 1 tablespoon honey for a touch of sweetness - Salt and freshly ground pepper to taste - Fresh basil leaves for a fragrant garnish You can jazz up this salad with some tasty extras. Here are a few ideas: - Sliced almonds or pecans for added crunch - Grilled chicken or shrimp for protein - Avocado slices for creaminess - Dried cranberries for extra sweetness - A sprinkle of red pepper flakes for heat This salad is not only delicious but also healthy. Here’s a breakdown of the key nutrients: - Calories: About 300 per serving - Protein: 10g - Fat: 18g (mostly healthy fats from olive oil and walnuts) - Carbohydrates: 30g - Fiber: 4g - Sugars: 5g (natural sugars from fruit) This nutrient-packed dish makes a great choice for a light meal or side. {{ingredient_image_2}} Start by boiling water in a large pot. Add salt. Once the water boils, add 8 oz of rotini pasta. Cook it according to the package time, usually around 8 to 10 minutes. The pasta should be firm but cooked, known as al dente. After cooking, drain the pasta in a colander. Rinse it quickly with cold water to stop the cooking. Set it aside to cool down completely. In a small bowl, mix the dressing. Whisk 3 tablespoons of extra virgin olive oil with 2 tablespoons of balsamic vinegar and 1 tablespoon of honey. Add a pinch of salt and pepper to taste. Whisk until smooth and well mixed. This dressing adds a nice tang and sweetness to your salad. Take a large mixing bowl and add the cooled rotini pasta. Next, add 4 cups of washed and dried fresh spinach. Then, add 1 cup of sliced strawberries, ½ cup of crumbled feta cheese, and ¼ cup of coarsely chopped walnuts. Gently toss the ingredients together. Be careful not to squish the spinach or strawberries. Now, drizzle your prepared dressing over the pasta salad. Use a big spoon to toss the salad carefully. Make sure everything is coated in the dressing. Taste it! If you want, add more salt or pepper for extra flavor. Place the salad in the fridge for 15 to 30 minutes. This chill time helps the flavors blend well. It also makes the salad refreshing when served. Serve it cold for the best taste! Before you serve, sprinkle fresh basil leaves on top. This adds a nice aroma and a pop of color. It makes your salad look even more inviting! To cook rotini pasta just right, start with a large pot. Fill it with water and add salt. It should taste like the sea! Bring the water to a rolling boil. Add your pasta and stir. Cook it according to the package for al dente. This means it should be firm to bite. Once it’s done, drain it in a colander. Rinse it with cold water to stop cooking. This keeps the pasta from getting too soft. Set it aside to cool completely before mixing it with other ingredients. The dressing can change the whole salad. If you want a twist, try lemon juice instead of balsamic vinegar. You can also swap honey for maple syrup for a different sweetness. For a creamy dressing, mix in some yogurt or sour cream. Add garlic or herbs to boost flavor. Taste as you go! Adjust salt and pepper for the best balance. You can even add a splash of orange juice for a fruity kick. For special days, serve this salad in a big, beautiful bowl. It looks great on a platter too! Use fresh basil leaves for a pop of color at the end. For extra flair, drizzle balsamic glaze over the top before serving. This adds a sweet touch and makes the dish shine. Serve the salad chilled for the best taste. It’s perfect for picnics, parties, or family gatherings. Everyone will love the mix of sweet strawberries and crunchy walnuts! Pro Tips Perfect Pasta Texture: To achieve the ideal al dente texture, make sure to follow the package instructions and taste the pasta a minute or two before the suggested cooking time. Freshness Matters: Use the freshest spinach and strawberries you can find for the best flavor and nutrition. Seasonal produce will enhance the taste of the salad. Customizable Dressing: Feel free to adjust the sweetness of the dressing by adding more honey or substituting with maple syrup for a different flavor profile. Make Ahead: Prepare the salad ingredients in advance but dress it just before serving to keep the spinach crisp and the pasta from becoming soggy. {{image_4}} You can change this salad with the seasons. In spring, add peas for a sweet crunch. In summer, toss in fresh corn for a burst of sweetness. In fall, use roasted pumpkin for warmth and flavor. Winter can bring in citrus fruits like oranges or grapefruits. These changes keep the salad fresh and exciting all year round. To make this salad vegan, swap feta cheese for a plant-based cheese. Also, replace honey with maple syrup or agave nectar for sweetness. For gluten-free options, use gluten-free pasta made from rice or quinoa. These swaps ensure everyone can enjoy this delicious dish without worry. You can boost the protein in this salad easily. Add grilled chicken or shrimp for a heartier meal. Chickpeas or black beans work well for a vegetarian option. You can even sprinkle in some sliced hard-boiled eggs for extra protein. These additions make the salad more filling and satisfying, perfect for lunch or dinner. To store leftover strawberry spinach pasta salad, place it in a clean, airtight container. Make sure to cover the container well to keep moisture out. This helps keep the salad fresh. The salad will stay fresh in the fridge for about 3 days. After this time, the spinach may wilt, and the strawberries can lose their crunch. Always check for any signs of spoilage before eating. I don’t recommend freezing this salad. The pasta and fresh ingredients do not freeze well. They can become mushy and lose their flavor. If you want to save some, try just freezing the pasta separately. You can then make a fresh salad later with new ingredients. Yes, you can use other pasta shapes. Penne, fusilli, or farfalle work well. Each type offers a unique texture. Choose what you like best. Just remember to cook it al dente for the best bite. You can prepare this salad a few hours in advance. Cook the pasta and make the dressing ahead. Keep the spinach, strawberries, and nuts separate until just before serving. This keeps everything fresh and crunchy. You can add many fruits to this salad. Blueberries, raspberries, or peaches are great choices. Just make sure they are ripe and sweet. They will add extra flavor and color to your dish. Yes, this salad is perfect for meal prep. You can store it in individual containers. Just remember to add the dressing just before eating. This keeps the salad fresh and tasty for days. This blog post covered how to make a tasty pasta salad. We talked about key ingredients, optional toppings, and key nutritional facts. You learned step-by-step on cooking, dressing, and chilling your salad. I shared tips for cooking pasta, dressing ideas, and serving suggestions. We also explored fun variations and storage tips. In closing, you now have the tools to make a delicious salad. Get creative and enjoy serving it for any occasion!

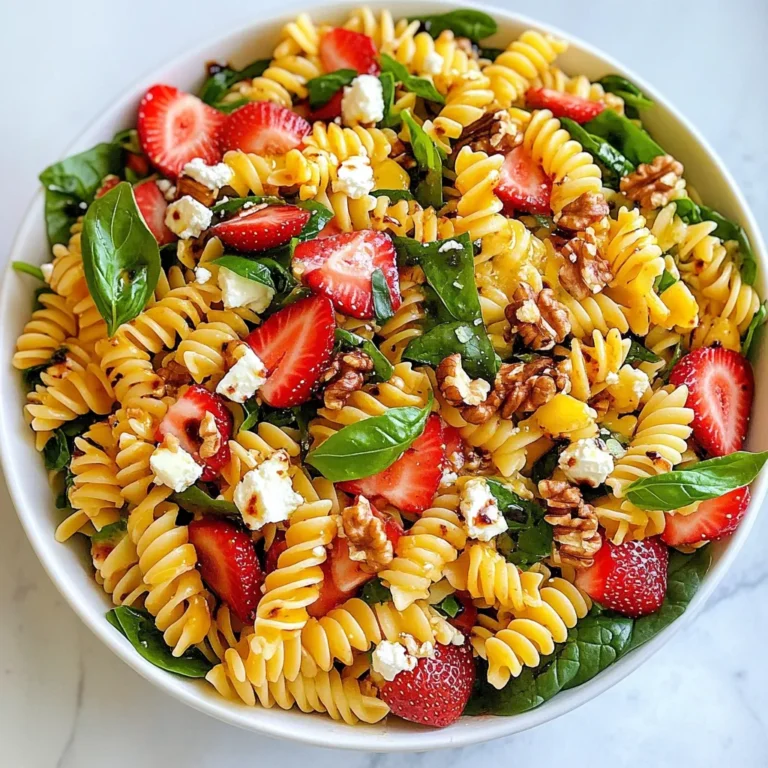
Strawberry Spinach Pasta Salad Fresh and Flavorful Dish

To make Gigi Hadid's spicy vodka pasta, gather these ingredients: - 12 oz (340g) penne pasta - 2 tablespoons extra virgin olive oil - 2 cloves garlic, minced - 1 small onion, finely chopped - 1 teaspoon red pepper flakes - 1 can (15 oz) crushed tomatoes - 1/2 cup heavy cream (or coconut cream) - 1/2 cup grated Parmesan cheese - Salt and freshly ground black pepper - Fresh basil leaves, for garnish If you have dietary needs, there are easy swaps: - Use gluten-free penne pasta for a gluten-free option. - Replace heavy cream with coconut cream for a dairy-free dish. - Nutritional yeast can replace Parmesan cheese for a vegan option. For the best flavor, use quality brands: - Pasta: Barilla or De Cecco for reliable penne. - Olive Oil: California Olive Ranch or Colavita for great taste. - Tomatoes: San Marzano for rich flavor in crushed tomatoes. - Cheese: BelGioioso for fresh Parmesan cheese. Choosing these brands can elevate your dish and ensure a tasty meal. {{ingredient_image_2}} First, grab a big pot. Fill it with water and add a pinch of salt. Bring it to a boil. Once it bubbles, add 12 ounces of penne pasta. Cook it until it is al dente, which means it should be firm but not hard. This usually takes about 10-12 minutes. Remember to save one cup of that pasta water before draining it. Set the pasta aside for later. Next, use that same pot to make your sauce. Pour in 2 tablespoons of extra virgin olive oil over medium heat. Add 2 minced cloves of garlic and 1 small finely chopped onion. Stir them for about 3-4 minutes. You want the onions to become clear and smell good. This is key for flavor! Now, it’s time to spice things up! Add 1 teaspoon of red pepper flakes. Stir for a minute to let the heat come out. Pour in 15 ounces of crushed tomatoes and mix it all together. Turn up the heat a bit. Let it simmer for 7-10 minutes. You want the sauce to thicken a little. After that, lower the heat and add ½ cup of heavy cream. Stir until it turns a nice pink. If it's too thick, add some of that pasta water you saved. Finally, fold in ½ cup of grated Parmesan cheese. Mix until it melts. Add salt and black pepper to taste. Toss in the cooked penne pasta, mixing well to coat every piece. Now, you're ready to serve! To change the spice in Gigi Hadid's spicy vodka pasta, focus on the red pepper flakes. Start with 1 teaspoon as the recipe suggests. If you like more heat, add more flakes. You can also use fresh chilies for a different kick. Remember, spice can build up, so taste as you go. This way, you find the heat that suits you best. The key to a creamy sauce lies in the heavy cream. Add it slowly and stir well. If the sauce is too thick, use some reserved pasta water. This water helps loosen the sauce without losing flavor. For a vegan twist, coconut cream works great too. It gives a rich texture and a hint of sweetness. For serving, I love using shallow bowls. This lets the sauce shine on top of the pasta. Fresh basil leaves add color and freshness. A sprinkle of extra Parmesan cheese is a must for flavor. If you want to make it fancy, drizzle a little olive oil on top. You can pair this pasta with a fresh salad or garlic bread for a full meal. Pro Tips Adjust the Spice Level: Feel free to modify the amount of red pepper flakes based on your spice tolerance. You can start with less and add more as needed to suit your taste. Cheese Variations: For a different flavor profile, try using Pecorino Romano cheese instead of Parmesan. It adds a unique sharpness to the dish. Fresh Herbs: If you have fresh herbs on hand, consider adding a handful of chopped parsley or oregano along with the basil for an extra layer of flavor. Make Ahead: This pasta dish can be made ahead of time. Just store it in an airtight container in the fridge and reheat gently over low heat, adding a splash of pasta water to loosen the sauce. {{image_4}} You can make this dish vegan and dairy-free. Swap the heavy cream for coconut cream. It gives a rich taste without dairy. Use nutritional yeast instead of Parmesan for a cheesy flavor. This keeps it creamy and delicious! Want to add more protein? Chicken and shrimp work great here. Cook the chicken or shrimp in the pot before adding garlic and onions. This adds flavor to your sauce. You could also use plant-based proteins like chickpeas for a hearty twist. If you need gluten-free pasta, many brands offer great choices. Look for penne made from brown rice or quinoa. These options taste good and hold the sauce well. They make this dish safe for those with gluten issues. To keep your Gigi Hadid spicy vodka pasta fresh, let it cool down first. Place it in an airtight container. This helps keep the pasta from drying out. Store it in the fridge for up to three days. If you want to enjoy it later, freezing is a great option. When you reheat leftovers, use a skillet for best results. Add a splash of water or extra cream to keep it moist. Heat it on low, stirring often. This helps to warm it without making it dry. You can also use the microwave, but cover it with a damp paper towel to trap steam. To freeze, pack the pasta in an airtight container. It can stay in the freezer for up to three months. When you’re ready to eat, thaw it overnight in the fridge. Reheat it gently, as mentioned above, to keep the creaminess intact. Enjoy your delicious pasta whenever you want! Gigi Hadid's spicy vodka pasta stands out for its creamy texture and bold flavors. She uses a mix of crushed tomatoes and heavy cream, creating a rich sauce. The red pepper flakes add a kick, making it fun to eat. This dish is easy to make, yet it feels fancy. You can serve it for a quick weeknight meal or a dinner party. The use of fresh basil gives it a nice touch, adding color and aroma. Yes, you can use other pasta shapes! While penne is the star, any short pasta works well. Rigatoni, fusilli, or farfalle can hold the sauce nicely. Just make sure to adjust the cooking time based on the pasta you choose. Remember to save some cooking water to mix with the sauce, no matter what pasta you pick. To amp up the heat, add more red pepper flakes. Start with one more teaspoon and taste as you go. You can also use spicy sausage or add a dash of hot sauce. If you want a smoky flavor, try adding smoked paprika. For a fresh twist, toss in some chopped fresh chili peppers. Just remember to balance the heat with the creaminess of the sauce! You learned about the key ingredients and easy steps to cook Gigi Hadid's pasta. We explored substitutions, tips for texture, and storage methods. Remember, you can customize this dish to fit your taste. Try different proteins or adjust the spices to make it your own. This recipe works for various diets too. Enjoy creating this dish in your kitchen!

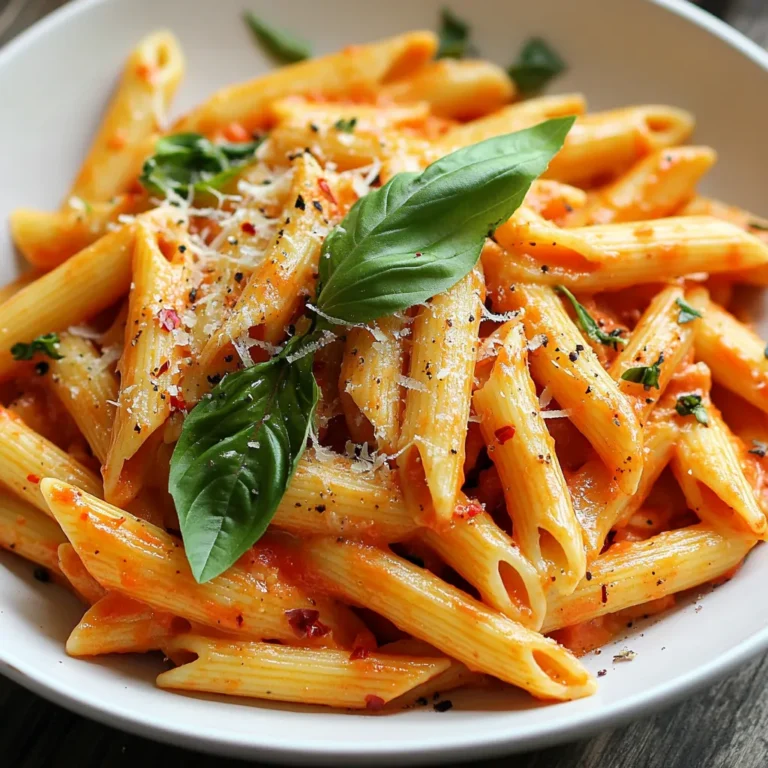
Gigi Hadid Spicy Vodka Pasta Flavorful Taste Explosion

- 1 lb smoked sausage, sliced into rounds - 1 cup bell peppers (a mix of red, yellow, and green), diced - 1 medium onion, finely chopped - 2 cups fresh baby spinach - 2 cloves garlic, minced - 1 cup cherry tomatoes, halved - 1 cup vegetable broth or chicken broth - 1 cup long-grain rice - 1 teaspoon smoked paprika - 1 teaspoon dried oregano - Salt and pepper to taste - 2 tablespoons extra virgin olive oil - Fresh parsley, chopped, for garnish You will need a mix of fresh and flavorful ingredients for this dish. The smoked sausage adds a rich taste that pairs well with the sweetness of bell peppers and the earthiness of spinach. The garlic and onion bring depth to each bite. When choosing your broth, both vegetable and chicken work well. The rice absorbs all the wonderful flavors. The smoked paprika and oregano enhance the dish with a warm, comforting taste. Don't forget salt and pepper for balance. Finally, a drizzle of olive oil and a sprinkle of parsley will brighten your meal. This simple yet tasty dish uses ingredients that you can easily find in your local store. Enjoy crafting this one-pot wonder! {{ingredient_image_2}} - Heat olive oil in a pot or Dutch oven. - Sauté smoked sausage until golden brown. First, I heat the olive oil in a pot over medium heat. I let it warm for about 1-2 minutes. Then, I add the sliced smoked sausage. I sauté it for around 5 minutes. I want it to get a nice golden-brown color. This step adds great flavor to the dish. - Add onion, bell peppers, and garlic. - Sauté until vegetables soften. Next, I add the chopped onion, diced bell peppers, and minced garlic to the pot. I let them cook for about 4-5 minutes. I stir occasionally until the vegetables soften. The onions should become translucent. This step makes the dish fragrant and tasty. - Add cherry tomatoes, smoked paprika, and oregano. - Stir in broth and rice. Now, I introduce the halved cherry tomatoes, smoked paprika, and dried oregano. I season with salt and pepper. I mix everything well until combined. Then, I pour in the broth and add the long-grain rice. I stir thoroughly to ensure the rice spreads out evenly in the mixture. - Bring mixture to a boil. - Cover and simmer until rice is tender. I increase the heat and bring the mixture to a boil. Once it bubbles, I reduce the heat to low. I cover the pot with a lid and let it simmer for about 20 minutes. I want the rice to be tender and soak up most of the liquid. - Fold in baby spinach. - Garnish and serve. After cooking, I remove the pot from the heat. I gently fold in the baby spinach. It wilts down nicely into the warm medley. Finally, I dish out the savory mix onto plates or bowls. I garnish each serving with fresh parsley for a pop of color and flavor. Enjoy your meal! - Use a heavy-bottomed pot for even cooking. - Adjust seasoning to enhance flavors. A heavy pot spreads heat well. This helps food cook evenly and reduces burning. I always choose my trusty Dutch oven for this dish. Seasoning is key to great taste. Start with salt and pepper, then adjust as needed. You can add more smoked paprika for a deeper flavor. - Pair with a side salad or crusty bread. - Use as meal prep for the week. Serving this dish with a fresh salad brightens the meal. A crusty bread is perfect for soaking up the yummy broth. This One Pot Smoked Sausage Dinner is great for meal prep. You can easily store it in portions for quick lunches. - Opt for turkey sausage for a lighter version. - Substitute quinoa for rice for extra protein. Turkey sausage cuts back on fat but keeps the flavor. It's a smart swap if you want a lighter meal. Quinoa packs in protein and fiber. It cooks well in this dish and adds a nutty taste. Pro Tips Use High-Quality Sausage: Selecting a good quality smoked sausage can elevate the flavor of your dish significantly. Look for sausages made with natural ingredients and minimal fillers. Adjust Spice Levels: If you prefer a spicier kick, consider adding a pinch of cayenne pepper or red pepper flakes to the sautéed vegetables for extra heat. Vegetable Variations: Feel free to customize the vegetable mix according to your preference. Zucchini, mushrooms, or even corn can be wonderful additions to this medley. Let it Rest: After removing the pot from heat, let the dish sit covered for a few minutes before serving. This allows the flavors to meld together beautifully. {{image_4}} You can switch up the sausage for different types. Try chicken or turkey sausage for a lighter touch. You can also use spicy sausage if you crave more heat. Seasonal vegetables are a great addition too. Use zucchini in summer or butternut squash in fall. Mixing in these fresh veggies adds flavor and color. To boost the taste, add crushed red pepper for a kick. Just a pinch can change the whole dish. Fresh herbs like thyme or rosemary also work well. They add depth and a lovely aroma that fills your kitchen. Experiment with what you love to make this dish your own. If you want a meatless meal, swap out the sausage for plant-based sausage. This keeps the dish hearty while cutting out meat. You can also increase the veggies to make it filling. Try adding mushrooms, carrots, or even sweet potatoes for extra flavor. This way, you get a colorful, wholesome meal without losing taste. To keep your One Pot Smoked Sausage Dinner fresh, store any leftovers in an airtight container. This helps prevent spoilage and keeps flavors intact. Consume within 3-4 days for best quality. If you wait longer, the taste may suffer. If you want to save some for later, cool the dish completely before freezing. This step is key to avoid ice crystals. Store in freezer-safe containers for up to 3 months. Label the containers with the date to keep track of how long they’ve been in the freezer. When it's time to eat again, reheat your dish on the stovetop or in the microwave. If the rice seems too dry, add a splash of broth. This will help revive the dish and keep it moist. Enjoy your tasty meal just like it was fresh! Yes, it's perfect for meal prep. You can cook it ahead of time. Store it in the fridge. This way, you have a quick meal ready to go. A green salad or steamed vegetables work well. They add freshness and balance. You could also serve it with crusty bread for a hearty meal. Add jalapeños or chili flakes to the mix. You can start with a small amount. Taste it as you go to find the right heat for you. Yes, ensure that the broth and sausage are gluten-free. Check labels on your ingredients. This way, everyone can enjoy the meal. Yes, but adjust the cooking time as brown rice takes longer to cook. You might need to add a bit more broth too. Just keep an eye on it while it simmers. This blog post shared a simple and tasty One Pot Smoked Sausage Dinner. I walked you through the main ingredients, cooking steps, and tips for the best meal prep. You learned how to make it your own with ingredient swaps and flavor changes. Remember, you can store leftovers easily and reheat them when needed. This meal is quick, versatile, and satisfying. Get creative and enjoy every bite!

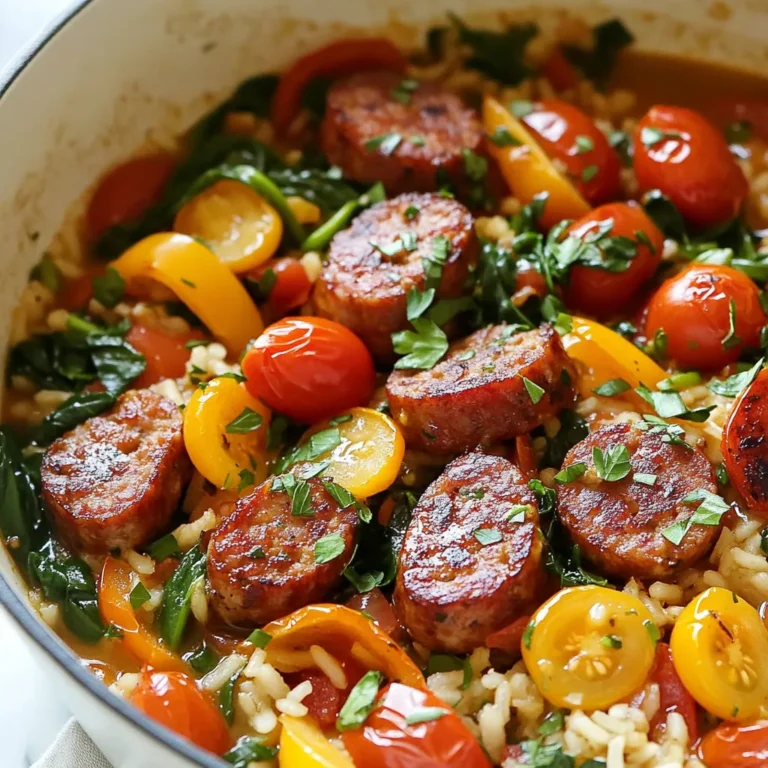
One Pot Smoked Sausage Dinner Quick and Tasty Meal

- 2 boneless, skinless chicken breasts - 1 cup Greek yogurt - 1/2 cup low-sodium chicken broth - 1 cup fresh spinach, chopped - 1/2 cup sun-dried tomatoes, roughly chopped - 2 cloves garlic, minced - 1 teaspoon dried basil - 1 teaspoon dried oregano - Salt and black pepper to taste - 1 tablespoon olive oil - 1/4 cup grated Parmesan cheese - Fresh parsley, chopped The main ingredients are the heart of this recipe. I love the chicken breasts because they stay juicy and cook evenly. Greek yogurt brings a creamy texture and a protein boost. Low-sodium chicken broth adds flavor without being too salty. For the additional ingredients, fresh spinach adds color and nutrients. Sun-dried tomatoes add a burst of sweetness. Garlic gives a strong, savory taste. Dried basil and oregano round out the flavor. Salt and pepper help bring all the tastes together. You can garnish the dish with grated Parmesan cheese for a salty kick. Fresh parsley adds a vibrant touch. These little details make a big difference in presentation and taste. {{ingredient_image_2}} - Seasoning the chicken Start by seasoning both sides of the chicken breasts. Use salt, black pepper, and dried basil. This mix boosts the flavor and makes each bite tasty. - Cooking the chicken Heat olive oil in a large skillet over medium heat. When the oil shimmers, add the seasoned chicken breasts. Cook them for about 6-7 minutes on each side. Look for a golden brown color. Make sure the chicken is cooked through. Once done, take the chicken out and put it on a plate to rest. - Sautéing garlic and sun-dried tomatoes In the same skillet, add minced garlic. Sauté for about one minute until it smells good. Watch closely so the garlic does not burn. Next, add the chopped sun-dried tomatoes. Cook for two more minutes while stirring often. - Incorporating chicken broth and Greek yogurt Pour in the low-sodium chicken broth and bring it to a gentle simmer. This step helps blend the flavors. Once it simmers, lower the heat. Gradually stir in the Greek yogurt. Mix until it is smooth. Let it simmer for about three minutes, stirring now and then to keep it creamy. - Adding spinach and chicken back to the skillet Toss in the chopped spinach and cook until it wilts. This usually takes about 2-3 minutes. Then, return the cooked chicken to the skillet. Nestle it in the creamy sauce and let it heat through for another two minutes. - Adjusting seasoning before serving Taste the sauce and adjust the seasoning if needed. Add more salt or pepper to suit your taste. When ready, serve the chicken on plates, drizzling it with the creamy sauce. Enjoy your meal! - To ensure chicken is cooked through, use a meat thermometer. The chicken should reach 165°F. - To avoid curdling Greek yogurt, add it off the heat. Mix it slowly into the sauce. - Adjust seasoning by tasting as you cook. Add more salt or pepper if needed. - Serve the chicken over quinoa or rice for extra flavor and texture. A lemon wedge adds brightness. - Lower calories by using non-fat Greek yogurt instead of regular yogurt. - Increase protein by adding a scoop of protein powder to the Greek yogurt sauce. Pro Tips Perfectly Cooked Chicken: Use a meat thermometer to ensure your chicken reaches an internal temperature of 165°F (75°C) for safe consumption and optimal juiciness. Enhance Flavor with Marinade: Marinating chicken breasts in Greek yogurt for at least 30 minutes before cooking can further tenderize the meat and infuse it with flavor. Customizable Creamy Sauce: Feel free to add additional vegetables such as bell peppers or mushrooms for a more colorful and nutritious sauce variation. Storage Tips: Store any leftovers in an airtight container in the refrigerator for up to 3 days. Reheat gently on the stove to maintain creaminess. {{image_4}} You can easily switch up the protein in this dish. If you prefer turkey, use turkey breasts instead of chicken. For a plant-based option, tofu works well too. Just make sure to press the tofu to remove excess moisture. This will help it absorb flavors better. Greek yogurt adds creaminess, but you can swap it for sour cream or cottage cheese. Each option brings its unique taste and texture. If you want a dairy-free choice, try using vegan yogurt made from coconut or almond milk. Enhancing the flavor of your creamy chicken is simple. Try adding herbs like thyme or rosemary. Fresh herbs can brighten the dish. You can also experiment with spices like paprika or cayenne for a little heat. Don’t forget about vegetables! Bell peppers or mushrooms can add depth. You can sauté them with the garlic for a tasty twist. Pair your creamy chicken with various sides. Quinoa or whole-grain rice makes a great base. You can also serve it with mashed potatoes for a comforting meal. If you’re watching carbs, consider serving it over steamed cauliflower rice or zucchini noodles. Both options are light and delicious. They soak up the creamy sauce nicely and keep the meal healthy. To keep your High Protein Creamy Chicken fresh, start with proper cooling. Allow the dish to cool down for about 30 minutes at room temperature. This helps avoid condensation in your storage containers. Use airtight containers to keep moisture in and air out. Glass containers work well as they do not stain and are easy to clean. When it’s time to enjoy leftovers, reheating is key. For the best results, use a stovetop method. Place the chicken in a skillet over low heat. Add a splash of chicken broth or a bit more Greek yogurt. Stir gently to prevent the sauce from separating. If you prefer using a microwave, cover the dish with a damp paper towel to keep the chicken moist. Heat in short bursts, stirring in between. In the fridge, your creamy chicken will last for about 3 days. Make sure to store it in an airtight container. If you want to keep it longer, consider freezing. It can be frozen for up to 3 months. When freezing, portion it out for easy meals later. Thaw it overnight in the fridge before reheating for the best flavor and texture. Can I use frozen chicken breasts for this recipe? Yes, you can use frozen chicken breasts. Just make sure to thaw them first. This helps the chicken cook evenly. If you cook from frozen, increase the cooking time. Aim for an internal temperature of 165°F to ensure safety. What can I substitute for Greek yogurt? You can use sour cream or plain yogurt. These options will keep the dish creamy. Another choice is cottage cheese, which adds protein but may change the texture slightly. Choose what you prefer based on taste and diet. How much protein is in each serving? Each serving provides about 40 grams of protein. Chicken breasts are a great source of protein. Greek yogurt also adds a nice boost, helping you meet your daily needs. Are there any dietary restrictions for this dish? This dish is generally gluten-free and low in carbs. However, it does contain dairy from the Greek yogurt and Parmesan cheese. If you're lactose intolerant or vegan, consider using dairy-free alternatives. Can this recipe be made in a slow cooker? Yes, you can make this in a slow cooker. Just add all the ingredients and cook on low for 4-6 hours. This method will make the chicken very tender and infuse flavors well. What cooking methods can be used for the chicken? You can grill, bake, or pan-sear the chicken. Grilling adds a nice char flavor. Baking is easy and hands-off. Pan-searing gives a golden crust. Choose the method that fits your time and taste. This post covered a delicious high-protein creamy chicken recipe. We discussed key ingredients, simple steps, and helpful tips. You now know how to create a tasty sauce using Greek yogurt and chicken broth. I also shared variations if you want to switch things up or adjust flavors. Remember, cooking can be fun and healthy. Feel free to experiment with ingredients and enjoy your meal! Healthy eating never tasted this good.

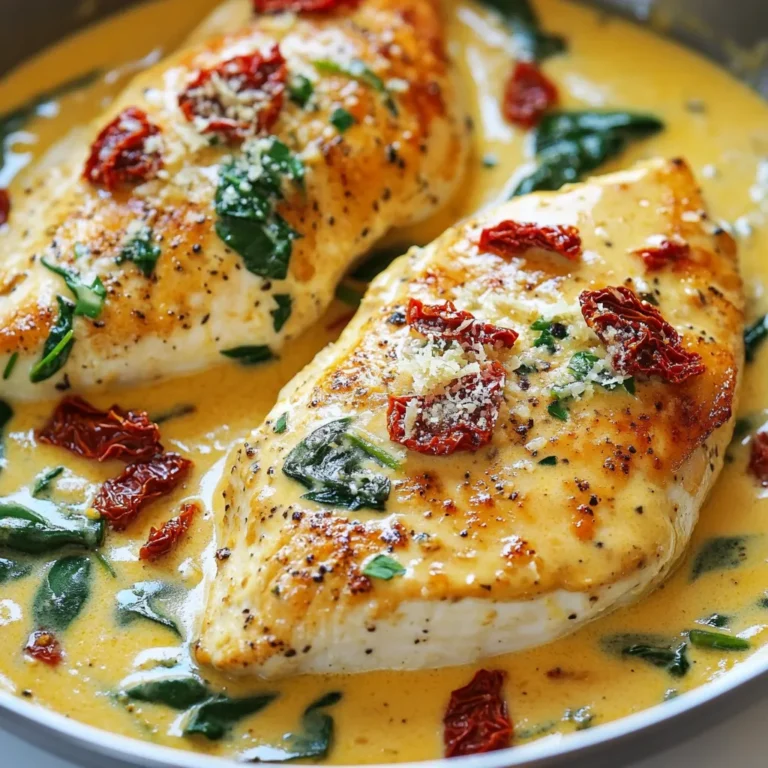
High Protein Creamy Chicken for a Flavorful Meal

- 1 lb ground chicken - 1 cup fresh spinach, finely chopped - 1/2 cup white cheddar cheese, shredded - 1/4 cup breadcrumbs - 1 large egg - 2 cloves garlic, minced - 1 teaspoon onion powder - 1 teaspoon salt - 1/2 teaspoon black pepper - Avocado slices - Sliced tomatoes - Crisp lettuce - Additional white cheddar cheese The main ingredients form the heart of your White Cheddar Spinach Chicken Burgers. Ground chicken keeps it light and healthy. Fresh spinach adds color and nutrients. White cheddar cheese melts beautifully and gives a rich flavor. Breadcrumbs help bind everything together, while the egg acts as a great adhesive. For seasonings, I use minced garlic for a punch and onion powder for sweetness. Salt and black pepper balance the taste. You can adjust these to fit your flavor preference. Optional toppings let you customize your burger. Creamy avocado slices add richness, while crisp lettuce and fresh tomatoes add crunch. You can even add more white cheddar on top for extra cheesiness. {{ingredient_image_2}} - In a large bowl, combine all your ingredients. Use: - 1 lb ground chicken - 1 cup fresh spinach, finely chopped - 1/2 cup white cheddar cheese, shredded - 1/4 cup breadcrumbs - 1 large egg - 2 cloves garlic, minced - 1 teaspoon onion powder - 1 teaspoon salt - 1/2 teaspoon black pepper - Mix everything well. You can use your hands or a spatula. Make sure there are no dry spots. This helps all the flavors blend nicely. - Divide the mixture into four equal portions. Each should be about the same size. This ensures even cooking. - Shape each portion into a patty. Aim for a thickness of about 3/4 inch. This thickness helps them cook right. - Heat a non-stick skillet on medium heat. Add 1 tablespoon of olive oil. Wait until the oil shimmers. - Place the patties in the skillet. Space them well to avoid sticking. Cook for 5-6 minutes without flipping. Look for a golden brown color. - Flip the burgers carefully. Cook them for another 5-6 minutes. Use a meat thermometer to check the internal temperature. It should reach 165°F (75°C) and not be pink in the center. - In the last minute, add more white cheddar cheese on top. Let it melt beautifully. - Once done, take the burgers out of the skillet. Let them rest for a minute. If you want, toast the burger buns in the skillet till they are lightly browned. - To serve, place each patty on a bun. Add any toppings you like, such as avocado, tomatoes, or lettuce. Finish with the top bun. To get a crispy texture on your burgers, use a non-stick skillet. Make sure the oil is hot before adding the patties. This helps them brown nicely. Cook them without flipping for the first 5-6 minutes. This also locks in juices. When you flip, let them cook for another 5-6 minutes. Use a meat thermometer to check if they reach 165°F. This ensures they are safe to eat without being dry. If you want to switch up the protein, use ground turkey or plant-based meat. Both options work well. For cheese, try mozzarella or feta if you prefer something different. These will give your burgers a unique taste while still being delicious. For a complete meal, serve your burgers with sweet potato fries or a fresh salad. Both add color and crunch. You can place your burgers on a rustic wooden board for a fun presentation. Garnish with fresh herbs like parsley or cilantro for an extra pop. This makes your dish look great and adds flavor. Pro Tips Use Fresh Spinach: Opt for fresh spinach instead of frozen for a vibrant color and better texture in your burgers. Experiment with Cheese: Feel free to mix different types of cheese like feta or mozzarella for a unique flavor twist. Check Doneness: Always use a meat thermometer to ensure your chicken burgers reach an internal temperature of 165°F (75°C) for safety. Customize Toppings: Get creative with your toppings! Consider adding a spicy aioli or pickled jalapeños for an extra kick. {{image_4}} Want to add more taste to your burgers? Try mixing in some fresh herbs. Basil and dill work great. They add a bright, fresh flavor. You can also spice things up. Add red pepper flakes or a pinch of cayenne. This gives your burgers a nice kick. You can change the shape of your dish too. Instead of burgers, make a meatloaf with the same mix. Just pour it into a loaf pan and bake. It cooks evenly and stays juicy. Or, make sliders with smaller patties. They are perfect for parties and fun to eat. Just adjust the cooking time for smaller sizes. If you need gluten-free burgers, no worries! You can use oats or ground flaxseed as a binder. They work well to hold the mixture together. For buns, look for gluten-free brands. Many stores have tasty options. You can enjoy the same great flavor without gluten. To store leftover burgers, let them cool first. Place them in an airtight container. This helps keep them fresh. You can keep them in the fridge for up to three days. I recommend using glass or plastic containers with tight lids. This keeps the burgers moist and prevents them from absorbing other smells. You can freeze both uncooked and cooked patties. For uncooked patties, wrap each one in plastic wrap. Place them in a freezer bag. Remove as much air as you can. They can last up to three months. For cooked patties, let them cool before freezing. Wrap them the same way as uncooked patties. They also last up to three months. To thaw, place the patties in the fridge overnight. You can also use the microwave. Just use the defrost setting to avoid cooking them. To reheat without drying out, use a skillet. Heat a little oil over low heat. Add the burgers and cover them. This keeps the moisture in. Cook until they are hot, about 5 minutes. You can also use a microwave, but be careful. Place the burger on a microwave-safe plate. Cover it with a damp paper towel. Heat for about 30 seconds, then check the warmth. If needed, heat for another 15 seconds. To check if your chicken burgers are done, use a meat thermometer. The safe internal temperature for chicken is 165°F (75°C). This ensures the burgers are cooked through and safe to eat. Look for no pink in the center. The burgers should be golden brown on the outside. Checking the temperature is crucial to avoid undercooked meat. Yes, you can prepare these burgers ahead of time. Mix the ingredients and shape them into patties. You can store them in the fridge for up to one day. If you want to make them even earlier, freeze the uncooked patties. Just wrap them well in plastic wrap. Thaw them overnight in the fridge before cooking. This makes meal prep easy and quick. These burgers pair well with many sides. Consider serving them with crispy sweet potato fries. A fresh salad complements the flavors nicely. You can also try coleslaw for a crunchy bite. For drinks, a light lager or iced tea works great. Feel free to mix and match your favorites for a complete meal. In this post, we explored making White Cheddar Spinach Chicken Burgers. We covered the key ingredients, including ground chicken and fresh spinach, to create a tasty mixture. I shared steps for preparation, shaping, and cooking the patties. You learned cooking tips and ways to customize your burgers. Finally, we discussed storage options and answered common questions. These burgers are more than just a meal; they are a fun twist on your classic burger. Enjoy making them your own!

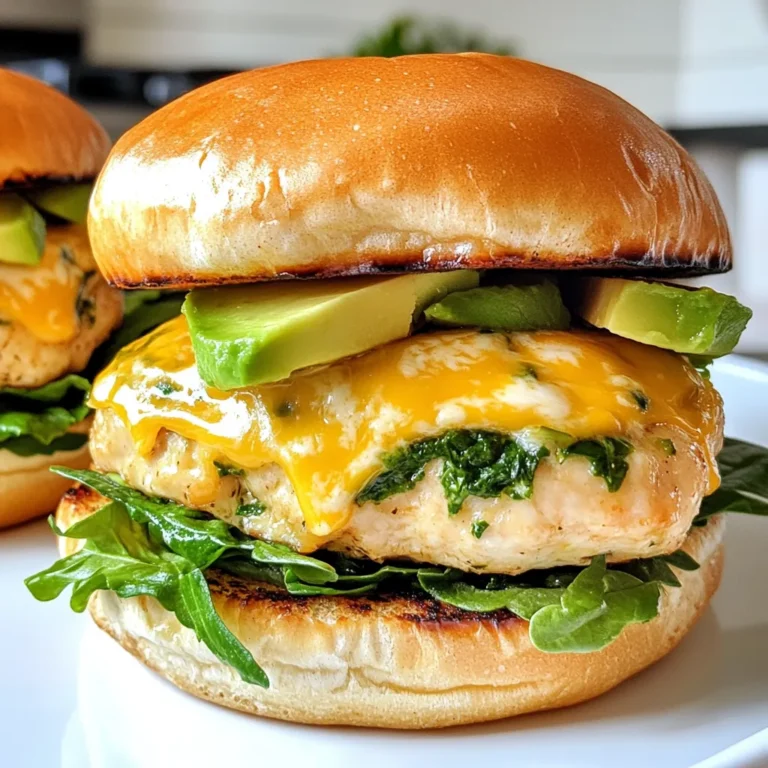
White Cheddar Spinach Chicken Burgers Flavorful Delight

- 2 boneless, skinless chicken breasts, diced into 1-inch pieces - 2 tablespoons olive oil - 3 cloves garlic, minced - 3 cups low-sodium chicken broth - 12 oz fettuccine pasta - 1 cup heavy cream - 1 cup freshly grated Parmesan cheese - 1 teaspoon Italian seasoning - Fresh salt and freshly cracked black pepper to taste - Chopped fresh parsley for garnish When making Instant Pot Chicken Alfredo Pasta, I always start with quality ingredients. Fresh chicken breast makes a big difference. I prefer to use boneless, skinless pieces. They cook quickly and stay tender. Next, I reach for olive oil. This oil adds flavor and helps with cooking. Garlic is another key ingredient. The aroma fills your kitchen and makes the dish even better. I use three cloves for a nice punch. Chicken broth is vital for flavor. Low-sodium broth lets you control the saltiness. For the pasta, I like fettuccine. It holds the sauce well and gives a nice bite. Cream is what makes this dish rich and smooth. Heavy cream creates that famous Alfredo texture. Don’t forget the Parmesan cheese! Freshly grated cheese melts perfectly, adding depth to the sauce. A little Italian seasoning adds warmth and flavor. Finally, I season with salt and freshly cracked black pepper. You can adjust these to your taste. A sprinkle of chopped parsley on top gives a fresh look and taste. With these ingredients ready, you are set for a tasty meal. Each one plays an important role in creating a creamy, flavorful dish. {{ingredient_image_2}} Preparing the Instant Pot To start, set your Instant Pot to the sauté function. Wait for it to get hot. Cooking the Chicken Add 2 tablespoons of olive oil. Then, put in 2 diced chicken breasts. Stir the chicken for 5-7 minutes until it is golden brown. Season it with salt and pepper. Once done, take the chicken out and set it aside. Timing and Tips for Perfect Garlic In the same pot, add 3 minced garlic cloves. Sauté for about 1 minute. Stir constantly to keep it from burning. Importance of Scraping the Pot Make sure to scrape the bottom of the pot. This gets the tasty browned bits into your dish. Adding Broth and Pasta Pour in 3 cups of low-sodium chicken broth. Use a wooden spoon to mix well. Then, gently add 12 oz of fettuccine pasta. Ensuring Proper Submersion Press the pasta down if needed. Ensure it’s all under the broth for even cooking. Securing the Lid and Valve Position Next, secure the lid on the Instant Pot. Make sure the valve is set to sealing. Cooking Time and Pressure Release Cook on high pressure for 6 minutes. When done, carefully do a quick release to let out the steam. Combining Ingredients After Cooking After releasing the pressure, open the lid slowly. Stir in 1 cup of heavy cream and 1 cup of grated Parmesan cheese. Add the cooked chicken back in. Adjusting Seasoning and Consistency Mix everything well until the cheese melts. Taste the sauce and adjust with salt and pepper if needed. Ladling the Pasta Scoop the creamy pasta into bowls. Presentation Tips and Garnishes Top with chopped parsley for a fresh look. Serve with extra Parmesan and garlic bread for a special touch. Enjoy! Cooking Time for Tender Chicken To get tender chicken, cook it for 5-7 minutes. Sauté it until golden brown. Make sure it cooks through before you take it out. This step makes your dish flavorful and juicy. Marinades and Seasonings Suggestions Using marinades can add great flavor to your chicken. Try a mix of olive oil, lemon juice, and Italian herbs. Let the chicken soak for at least 30 minutes. This makes it more tasty and moist. You can also season it with salt, pepper, and garlic powder. Adjusting Sauce Consistency If your sauce is too thick, add more heavy cream. A little chicken broth can help too. Stir well until you reach your desired creaminess. If it’s too thin, let it cook for a few more minutes. This will help it thicken up nicely. Common Mistakes to Avoid Avoid burning the garlic; it can make your sauce bitter. Sauté it for just one minute. Also, be careful not to overcook the pasta. It should be al dente, which means firm to the bite. Cleaning and Maintaining the Instant Pot After cooking, let the pot cool down before cleaning. Use warm, soapy water and a soft sponge. Make sure to clean the sealing ring well to avoid smells. Always check the vent for any food residue. Troubleshooting Common Issues If your pot does not come to pressure, check the sealing ring. Make sure it is in place and not damaged. If your food burns, add more liquid next time. The browning bits at the bottom can give great flavor, but too much can cause burning. Pro Tips Rest the Chicken: After sautéing, let the chicken rest for a few minutes before adding it back to the pot. This helps retain its juices and keeps it tender. Use Fresh Ingredients: For the best flavor, use fresh garlic and high-quality Parmesan cheese. Fresh ingredients can elevate the dish significantly. Don’t Overcook the Pasta: When adding the fettuccine, be careful not to overcook it during the pressure cooking phase. It should be al dente for the best texture. Adjust the Creaminess: If you prefer a creamier sauce, feel free to add more heavy cream or cheese to your liking after pressure cooking. {{image_4}} You can easily add veggies to your Chicken Alfredo Pasta. Try adding: - Broccoli florets - Spinach - Peas - Bell peppers These veggies boost nutrition and add color. Just stir them in after cooking the pasta. They will cook quickly in the hot sauce. If you want to switch from chicken, use these: - Shrimp - Tofu - Turkey These proteins work well and bring new flavors. Adjust cooking times if needed. Shrimp cooks fast, while turkey may need a bit longer. To make this dish gluten-free, use gluten-free pasta. Many brands offer great-tasting options. Just follow the cooking times on the package. You can still enjoy the creamy sauce with your favorite gluten-free noodles. If you need a dairy-free option, replace heavy cream and cheese with: - Coconut milk - Nutritional yeast These swaps keep the dish creamy and add unique flavors. Taste as you go to find the right balance. You can adjust the seasonings to fit your taste. Try adding: - Red pepper flakes for heat - Fresh herbs like basil or thyme These changes can elevate your dish. Start with small amounts and taste as you mix. For a cheesy twist, try mixing in: - Mozzarella - Gouda - Asiago Each cheese will change the flavor profile. Choose what you like best for a rich, creamy dish. - Place leftovers in an airtight container. - Let the dish cool before sealing. - Store in the fridge for up to 3 days. Chicken Alfredo pasta tastes great the next day. The flavors blend well overnight. - Use the microwave for quick reheating. - Heat in short intervals, stirring in between. - You can also reheat on the stove. To keep the creaminess, add a splash of milk or cream. Stir well while heating. - For freezing, cool the dish completely first. - Place it in a freezer-safe container. - It can last up to 3 months in the freezer. When ready to eat, thaw in the fridge overnight. Reheat gently on the stove or microwave. The total time to cook this dish is about 30 minutes. It takes 10 minutes to prep and 20 minutes to cook. You can sauté the chicken and garlic in about 7 minutes. Cooking the pasta under pressure takes only 6 minutes. Yes, you can use other types of pasta. Penne or rigatoni work well too. Just adjust the cooking time if needed. Smaller pastas, like macaroni, may cook faster. If you want a lighter option, use half-and-half instead of heavy cream. For a dairy-free choice, try coconut cream or cashew cream. These options keep the dish creamy and rich without the dairy. To prevent sticking, make sure the pasta is fully submerged in the broth. Stir the pasta gently when you add it. Also, using enough liquid helps keep the pasta from clumping together. Yes, you can make this recipe ahead of time. Cook the pasta and store it in the fridge for up to 3 days. Reheat it on the stove or in the microwave. Add a splash of chicken broth to help it stay creamy. This blog post detailed how to make Instant Pot Chicken Alfredo Pasta. You learned about key ingredients, step-by-step cooking, and storage tips. Perfecting your dish involves using the right techniques and making adjustments for taste. Don’t hesitate to try variations or substitutes based on your needs. Remember, this dish is great fresh or as leftovers. Enjoy making a meal that your family will love!

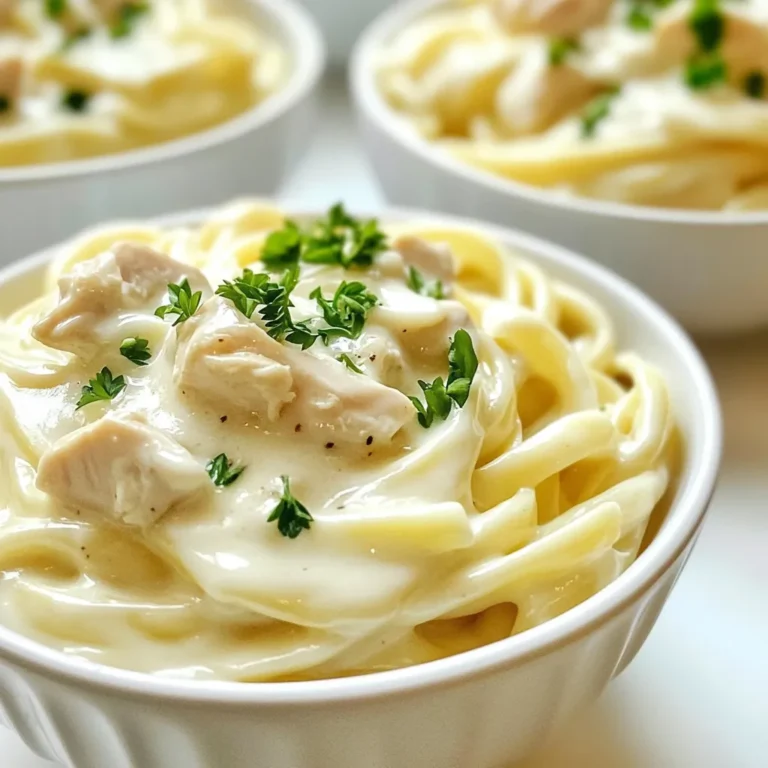
Instant Pot Chicken Alfredo Pasta Simple and Tasty

- 1 ½ cups graham cracker crumbs - ½ cup unsalted butter, melted - ¼ cup granulated sugar - 16 oz cream cheese, softened at room temperature - 1 cup granulated sugar - 1 teaspoon pure vanilla extract - 3 large eggs - 1 teaspoon ground cinnamon - 3 medium Granny Smith apples, peeled, cored, and thinly sliced - 2 tablespoons brown sugar - 1 teaspoon ground cinnamon - 1 tablespoon fresh lemon juice - 1 cup granulated sugar - 6 tablespoons unsalted butter (cut into pieces) - ½ cup heavy cream (at room temperature) - 1 teaspoon sea salt {{ingredient_image_2}} Start by preheating your oven to 350°F (175°C). In a bowl, mix 1 ½ cups of graham cracker crumbs, ½ cup of melted unsalted butter, and ¼ cup of granulated sugar. Stir until the mix looks like wet sand. Press this mix into the bottom of a 9-inch springform pan. Bake for 8-10 minutes until it turns golden brown. Let it cool completely. In a medium bowl, combine 3 thinly sliced Granny Smith apples, 2 tablespoons of brown sugar, 1 teaspoon of ground cinnamon, and 1 tablespoon of fresh lemon juice. Toss the apple slices gently until they are well-coated. Let the apples sit for a few minutes to soften. In a large bowl, use a hand mixer to beat 16 oz of softened cream cheese until creamy. Gradually add 1 cup of granulated sugar and 1 teaspoon of vanilla extract, mixing until smooth. Add 3 large eggs one at a time, mixing on low speed. Finally, stir in 1 teaspoon of ground cinnamon for flavor. Pour half of the cheesecake batter over the cooled crust, spreading it evenly. Layer the apple filling on top of this cheesecake layer. Pour the rest of the cheesecake batter on top and smooth it out. Place the springform pan in the oven and bake for 50-60 minutes. The edges should set, but the center should jiggle slightly. Turn off the oven and let the cheesecake cool inside for an hour with the door slightly open. This step helps prevent cracks. In a medium saucepan over medium heat, melt 1 cup of granulated sugar while stirring. Keep a close watch as it turns golden amber. Once melted, add 6 tablespoons of butter, stirring to mix. Slowly pour in ½ cup of room-temperature heavy cream while stirring until smooth. Add 1 teaspoon of sea salt and let the sauce cool. Once the cheesecake cools down, cover it and refrigerate for at least 4 hours, but overnight is best. This will help the flavors develop well. When you are ready to serve, carefully remove the sides of the springform pan. Drizzle the cheesecake with the salted caramel sauce and sprinkle some sea salt on top. Slice into wedges and enjoy! To make a great crust, use fresh graham cracker crumbs. Mix them with melted butter and sugar. Press the mixture firmly into the pan. Bake until golden brown. This gives your crust a nice crunch. Let it cool completely before adding the filling. For a creamy cheesecake, use room temperature cream cheese. Beat it well to remove lumps. Add sugar and vanilla slowly. Mix in the eggs one at a time. This helps keep the cheesecake smooth. Don’t overmix once you add the eggs; it can make the cheesecake dense. To prevent cracks, bake your cheesecake at a low temperature. The center should jiggle slightly when done. After baking, leave it in the oven with the door ajar. This gentle cooling helps avoid sudden temperature changes that cause cracks. Serve your cheesecake chilled for the best flavor. Drizzle warm salted caramel over each slice. For a fun twist, sprinkle some nuts on top. You can also add a thin apple slice on the side for extra flair. Enjoy every bite! Pro Tips Use Room Temperature Ingredients: Ensure your cream cheese and eggs are at room temperature before mixing. This helps create a smooth and creamy cheesecake batter without lumps. Prevent Cracking: Allow the cheesecake to cool slowly in the oven with the door ajar after baking. This gradual temperature change reduces the chances of cracking on the surface. Layering Technique: When adding the apple filling, make sure to spread it evenly to avoid sinking. This will help maintain distinct layers of cheesecake and apple filling. Chill Overnight: For best results, refrigerate the cheesecake overnight. This allows the flavors to meld together and the texture to set perfectly. {{image_4}} You can easily make this cheesecake gluten-free. Just swap the graham cracker crumbs for gluten-free crumbs. Look for brands made from nuts or gluten-free cookies. Use gluten-free butter as well. This way, everyone can enjoy a slice! Feel free to change the apples! In fall, use tart apples like Granny Smith. In summer, try berries like raspberries or blueberries. You can even mix fruits for a unique taste. Each season brings new flavors to explore! Want to spice things up? Add nutmeg or allspice for warmth. A splash of almond extract gives a nice twist. These flavors blend well with the apples and caramel. Experiment to find your favorite mix! Store your salted caramel apple pie cheesecake in the fridge. Use an airtight container. This keeps it fresh and tasty. It lasts for up to five days. If you want to serve it later, it’s best to keep the salted caramel sauce separate. You can freeze this cheesecake if you need to keep it longer. First, wrap it tightly in plastic wrap. Then, place it in a freezer-safe bag. It can stay in the freezer for up to three months. To thaw, move it to the fridge overnight before serving. If you want to warm your cheesecake, a gentle method works best. Preheat your oven to 300°F (150°C). Place the cheesecake on a baking sheet. Heat it for about 10-15 minutes. This warms it without overcooking. Remember to drizzle fresh salted caramel sauce before serving for extra flavor! To slice cheesecake, use a sharp knife. Dip the knife in hot water first. Wipe it dry before each cut. This keeps the slices clean and neat. For best results, chill the cheesecake overnight. Cold cheesecake firms up, making it easier to slice. Yes, you can make this cheesecake a day ahead. It tastes great after chilling overnight. This also allows the flavors to blend well. Just cover it tightly in the fridge. When ready to serve, drizzle on the salted caramel sauce. To prevent cracks, keep the oven temperature low. Avoid overmixing the batter. Always bake the cheesecake until the edges are set but the center jiggles slightly. After baking, leave the cheesecake in the oven with the door ajar. This gentle cooling helps avoid cracks. If you need a substitute for cream cheese, use mascarpone cheese. It has a similar texture and taste. You can also try Greek yogurt for a lighter option. However, the flavor will change slightly. To recap, we explored the delicious world of cheesecake with layers of apples, caramel, and a perfect crust. I shared step-by-step instructions to guide you through making it. You learned tips to perfect each layer and variations to suit your needs. Remember, the key is patience—chill it well and serve it right for best results. Enjoy this treat with your friends and family, and don't forget to personalize it. With practice, you'll master this recipe and impress everyone. Happy baking!

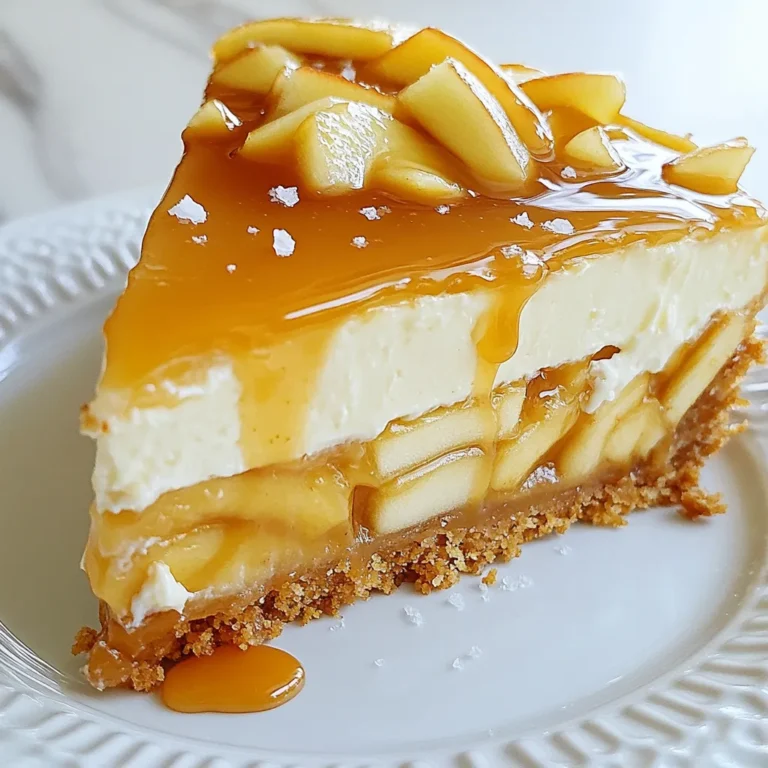
Salted Caramel Apple Pie Cheesecake Delight

- 1 lb ground beef - 1/2 cup breadcrumbs - 1/4 cup finely chopped onion - 1/4 cup grated Parmesan cheese The main ingredients bring the heartiness to the meatloaf cupcakes. Ground beef gives a rich flavor. Breadcrumbs help bind everything together. Finely chopped onion adds a sweet taste. Grated Parmesan cheese adds a salty kick. - 1/4 cup ketchup - 1 tablespoon Worcestershire sauce - 1 tablespoon Dijon mustard - 1 teaspoon garlic powder Flavor enhancers take these cupcakes to the next level. Ketchup adds sweetness and moisture. Worcestershire sauce gives a savory depth. Dijon mustard adds a tangy twist. Garlic powder brings a warm, aromatic touch. - 1 teaspoon smoked paprika - Salt and pepper to taste - 1/2 cup BBQ sauce - Fresh parsley for garnish Seasoning is key for delicious meatloaf cupcakes. Smoked paprika adds a hint of smokiness. Salt and pepper bring out all the flavors. BBQ sauce adds a sweet and sticky glaze. Fresh parsley gives a pop of color and brightness. {{ingredient_image_2}} - Preheat your oven to 350°F (175°C). - Line a muffin tin with paper cupcake liners to avoid sticking. - In a large mixing bowl, combine the following ingredients: - 1 lb ground beef - 1/2 cup breadcrumbs - 1/4 cup finely chopped onion - 1/4 cup grated Parmesan cheese - 1/4 cup ketchup - 1 tablespoon Worcestershire sauce - 1 tablespoon Dijon mustard - 1 egg, lightly beaten - 1 teaspoon garlic powder - 1 teaspoon smoked paprika - Salt and pepper to taste Mix everything well with your hands or a spatula. Ensure all the ingredients blend evenly. - Carefully scoop the meat mixture into each cupcake liner, filling them about three-quarters full. - Place the muffin tin in the oven and bake for 25 to 30 minutes. - Use a meat thermometer to check that the internal temperature reaches 160°F (71°C). Make sure to check a few cupcakes to confirm they are fully cooked. - Once baked, take the muffin tin out of the oven and let the cupcakes cool for about 5 minutes. - Drizzle your favorite BBQ sauce on top of each meatloaf cupcake for added flavor. - Return the cupcakes to the oven for another 5 to 10 minutes. This will caramelize the sauce slightly, giving it a nice glaze. - After caramelizing, let them cool for a few more minutes. - Lift the cupcakes out of the muffin tin carefully. - Just before serving, add a sprinkle of freshly chopped parsley on top for a pop of color and flavor. To make the best meatloaf cupcakes, start with the right meat mixture. You want it moist but not too wet. Use a mix of ground beef, breadcrumbs, and egg to bind it well. This gives a nice texture. For checking doneness, a meat thermometer is key. The internal temperature should reach 160°F. Always check a few to ensure they are all cooked. Pair these cupcakes with sides for a complete meal. A fresh side salad adds crunch and balance. You can also serve them with mashed potatoes or corn. For presentation, place the meatloaf cupcakes on a colorful platter. Drizzle extra BBQ sauce on top for a tasty look. A sprinkle of parsley adds a nice touch too. You can adjust the BBQ sauce to fit your taste. If you like it sweeter, use more ketchup. If you want it spicier, add some hot sauce. Feel free to mix in different herbs or spices. Chopped basil or thyme can add a nice twist to the flavor. Try garlic powder or onion powder for extra depth. Pro Tips Use Lean Meat: Opt for lean ground beef to reduce excess grease and ensure a healthier cupcake without sacrificing flavor. Customize the BBQ Sauce: Experiment with different types of BBQ sauce, such as spicy or honey-infused, to add unique flavors to your meatloaf cupcakes. Don’t Overmix: Mix the ingredients just until combined to avoid tough meatloaf cupcakes. Overmixing can lead to a dense texture. Cool Before Serving: Allow the cupcakes to cool slightly before serving; this helps them retain their shape and makes them easier to handle. {{image_4}} You can switch out the ground beef for different meats. Ground turkey or chicken works well. These options can make the dish lighter. For gluten-free needs, use gluten-free breadcrumbs. They help keep the texture right while catering to dietary needs. BBQ sauces can change the taste of your meatloaf cupcakes. Try smoky, sweet, or spicy types. You can also add spices like chili powder or cayenne for extra heat. Mixing in cheese, like cheddar or mozzarella, gives a creamy touch. Toss in some finely chopped vegetables, such as bell peppers or zucchini, for added nutrition and flavor. Meatloaf muffins are fun and easy to serve. They are perfect for parties or casual dinners. You can also serve them as traditional meatloaf. If you want bite-sized treats, make mini versions for appetizers. These small bites are great for gatherings and are easy to eat. To keep your Bourbon BBQ meatloaf cupcakes fresh, refrigerate them. Place them in an airtight container. This helps seal in moisture and flavor. They will stay good for up to three days in the fridge. Always allow them to cool before storing. This prevents condensation, which can make them soggy. For long-term storage, freezing is your best option. Wrap each cupcake tightly in plastic wrap. Then, place them in a freezer-safe bag or container. They can last up to three months in the freezer. When you are ready to enjoy them, thaw them in the fridge overnight. Reheat in the oven at 350°F (175°C) for about 15-20 minutes. This keeps them moist and tasty. These meatloaf cupcakes are perfect for meal prep. You can make them in advance for busy nights. Prepare a batch on the weekend and store them in the fridge. Portion them out for easy meals throughout the week. You can also freeze some to enjoy later. This way, you always have a fun, tasty meal ready to go. Can I make these cupcakes in advance? Yes, you can make these cupcakes ahead of time. Bake them fully, then cool. Store them in the fridge for up to three days. When ready to serve, just reheat them in the oven. This keeps them moist and tasty. What temperature should the meatloaf cupcakes reach? The meatloaf cupcakes must reach an internal temperature of 160°F (71°C). Use a meat thermometer to check the center. This ensures they are safe to eat and perfectly cooked. What can I use instead of ground beef? You can use ground turkey or chicken instead of ground beef. Both options are lean and still taste great. If you prefer a richer flavor, try ground pork. Can I replace BBQ sauce with something else? Yes, you can use other sauces like teriyaki or sweet chili sauce. For a smoky flavor, try a chipotle sauce. Just adjust the amount to match your taste. Are these cupcakes suitable for gluten-free diets? To make these cupcakes gluten-free, replace breadcrumbs with gluten-free breadcrumbs or ground oats. Check that your BBQ sauce is also gluten-free. How to make them dairy-free? To make the cupcakes dairy-free, skip the Parmesan cheese. You can use a dairy-free cheese or nutritional yeast for flavor. Always check labels for dairy ingredients in sauces. These meatloaf cupcakes are easy and fun to make. We covered the key ingredients, flavors, and seasoning that give them taste. The step-by-step guide helps you bake them perfectly. Tips showed you how to store and serve them well. Variations let you get creative using different meats and spices. Try these cupcakes for a tasty meal. They are great for busy nights or parties. Get cooking, and enjoy every bite!

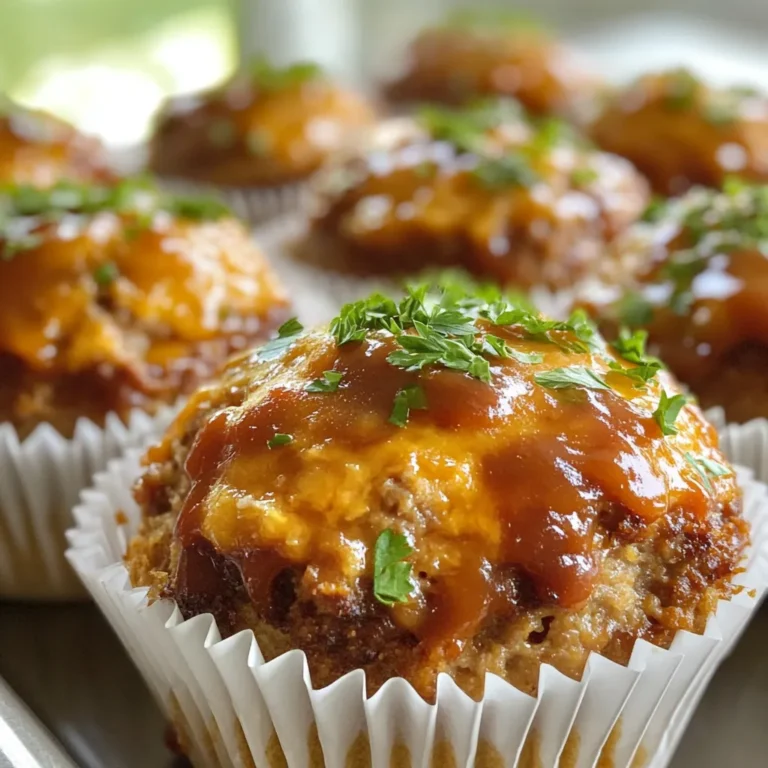
Bourbon BBQ Meatloaf Cupcakes Tasty and Fun Meal

- 2 boneless, skinless chicken breasts - 8 oz. fettuccine pasta - 2 cups fresh spinach - 1 cup cherry tomatoes, halved The main ingredients in Chicken Mozzarella Pasta create a tasty meal. Chicken breasts give protein and flavor. Fettuccine pasta is perfect for holding the sauce. Fresh spinach adds color and nutrients. Cherry tomatoes bring a sweet touch and a pop of freshness. - 1 cup shredded mozzarella cheese - Substitutions for mozzarella: provolone, gouda, or feta Mozzarella cheese is key for this dish. It melts beautifully and adds creaminess. You can swap it for provolone or gouda if needed. Feta gives a tangy flavor and works well too if you want something different. - 2 tablespoons olive oil - 2 cloves garlic, minced - 1 teaspoon dried basil - 1 teaspoon dried oregano - Salt and pepper to taste Olive oil is great for cooking the chicken. It adds richness and flavor. Garlic gives a nice aroma and taste. Dried basil and oregano add warmth and depth to the dish. Don't forget to season with salt and pepper for balance. {{ingredient_image_2}} 1. Start by bringing a large pot of salted water to a rolling boil. 2. Add 8 oz. of fettuccine pasta to the boiling water. 3. Cook the pasta according to the package instructions. This usually takes about 8-10 minutes. 4. Check the pasta for doneness; it should be al dente. 5. Once cooked, drain the pasta but save about ½ cup of the pasta water. Set the pasta aside. 1. While the pasta cooks, take 2 boneless, skinless chicken breasts. 2. Season both sides well with salt, pepper, dried basil, and dried oregano. 3. Make sure you cover the entire surface for even flavor. 4. Heat 2 tablespoons of olive oil in a large skillet over medium-high heat. 5. Once the oil is hot, add the seasoned chicken breasts. 6. Cook for 6-7 minutes on each side until golden brown. 7. Check the chicken's internal temperature; it should reach 165°F. 8. Transfer the cooked chicken to a cutting board and let it rest before slicing. 1. In the same skillet, keep the heat on medium and add 2 cloves of minced garlic. 2. Sauté the garlic for about 30 seconds until it smells fragrant. 3. Next, toss in 1 cup of halved cherry tomatoes. Cook for 2-3 minutes, stirring often. 4. The tomatoes should soften a bit but still hold their shape. 5. Add 2 cups of fresh spinach next. Stir until just wilted, which takes about a minute. 6. Make sure the vegetables remain tender but not mushy for the best texture. To ensure a creamy pasta consistency, always reserve some pasta water. This starchy water helps bind the sauce and pasta together. Add it slowly until you reach your desired creaminess. For the cheese, grate fresh mozzarella instead of using pre-shredded cheese. Fresh cheese melts better, giving you a smooth, rich texture. You can prepare components in advance to save time. Cook the chicken and chop the veggies a day early. Store each item in separate containers in the fridge. For leftovers, place them in airtight containers. They will last for three to four days. Reheat gently on the stove, adding a splash of water to help revive the sauce. Garnish with fresh basil leaves for a pop of color and flavor. You can also sprinkle some extra cheese on top before serving for a more indulgent dish. Pair this meal with a side salad or garlic bread to make it a complete dinner. Each element adds freshness and balance to your plate. Pro Tips Use Fresh Ingredients: Always opt for fresh spinach and ripe cherry tomatoes for the best flavor. Fresh ingredients elevate the dish and provide vibrant color. Perfectly Cooked Chicken: Ensure your chicken reaches an internal temperature of 165°F. Use a meat thermometer for accuracy, which helps prevent overcooking and dryness. Cheese Melting Tips: To achieve that gooey, cheesy texture, add mozzarella cheese off the heat. This prevents it from becoming rubbery while still allowing it to melt beautifully. Customize Your Pasta: Feel free to add your favorite vegetables like bell peppers or zucchini for added nutrition and flavor. This dish is versatile and can be tailored to your taste. {{image_4}} You can switch out chicken for other proteins. Tofu is a great choice for a vegetarian meal. Shrimp also works well if you want seafood. Both options give a nice twist to the dish. For the pasta, try different types. Penne or spaghetti can change the texture and look. Each pasta type holds sauce differently, so pick one that you love. Want to spice things up? Add red pepper flakes for a kick. Just a pinch can make a big difference. This adds warmth without overpowering the dish's main flavors. You can also use different herbs. Fresh thyme or parsley can brighten the taste. Experiment with what you have at home for a unique twist. If you need gluten-free options, choose gluten-free pasta. Many brands offer great substitutes. They cook similarly to regular pasta, so you won't miss out. For a vegan version, replace mozzarella with vegan cheese. There are many tasty options available now. You can enjoy the same creamy texture without dairy. To keep your chicken mozzarella pasta fresh, use airtight containers. Glass or plastic containers work well. Make sure to let the pasta cool down before sealing. Store it in the fridge. It stays good for about 3 to 4 days. If you want to save it longer, consider freezing. You can freeze chicken mozzarella pasta for up to 2 months. First, let it cool completely. Then, place it in freezer-safe bags or containers. Squeeze out the air to prevent freezer burn. When you want to eat it, take it out of the freezer. Let it thaw in the fridge overnight. To reheat, place it in a skillet on medium heat. Add a splash of water or broth to keep it moist. Stir until it's hot throughout. Enjoy your tasty meal again! It takes about 30 minutes to make Chicken Mozzarella Pasta. You spend 10 minutes prepping the ingredients. The cooking time is roughly 20 minutes. This means you can enjoy a tasty meal in no time! Yes, you can use frozen chicken. It’s best to thaw it first for even cooking. You can do this overnight in the fridge or use the microwave. Once thawed, season and cook just like fresh chicken. This makes meal prep easy and quick! If you don’t have mozzarella, try using provolone or gouda. Both cheeses melt well and add great flavor. You could also use a dairy-free cheese for a vegan option. These swaps will still give you a creamy texture and tasty dish. Chicken Mozzarella Pasta is easy and tasty. We covered the key ingredients, like chicken and fettuccine, alongside cheese choices and seasonings. The step-by-step guides show you how to cook pasta, prepare chicken, and sauté veggies. I shared tips to perfect the dish and meal prep ideas. You can even explore variations to suit your taste. Now, enjoy crafting this meal and impressing your friends. Flavor and fun await in your kitchen!

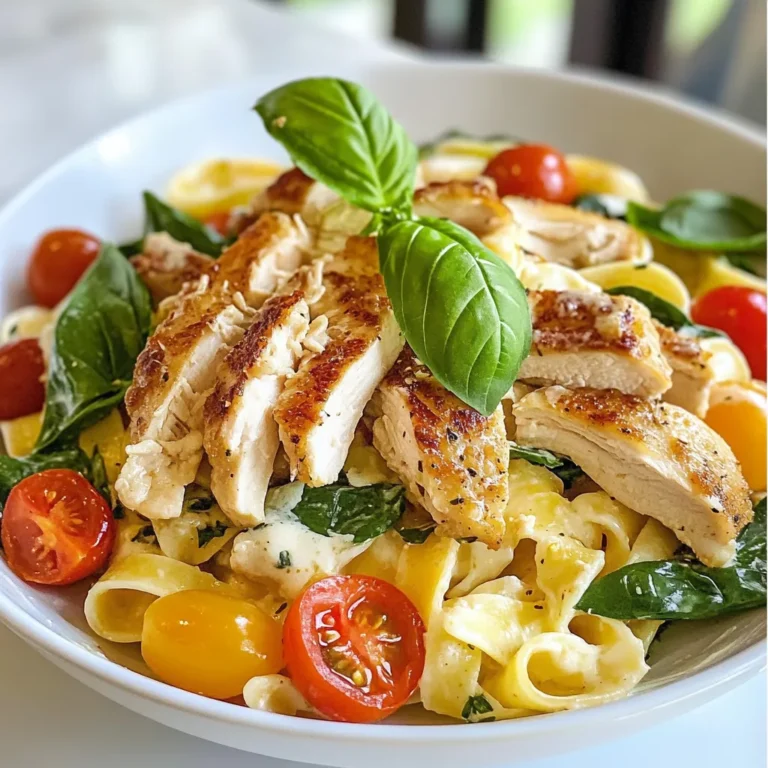
Chicken Mozzarella Pasta Flavorful Dinner Idea

PREV 1 … 17 18 19 20 NEXT
homedishhaven

explore

DessertsDinnerAppetizersDrinks

Our Policies

  • Cookie Policy
  • Copyright Policy
  • Disclaimer
  • GDPR Policy
  • Terms Of Use
Back to Top
  • About
  • Contact Us
  • Privacy Policy
© 2025 homedishhaven