FREE DINNER EBOOK! Get your copy!
  • Cookie Policy
  • GDPR Policy
  • Disclaimer
  • Terms Of Use
  • Visit my other site: Fun Cookie Recipes
homedishhaven
  • Home
  • Dinner
  • Desserts
  • Drinks
  • Appetizers
  • Contact
  • About
  • Privacy Policy
  • Home
  • Dinner
  • Desserts
  • Drinks
  • Appetizers
  • Contact
  • About
  • Privacy Policy
  • Cookie Policy
  • GDPR Policy
  • Disclaimer
  • Terms Of Use
Visit my other site: Fun Cookie Recipes

HOME / CATEGORIES /

Latest

To make No Bake Peanut Butter Bars, gather these simple ingredients: - 1 cup natural peanut butter - 1/2 cup honey or maple syrup - 1 teaspoon pure vanilla extract - 2 cups rolled oats - 1/2 cup vanilla-flavored protein powder - 1/4 cup dark chocolate chips (optional) - 1/4 cup chopped nuts (like almonds or walnuts, optional) - A pinch of sea salt You can customize this recipe easily. For a nut-free option, use sunflower seed butter. If you want to cut sugar, try using mashed banana instead of honey. For a gluten-free version, pick certified gluten-free oats. If you prefer a different protein powder, use chocolate flavored for a richer taste. You can skip the chocolate chips if you want a lower-sugar treat. Instead, add dried fruit for a sweet twist. These bars are packed with nutrients. Each bar has around 180 calories. They contain healthy fats from peanut butter and fiber from oats. The protein powder adds a nice protein boost, about 5-7 grams per bar. If you add chopped nuts, you get even more healthy fats and protein. This treat is perfect for a quick snack or a post-workout boost. Remember, the exact numbers may change based on your specific ingredients. {{ingredient_image_2}} To start, gather your peanut butter, honey, and vanilla extract. Use natural peanut butter for the best flavor and texture. In a medium saucepan, combine these three ingredients. Heat over low heat while stirring. Once it is smooth and mixed well, take it off the heat. This mix will be the heart of your bars. Next, take a large mixing bowl. Add rolled oats, protein powder, and a pinch of sea salt. Whisk these dry ingredients together. Make sure they are mixed well. This step ensures every bite has the same great flavor. Uniformity is key for a tasty treat! Now, pour the warm peanut butter mix into your dry ingredients. Stir until everything is coated and blended well. If you want, fold in dark chocolate chips and chopped nuts for extra flavor. Prepare an 8x8 inch baking dish by lining it with parchment paper. Pour the mixture into the dish. Press down firmly with a spatula or your hands to create a flat layer. Chill in the fridge for 1-2 hours to set. Once firm, lift the bars out using the parchment. Cut them into squares or rectangles. Enjoy your tasty no-bake peanut butter bars! To get the best texture, use natural peanut butter. It gives a creamy base. Make sure to heat the peanut butter, honey, and vanilla until smooth. This helps blend everything well. When mixing in the oats, stir gently but firmly. You want everything coated without breaking the oats. If you want a firmer bar, chill them longer. For a beautiful look, serve your bars on a wooden platter. Drizzle melted chocolate on top for a fancy touch. You can also add whole peanuts on the bars. This adds a nice crunch and makes them pop. Cut them into squares or rectangles for easy grabbing. One mistake is not pressing the mixture firmly into the dish. This can lead to crumbly bars. Another issue is skipping the chilling time. If you don’t chill long enough, the bars won’t hold together. Also, avoid using low-quality peanut butter. It can change the taste and texture. Pro Tips Use Creamy Peanut Butter: For a smoother texture in your bars, opt for creamy peanut butter rather than crunchy. This ensures a uniform mix and easier slicing once set. Chill for Extra Firmness: Allowing the bars to chill for longer than 2 hours can provide an even firmer texture, making them easier to handle and cut. Customizable Add-ins: Feel free to customize the bars by adding your favorite mix-ins, like dried fruits or seeds, to enhance flavor and nutrition. Storage Tips: Store the bars in an airtight container in the refrigerator for up to a week, or freeze them for longer-term storage. Just thaw before serving! {{image_4}} You can make these no-bake peanut butter bars even tastier. Try adding mix-ins for flavor and fun. Some great options include: - Cocoa powder: For a rich chocolate taste, mix in 1/4 cup. - Coconut flakes: Add 1/4 cup of shredded coconut for a tropical twist. - Dried fruits: Mix in 1/2 cup of raisins or cranberries for sweetness and texture. - Spices: A pinch of cinnamon or nutmeg can boost the flavor profile. These add-ins let you customize your bars to suit your taste! I love how easy it is to adapt these bars for different diets. To make them vegan, simply swap honey for maple syrup. For gluten-free bars, just ensure your oats are certified gluten-free. You can also use dairy-free chocolate chips if you want a vegan option. These changes keep the flavor while meeting dietary needs. These bars are easy to store. You can make a big batch and enjoy them later. Here are some tips: - Single servings: Cut the bars into squares, wrap each piece in parchment paper, and place them in a container. - Layering: If you stack the bars, separate each layer with parchment paper to avoid sticking. - Fridge vs. freezer: Keep them in the fridge for up to one week. For longer storage, freeze them for up to three months. These simple steps help you enjoy your no-bake peanut butter bars whenever you want a tasty treat! To keep your no-bake peanut butter bars fresh, store them in an airtight container. Use parchment paper to separate layers. This prevents sticking and keeps bars intact. When stored properly, these bars last up to one week in the fridge. If you notice any change in smell or texture, it’s best to discard them. You can freeze these bars for up to three months. Cut the bars into squares first. Wrap each square in plastic wrap. Place them in a freezer-safe bag. When ready to eat, thaw them in the fridge overnight. Enjoy the same great taste! Yes, you can use crunchy peanut butter. It adds a nice texture. The bars will still taste great! If you like bits of peanut in your treat, crunchy is a fun choice. To make these bars vegan, use maple syrup instead of honey. Also, choose dairy-free chocolate chips. This way, you keep the bars plant-based and yummy. If you want a substitute for honey or maple syrup, try agave syrup or brown rice syrup. Both options will keep the bars sweet. You can also use date syrup for a rich taste. This blog post covered everything you need for making tasty bars. We started with key ingredients and helpful substitutions. Then, we walked through each simple step to make the bars. I shared tips for the best texture and ideas for good looks. We explored flavor options and dietary changes. Lastly, I outlined storage methods for freshness. Now, you can create delicious, healthy bars with ease. Enjoy your baking and share your tasty results with others!

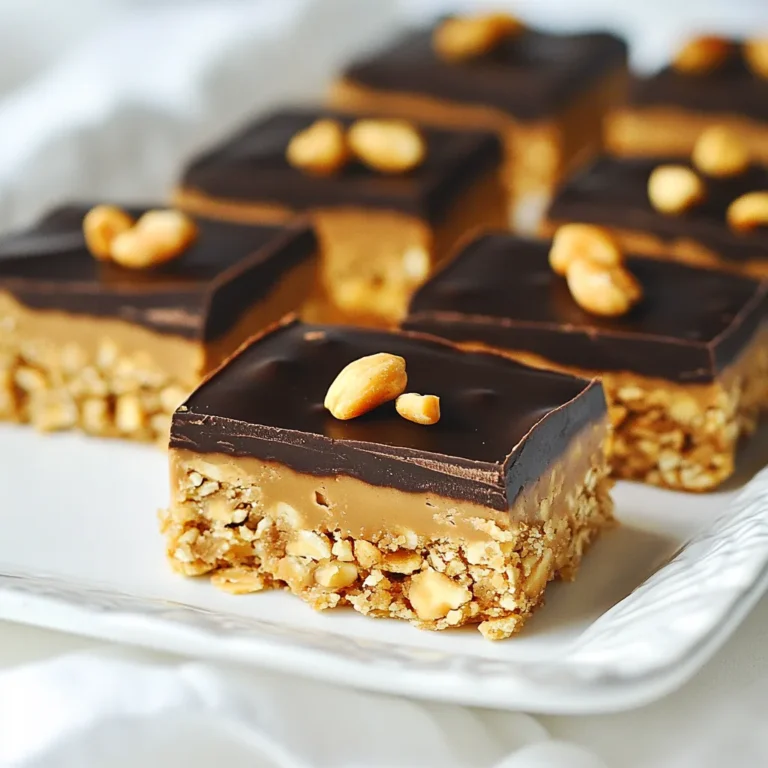
No Bake Peanut Butter Bars Easy and Tasty Treat

- Grated zucchini (1 cup) - All-purpose flour (1 cup) - Cocoa powder (1/2 cup) These ingredients bring the magic to your Double Chocolate Zucchini Bread. The grated zucchini keeps the bread moist and soft. It also adds a subtle flavor. All-purpose flour gives the bread its structure. Cocoa powder adds rich chocolate taste. You’ll love how these simple items create something special. - Chopped walnuts or pecans - Semi-sweet chocolate chips (1/2 cup) Add-ins can elevate your bread. Chopped nuts give a nice crunch and extra flavor. Semi-sweet chocolate chips make each bite extra sweet and gooey. You can add these to the batter for a delightful surprise. - Gluten-free flour options - Using coconut oil instead of vegetable oil Need gluten-free bread? Use a gluten-free flour blend. It works great in this recipe. If you want a different flavor, try coconut oil instead of vegetable oil. It adds a subtle coconut taste and keeps the bread moist. For the full recipe, check the section above. Enjoy making your deliciously moist Double Chocolate Zucchini Bread! First, set your oven to 350°F (175°C). This temperature is key for baking. Next, prepare your loaf pan. You can lightly grease it or line it with parchment paper. This makes removing the bread easy. Now, take your medium zucchini and grate it. Use a box grater or a food processor. After grating, use a clean kitchen towel to squeeze out any extra water. This step is important to keep your bread moist, not soggy. In a medium bowl, mix the dry ingredients. Combine all-purpose flour, cocoa powder, baking powder, baking soda, and salt. Whisk them well until they blend evenly. Set this mixture aside. In a large bowl, mix the wet ingredients. Add granulated sugar, brown sugar, eggs, vegetable oil, and vanilla extract. Use a whisk or electric mixer to blend until smooth. Now, gradually mix the dry ingredients into the wet ones. Stir gently until just combined. Do not over-mix; this keeps the bread light. Next, fold in the grated zucchini and chocolate chips. If you want, add chopped nuts for crunch. Mix gently to avoid overworking the batter. Pour the batter into your prepared loaf pan. Spread it evenly across the pan. Bake in the preheated oven for 50 to 60 minutes. Check with a toothpick. It should come out clean when the bread is done. Enjoy the process, and soon you will have a moist, double chocolate zucchini bread to savor. For the full recipe, refer to the section above. To keep your Double Chocolate Zucchini Bread moist, start with your zucchini. Grate it well, then use a towel to squeeze out excess water. This step is key. Too much moisture can make the bread soggy. When mixing your batter, be gentle. Over-mixing can lead to a dense loaf. Stir just enough to blend the wet and dry ingredients. This way, you keep the bread light and airy. Spices can make a big difference. Try adding a pinch of cinnamon or nutmeg for warmth. These spices complement the chocolate and add depth to the flavor. You can also adjust the sweetness. If you like it sweeter, add a bit more sugar. Taste the batter before baking to find your perfect balance. Presentation matters! Serve slices on a wooden board for a rustic look. Dust with powdered sugar for a pretty finish. For extra indulgence, pair your bread with a scoop of ice cream or a dollop of whipped cream. This makes it a delightful dessert. You can even enjoy it with a cup of coffee or tea for a cozy treat. Check out the Full Recipe to explore more ways to enjoy this delicious bread! {{image_4}} You can make this bread healthier with a few swaps. Using applesauce in place of some sugar works well. It adds moisture and sweetness without extra calories. You can replace half the granulated sugar with applesauce. This change keeps the bread moist and tasty. Another great choice is using whole wheat flour. It boosts fiber and nutrients. You can swap the all-purpose flour with whole wheat flour in equal parts. This change gives the bread a heartier texture while staying delicious. Want to mix up the flavors? Try adding different types of chocolate! You can use white chocolate or dark chocolate chips. Each type adds its own unique taste to the bread. Dark chocolate gives a rich flavor, while white chocolate adds creaminess. You can also add spices for a special twist. Cinnamon or nutmeg can enhance the flavor. Just a little sprinkle can change the whole taste of the bread. Experimenting with spices can make each loaf unique. You can adjust this recipe for the seasons. Adding pumpkin puree brings a warm, autumn flavor. Just mix in about half a cup of pumpkin puree. It pairs well with the chocolate and zucchini. For a festive touch, mix in cranberries. They add a pop of color and tartness. About half a cup of dried cranberries works best. Their sweetness contrasts nicely with the rich chocolate. For the full recipe, check out the complete guide! To keep your Double Chocolate Zucchini Bread fresh, let it cool completely. Wrap it tightly in plastic wrap or foil. You can also place it in an airtight container. This helps prevent it from drying out. If you want to keep it for more than a few days, use a freezer-safe bag or container. Freezing Double Chocolate Zucchini Bread is easy. First, slice the bread into pieces. Wrap each slice in plastic wrap. Place the wrapped slices in a freezer-safe bag. It’s best to remove as much air as possible. When you're ready to eat, take out the slices you want. Thaw them at room temperature. For a warm treat, pop them in the microwave for about 10-15 seconds. At room temperature, the bread lasts about three days. If you store it in the fridge, it can last up to a week. Always check for signs of spoilage. If the bread smells off or has mold, it’s time to toss it. Keeping an eye on your bread helps you enjoy it at its best. For the full recipe, check the section above. To boost the chocolate flavor, add more cocoa powder. Try using three-quarters cup instead of half a cup. You can also mix in more chocolate chips. Aim for one cup instead of half. Another great tip is to use dark chocolate chips. They add a rich taste that pairs well with the bread. This way, you will get a deeper chocolate flavor in every bite. Yes, you can swap zucchini for other veggies. Carrots work well in this recipe. Grate them finely, just like zucchini. You can also use shredded sweet potatoes. They add natural sweetness and keep the bread moist. Another option is to use finely grated beets. They give a unique flavor and a lovely color to the bread. You can enjoy this bread in many ways. Serve it warm with a pat of butter. It tastes great with cream cheese frosting too. For a fun twist, try it with a scoop of vanilla ice cream. You can also pair it with coffee or a glass of milk. It makes a perfect snack or dessert. For more ideas, check out the Full Recipe for extra serving suggestions. This blog post covered how to make delicious Double Chocolate Zucchini Bread. It included essential ingredients, steps for preparation, tips for flavor, and how to store leftovers. Your baking can be fun and creative, with options for health-conscious alternatives or seasonal add-ins. Enjoy experimenting with flavor variations and serving suggestions. Remember, this recipe is not just tasty but also a great way to sneak in vegetables. Happy baking!

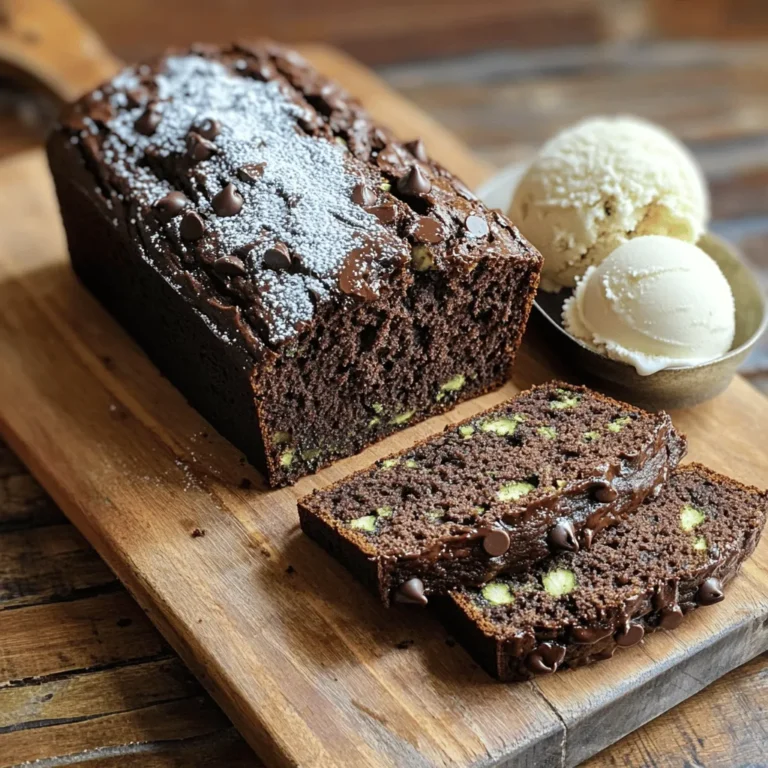
Double Chocolate Zucchini Bread Deliciously Moist Recipe

To make delicious cranberry brie bites, gather these simple ingredients: - 1 package of puff pastry (1 sheet, thawed) - 1 cup of fresh or canned cranberry sauce - 8 ounces of Brie cheese, cut into 1-inch cubes - 1 tablespoon of brown sugar - 1 tablespoon of chopped fresh rosemary (or 1 teaspoon dried rosemary) - 1 egg, beaten (for egg wash) - Sea salt for sprinkles Each ingredient plays a key role in flavor and texture. The puff pastry gives a flaky and light base. The Brie melts into a creamy delight. Cranberry sauce adds a sweet and tart kick. Brown sugar enhances the sweetness, while rosemary adds a fresh aroma. If you don't have some ingredients, here are some easy swaps: - Instead of puff pastry, you can use phyllo dough or crescent roll dough. - For Brie, camembert or goat cheese works well. - Use honey or maple syrup instead of brown sugar for a different sweetness. - Feel free to swap rosemary with thyme or sage for a unique twist. These substitutions still provide great flavor and texture. Fresh cranberry sauce has a bright, tart flavor. It gives a homemade touch and more texture. Canned cranberry sauce is sweet and smooth. It offers convenience for quick prep. When choosing, think about your taste and time. If you have time, try making fresh sauce. If you’re in a rush, canned sauce is a perfect choice. For the best results, use the freshest ingredients you can find. This will make your cranberry brie bites shine at any gathering! Start by preheating your oven to 400°F (200°C). This ensures even baking. Line a baking sheet with parchment paper. This helps prevent sticking. Next, roll out the puff pastry on a lightly floured surface. Make it smooth and even. Cut the pastry into 2-inch squares. Aim for about 16 squares. Place each pastry square on the baking sheet, leaving space in between. In the center of each square, add about one teaspoon of cranberry sauce. Spread it slightly for a base. Now, top the sauce with a cube of Brie cheese. Make sure it sits nicely on the sauce. Sprinkle a pinch of brown sugar and chopped rosemary over the Brie. This adds sweetness and herb flavor. Fold the corners of each pastry square towards the center. Pinch the edges to seal the filling inside. Brush each assembled bite with beaten egg for a golden finish. Then, sprinkle a small pinch of sea salt on top. This will contrast well with the sweet cranberry. Place your baking sheet in the oven. Bake for 15-20 minutes. Look for a golden brown color and puffed pastry. Once done, take them out and let them cool for a few minutes. Enjoy these bites warm for the best flavor! For the full recipe, check the earlier section. To make great puff pastry, start with a good quality sheet. Thaw it gently in the fridge. This keeps the butter cold and helps it puff up nicely. Roll it out lightly to avoid tearing. Cut it into even squares for uniform baking. Each bite should have enough room to rise. Use a sharp knife to cut, as this helps the edges seal better. These cranberry brie bites shine on their own, but they also pair well with many items. Serve them with a sweet dip, like honey or balsamic glaze. Fresh fruit, like apple slices or grapes, adds a nice touch. For drinks, a crisp white wine complements the flavors perfectly. If you prefer something non-alcoholic, try sparkling water with a hint of lemon. If you have leftover bites, store them in an airtight container. Place a piece of parchment paper between layers to keep them fresh. They can last in the fridge for about two days. To reheat, pop them in the oven at 350°F (175°C) for about 10 minutes. This helps to keep the pastry crispy. For more tips, check out the full recipe. {{image_4}} You can make cranberry brie bites even more fun by adding nuts or fruits. Chopped walnuts or pecans add a nice crunch. They pair well with the creamy Brie. You might also try adding some thin apple slices or pear pieces. These fruits bring natural sweetness and a fresh taste to each bite. While Brie is classic, you can switch things up with other cheeses. Camembert offers a similar soft texture. Goat cheese gives a tangy twist, and cheddar adds a sharp kick. Feel free to experiment with your favorites. Each cheese brings its own unique flavor, making every batch special. You can change the flavor of your bites with seasonal ingredients. In fall, add pumpkin spice to the cranberry sauce. In winter, mix in some cinnamon or nutmeg. For spring, consider using fresh herbs like basil or mint. Summer is perfect for bright flavors like lemon zest or even a hint of jalapeño for heat. These combos keep your appetizer fresh and exciting. For more details, check the Full Recipe. Cranberry Brie bites are easy and fun to make. They combine sweet and salty flavors. The creamy Brie melts perfectly with the tart cranberry sauce. You start with puff pastry, which gives a flaky base. - Puff Pastry: It creates a light and airy texture. Make sure to thaw it before use. - Cranberry Sauce: You can use fresh or canned. It adds a burst of flavor. - Brie Cheese: Choose a good quality Brie for the best taste. Cut it into cubes. - Brown Sugar: It adds sweetness and helps with caramelization. - Rosemary: Fresh rosemary gives a nice herbal note. Dried works too. - Egg Wash: It makes the bites golden and shiny. - Sea Salt: A sprinkle on top will balance the flavors. The steps are simple. You roll out puff pastry, cut it, and fill it. Then you fold and bake. In just 15-20 minutes, you will have golden bites. The total time for this recipe is about 35 minutes. You will spend 15 minutes preparing. The baking takes 15-20 minutes. This recipe makes 16 bites. It’s perfect for parties or gatherings. Each Cranberry Brie bite has about 100 calories. They also have: - Fat: 6 grams - Carbohydrates: 10 grams - Protein: 2 grams These bites are delicious, but watch your portions. Enjoy them as part of a balanced meal. For the full recipe, check below! Yes, you can prepare these bites ahead of time. Make them up to a day before your event. After you assemble them, cover and refrigerate. When you are ready to bake, just take them out and let them sit for a few minutes. Then, brush with egg wash and bake as directed. Cranberry Brie Bites pair well with many foods. Here are some great options: - Sliced baguette or crackers - A fresh green salad with a light dressing - A cheese board featuring various cheeses - Sliced apples or pears for a sweet touch These options will create a lovely spread for your guests. To reheat leftover bites, simply preheat your oven to 350°F (175°C). Place the bites on a baking sheet. Cover them loosely with foil to keep them from drying out. Heat for about 10-15 minutes or until warm. This method keeps them crispy and delicious. Enjoy them again! In this article, we covered how to make delicious Cranberry Brie Bites. We discussed key ingredients, including fresh and canned options. You learned easy step-by-step instructions for prepping and baking. I shared tips for perfect puff pastry and ways to serve. We explored variations to mix things up, like different cheeses and add-ins. With this recipe, you can impress guests or enjoy a tasty snack anytime. Cooking can be fun and rewarding. So, gather your ingredients and start baking those bites!

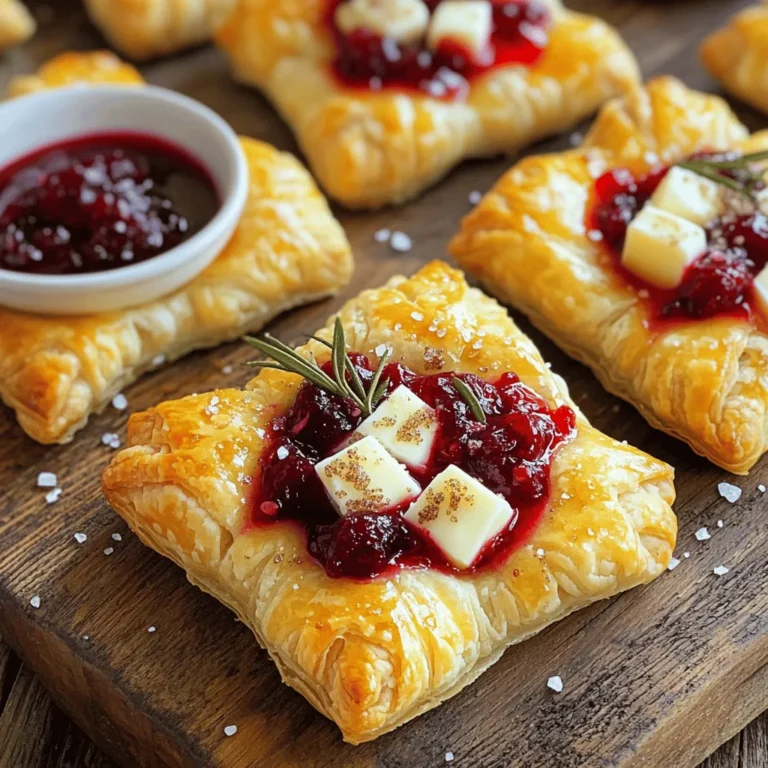
Cranberry Brie Bites Tasty and Simple Party Appetizer

To make my sheet-pan chicken fajitas, gather these main ingredients: - 1 lb boneless, skinless chicken breasts - 1 large red bell pepper, sliced into strips - 1 large yellow bell pepper, sliced into strips - 1 large onion, sliced into thin wedges - 3 tablespoons extra virgin olive oil - 2 teaspoons chili powder - 1 teaspoon ground cumin - 1 teaspoon garlic powder - 1 teaspoon smoked paprika - Salt and freshly ground black pepper, to taste These ingredients bring vibrant colors and bold flavors. The chicken gives protein, while the peppers and onions add sweetness and crunch. For a complete meal, consider these accompaniments: - 8 small flour or corn tortillas - Fresh cilantro, finely chopped (for garnish) - Lime wedges, for serving Tortillas hold all that tasty filling. Add cilantro for a fresh touch, and lime for a zesty kick. You will need a few tools to make this easy dish: - Sheet pan - Parchment paper - Mixing bowl Using a sheet pan helps everything cook evenly. Parchment paper makes cleanup a breeze. A mixing bowl is perfect for tossing your ingredients together. For the full recipe, check out the complete guide. Happy cooking! 1. Preheat the oven and line the baking sheet Start by preheating your oven to 425°F (220°C). This high heat helps cook the chicken and veggies quickly. Line a large baking sheet with parchment paper. This makes for easy cleanup later. 2. Prepare the chicken and vegetables In a large mixing bowl, add 1 pound of thinly sliced boneless, skinless chicken breasts. Next, toss in one sliced red bell pepper, one sliced yellow bell pepper, and one sliced onion. These veggies add color and flavor to the dish. 1. Drizzle olive oil and add spices Pour 3 tablespoons of extra virgin olive oil over your chicken and vegetables. This oil helps the spices stick and adds good flavor. Then, sprinkle in 2 teaspoons of chili powder, 1 teaspoon of ground cumin, 1 teaspoon of garlic powder, and 1 teaspoon of smoked paprika. Season with salt and freshly ground black pepper to taste. 2. Toss ingredients to coat evenly Use your hands or a spatula to mix everything well. Make sure each piece of chicken and each veggie strip is coated in oil and spices. This step is key to ensuring each bite is full of flavor. 1. Spread out the mixture on the baking sheet Pour the seasoned chicken and veggies onto the prepared baking sheet. Spread them out in an even layer. Leave enough space between the pieces. This helps them roast well instead of steaming. 2. Bake times and temperature guidelines Place the baking sheet in your preheated oven. Bake for 20 to 25 minutes. The chicken should reach an internal temperature of 165°F (74°C) and the veggies should be tender and slightly caramelized. This gives that delicious roasted flavor. For the complete instructions and details, check out the Full Recipe. Spacing on the sheet pan is key. If the chicken and veggies are too close, they steam instead of roast. This means less flavor and texture. Give them room to breathe. Aim for an even layer with some space between the pieces. Always check for doneness. The chicken should reach an internal temperature of 165°F (74°C). Use a meat thermometer for accuracy. The vegetables should be tender and slightly caramelized. If they look dry, they may need more oil or time. To boost flavor, try adding more spices. Cumin and chili powder are great, but you can also use oregano or cayenne for extra kick. A pinch of cinnamon can add warmth, too. Adjust heat levels to your taste. If you like spicy, add fresh jalapeños or crushed red pepper. For milder fajitas, skip the spicy elements or use sweet bell peppers instead. For side dishes, consider guacamole or fresh salsa. These add creaminess and freshness. Rice or beans also pair well with fajitas. When serving, make it colorful. Use a large platter and lay out the chicken and veggies in a vibrant way. Add lime wedges and cilantro on top for a pop of color. These small touches make the meal look really appealing. {{image_4}} You can swap chicken for shrimp or beef. Shrimp cooks fast and adds a nice flavor. Just adjust the cooking time to avoid overcooking. If you prefer beef, use thin strips of flank steak. It pairs well with the spices. For a vegetarian option, try using black beans or chickpeas. These options add protein and keep the meal filling. You could also use tofu for a different texture. Feel free to change the veggies based on what you like. Zucchini, mushrooms, or even sweet potatoes can work great. These give a fresh twist to your dish. Seasonal veggies are a smart choice too. In summer, add fresh corn or cherry tomatoes. In winter, root vegetables like carrots or parsnips can add depth and warmth. Change the spice blend to suit your taste. Try adding a bit of cayenne for heat or smoked paprika for a richer flavor. You can also mix in taco seasoning for a fun twist. Consider playful ingredients like pineapple or mango. These fruits add sweetness and balance the spices. They also bring a vibrant color to your sheet pan. Store your leftover fajitas in an airtight container in the fridge. This keeps them fresh. Aim to eat leftovers within three days for the best taste. To freeze the fajitas, let them cool completely. Then, place them in a freezer-safe bag. Be sure to remove as much air as possible. They can last up to three months in the freezer. When ready to eat, move them to the fridge overnight to thaw. The best way to reheat fajitas is in a skillet. Heat over medium until warm. You can also use the microwave, but be careful. To avoid soggy tortillas, heat the filling separately. Then, warm tortillas on a dry skillet for a few seconds before filling them. This keeps everything nice and crisp. For the full recipe, check out the detailed instructions. You can make sheet-pan chicken fajitas in about 35 minutes. The prep time is around 10 minutes. Cooking them takes about 20 to 25 minutes at 425°F (220°C). This quick time makes it easy for busy nights. Yes, you can prepare the chicken and veggies ahead of time. Just slice them and store them in the fridge for up to 24 hours. You can also season them and keep them ready to go. This makes it easy to cook later. If you want to make it even easier, cook the fajitas and store leftovers in the fridge for up to four days. There are many great sides for chicken fajitas. You can serve them with: - Guacamole - Fresh tomato salsa - Rice or beans - A simple salad - Chips and queso dip For drinks, consider iced tea, soda, or a light beer. These pair well and enhance the meal. Enjoy your fajitas with your favorite sides for a fun dinner! This blog post covered all you need for tasty sheet-pan chicken fajitas. You learned about the main ingredients, cooking tools, and steps to prepare them. We discussed tips to enhance flavors and suggested variations to suit your taste. Remember, storing leftovers properly keeps meals fresh. You can make this dish ahead for easy meal prep. Enjoy getting creative with your fajitas! Now, it's time to gather your ingredients and start cooking. Fun meals await you in the kitchen!

Sheet-Pan Chicken Fajitas Quick and Easy Dinner

To make chocolate dipped pretzel rods, you need a few simple items. Gather these ingredients for a tasty treat: - Pretzel rods - Dark chocolate chips and coconut oil - Toppings: crushed nuts and colorful sprinkles - Sea salt for garnish Each ingredient plays a key role. Pretzel rods give that nice crunch. Dark chocolate chips and coconut oil create a smooth, rich coating. You can choose your favorite nuts or sprinkles to add fun flavors and colors. Finally, a pinch of sea salt boosts the sweet and salty balance. With these ingredients ready, you can create a fun and delicious snack. Don't forget to check the [Full Recipe] for complete instructions. Happy cooking! - Line a baking sheet with parchment paper. This keeps the pretzel rods from sticking. - Melt the chocolate chips with coconut oil in a bowl. Use the microwave for this. Heat in 30-second bursts. Stir after each time until the chocolate is smooth. - Dip each pretzel rod into the melted chocolate. Make sure they get a nice coat. Let the extra chocolate drip back into the bowl. - You can roll the dipped pretzel rods in crushed nuts or colorful sprinkles. This adds fun and taste. - Press gently when rolling to ensure even coverage. This helps with flavor and looks. - Place the coated pretzel rods on the baking sheet. Space them out to avoid sticking. - Chill them in the refrigerator. Leave them for about 30 minutes. This helps the chocolate harden completely. These steps make your chocolate dipped pretzel rods both tasty and fun. For the full recipe, see the earlier section. To get a smooth chocolate coating, start with high-quality chocolate chips. Use dark chocolate for a rich taste. Adding a tablespoon of coconut oil helps to make the chocolate creamy. Melt the chocolate in short bursts in the microwave. Stir well between each burst to avoid burning. This helps keep the chocolate smooth and shiny. To avoid clumping, make sure the bowl and utensils are dry. Any water can cause the chocolate to seize. If your chocolate does clump, add a bit more coconut oil. This can help restore its smoothness. Get creative with toppings! You can use crushed nuts or colorful sprinkles. Mix and match for fun flavors. Try almonds, peanuts, or walnuts with the chocolate. For a festive touch, use seasonal sprinkles. When arranging the pretzel rods, think about height and color. Place them in a tall glass or jar. This adds flair to your presentation. If you're giving them as gifts, tie a ribbon around the jar. Include a tag with a cute note for a personal touch. Pair these tasty pretzel rods with drinks. They go well with milk or hot chocolate. For adults, try serving with coffee or a sweet dessert wine. If you want to give them as gifts, think about how you package them. Use clear bags tied with ribbons. You can also use small boxes or jars. This makes them look special and fun to receive. {{image_4}} You can switch up the chocolate for dipping. Use white chocolate or milk chocolate instead of dark. Each type gives a unique taste and look. For seasonal fun, try adding holiday-themed sprinkles. They make the pretzel rods festive and even more fun to eat! If you need gluten-free snacks, choose gluten-free pretzels. They taste just as good and keep your treat safe. You can also make vegan options with plant-based chocolate. This way, everyone can enjoy these tasty treats! Get creative with toppings! Combine different toppings for unique flavors. You can mix nuts and sprinkles on one pretzel rod for a fun twist. Want to enhance the taste? Add flavor extracts like peppermint or almond to your chocolate. This gives a new twist to your chocolate-dipped pretzel rods. You can find the full recipe to help you get started! To keep your chocolate dipped pretzel rods fresh, follow these tips: - Store them in an airtight container. This keeps moisture away. - Use a cool, dry place. Avoid heat and sunlight. - Layer pretzel rods between parchment paper. This prevents sticking. How long do these treats stay good at room temperature? - They last about a week. Keep them stored properly. - If you want to store them longer, you can freeze them. To freeze, wrap each pretzel rod in plastic wrap. Then, place them in a freezer-safe bag. They can stay good for up to three months in the freezer. How do you know when pretzel rods have gone bad? - Check for a change in smell. A sour or off smell means they are bad. - Look for any white spots. This could mean the chocolate has bloomed. Always check the chocolate coating. If it looks dull or has cracks, it may not taste fresh. Remember, fresh treats make the best snacks! Can I use different types of chocolate? Yes, you can use milk chocolate or white chocolate. Each type adds a unique taste. Milk chocolate is sweeter, while dark chocolate has a rich flavor. If you like a twist, try flavored chocolates like mint or orange. How do I fix seized chocolate? If chocolate becomes thick or clumpy, it has seized. To fix this, add a small amount of vegetable oil or coconut oil. Heat it gently in the microwave, stirring until smooth again. This method can save your chocolate from being wasted. What else can I dip in chocolate? You can dip many snacks in chocolate! Try fruits like strawberries or bananas. You can also use cookies, potato chips, or marshmallows. Each item gives a new taste and fun texture. The options are endless! Are there other ways to use sprinkles? Absolutely! Sprinkles can add color to cakes, cupcakes, or cookies. You can also use them for topping ice cream or yogurt. Get creative by mixing different types of sprinkles for a fun look. They make any treat festive! Where to buy ready-made chocolate dipped pretzel rods? You can find ready-made chocolate dipped pretzel rods at many grocery stores. Check the candy aisle or the bakery section. They are also available online through retailers like Amazon or specialty snack shops. Recommended brands for store-bought versions Some popular brands for chocolate dipped pretzel rods include Snack Factory and Annie B's. These brands offer tasty options that are easy to find. Always check for quality and flavor to ensure you get the best treat. Making chocolate-dipped pretzel rods is fun and tasty. We covered ingredients, steps, and tips. You can choose your toppings and flavors, making each rod unique. Store them right for freshness and enjoy them later. In the end, these snacks bring joy to any occasion. They are easy to make and share. Try them out, and you’ll create something delicious. Get creative with toppings and flavors for your next treat!

Chocolate Dipped Pretzel Rods Tasty and Fun Treat

For a delicious cheesy baked gnocchi, gather these simple ingredients: - 500g potato gnocchi (store-bought or homemade) - 2 cups ricotta cheese - 1 cup shredded mozzarella cheese (plus extra for topping) - ½ cup grated Parmesan cheese - 1 cup marinara sauce (homemade or store-bought) - 1 teaspoon dried basil - 1 teaspoon garlic powder - Salt and pepper, to taste - Fresh basil leaves, for garnish Each ingredient plays a key role in creating a rich, comforting dish. The gnocchi gives a soft, pillowy base, while ricotta and mozzarella create a creamy, cheesy texture. Parmesan adds a punch of flavor, and marinara binds everything together with its tangy goodness. When choosing your ingredients, opt for high-quality cheese and fresh herbs if possible. This choice will elevate your dish and impress anyone at your table. For the full recipe, refer to the earlier section. - Preheat oven to 375°F (190°C). - Cook gnocchi in salted boiling water until it floats. First, I preheat my oven. This helps the dish bake evenly. I fill a large pot with salted water and bring it to a rolling boil. Once the water is boiling, I carefully add the gnocchi. I cook them until they float, which usually takes about 2-3 minutes. When they float, they are done. I drain them and set them aside in a bowl. - Mix ricotta, half mozzarella, and seasonings. Next, I grab a large mixing bowl. I add 2 cups of ricotta cheese, half of the shredded mozzarella, and my seasonings. I use salt, pepper, dried basil, and garlic powder. I stir the mixture until it is creamy and well mixed. This cheese blend gives the dish a rich flavor. - Layer marinara, gnocchi, and cheese mixture in a baking dish. - Top with remaining mozzarella and Parmesan. For assembly, I take a baking dish and spread a thin layer of marinara sauce on the bottom. This helps prevent sticking. Then, I layer half of the cooked gnocchi over the sauce. I spoon half of the cheese mixture over the gnocchi. I drizzle some more marinara on top for extra flavor. I repeat this with the rest of the gnocchi and cheese mixture. The final layer gets the rest of the marinara sauce. I finish by sprinkling the remaining mozzarella and Parmesan cheese on top. - Cover with foil and bake for 20 minutes, then uncover and bake for an additional 10-15 minutes. Now, I cover the baking dish with aluminum foil. I place it in the preheated oven and bake for 20 minutes. After that, I carefully remove the foil. I bake it for another 10 to 15 minutes until the top is bubbly and golden brown. The aroma fills my kitchen, making it hard to wait! You can find the full recipe in the previous sections if you want more details. To ensure your cheesy baked gnocchi is gooey, focus on the cheese. Use good-quality cheeses like ricotta and mozzarella. These melt well and create that dreamy texture. Mix the ricotta with half of the mozzarella before layering. This way, the cheese blends smoothly. Also, don't skip pre-cooking the gnocchi. Cooking them in salted water until they float helps them become tender. For extra flavor, add herbs and spices. Consider using fresh basil, oregano, or thyme. A sprinkle of chili flakes can give a nice kick. You might even try adding a touch of nutmeg for warmth. Be bold with your seasonings! Taste as you mix, and adjust to your liking. This makes each bite exciting and full of flavor. Presentation matters! Serve the dish in individual bowls for a cozy feel. A big platter for sharing works, too. Drizzle with extra marinara sauce for color. Fresh basil leaves on top add a lovely touch. You can even sprinkle some more cheese on top before serving. These small details make your dish look and taste even better. For full details on how to prepare this dish, check the Full Recipe. {{image_4}} You can get creative with the cheeses in this dish. Instead of ricotta, try cottage cheese for a lighter option. Cream cheese works well too, giving a rich flavor. For mozzarella, consider using gouda or fontina. These cheeses melt beautifully and add great taste. If you want a kick, use pepper jack cheese for a bit of spice. You can also swap marinara for pesto sauce or alfredo. Each choice adds a unique twist to your cheesy baked gnocchi. Adding veggies or proteins can make this dish even better! Spinach or kale adds nutrition and color. Sautéed mushrooms give a nice earthy taste. You could also mix in diced bell peppers or zucchini for extra crunch. If you prefer a meatier dish, try adding cooked chicken, sausage, or even bacon. These proteins enhance the flavor and make the meal heartier. Feel free to mix and match based on what you love or have on hand. To make this dish gluten-free, choose gluten-free gnocchi. Many brands offer tasty options made from rice or chickpeas. They cook similarly to regular gnocchi, so no need to change the method. Ensure your sauces and cheeses are gluten-free as well. Always read labels to avoid hidden gluten. With these swaps, you can enjoy cheesy baked gnocchi without worry! To store cheesy baked gnocchi, let it cool first. Place it in an airtight container. You can keep it in the fridge for up to three days. Make sure to cover it well. This helps maintain its creamy texture and taste. For the best taste, reheat your gnocchi in the oven. Preheat the oven to 350°F (175°C). Place the gnocchi in a baking dish. Cover it with foil to keep it moist. Heat for about 20 minutes. If you want a bubbly top, remove the foil for the last 5 minutes. You can freeze cheesy baked gnocchi too. After it cools, wrap it tightly in plastic wrap. Then, put it in a freezer-safe container. It can last for up to three months. To thaw, move it to the fridge overnight. Reheat it in the oven as mentioned above. This way, it stays tasty and delicious. For the full recipe, check out the entire guide! Yes, you can use homemade gnocchi. Homemade gnocchi often has a fresher taste. It can also be softer and more tender than store-bought types. Making your own gives you control over the texture and flavor. You can adjust the ingredients to suit your taste. If you have the time, I highly recommend trying it. It adds a personal touch to your cheesy baked gnocchi. If you don’t have ricotta cheese, you have options. Cottage cheese works well as a substitute. It has a similar texture but is a bit more tangy. Cream cheese can also be used for a richer taste. You might want to mix it with a bit of milk to soften it. Silken tofu is a great choice for a dairy-free version. Each substitute brings a unique flavor, so choose what fits your dish best. Baking gnocchi takes about 30 to 35 minutes. First, cover the dish with foil and bake for 20 minutes. This helps the gnocchi cook through. After that, remove the foil. Bake for another 10 to 15 minutes. You want the top to be golden and bubbly. Check that the cheese is melted and looks delicious before taking it out. The smell will be a great sign too! This dish combines simple ingredients to create a comforting meal. You learned how to layer gnocchi, cheese, and sauce for a mouthwatering bake. With tips on texture and flavor, you can make it your own. Explore variations, from gluten-free options to tasty additions. Store and reheat leftovers with ease. Now, you can enjoy this cheesy baked gnocchi that will impress anyone at your table. Happy cooking!

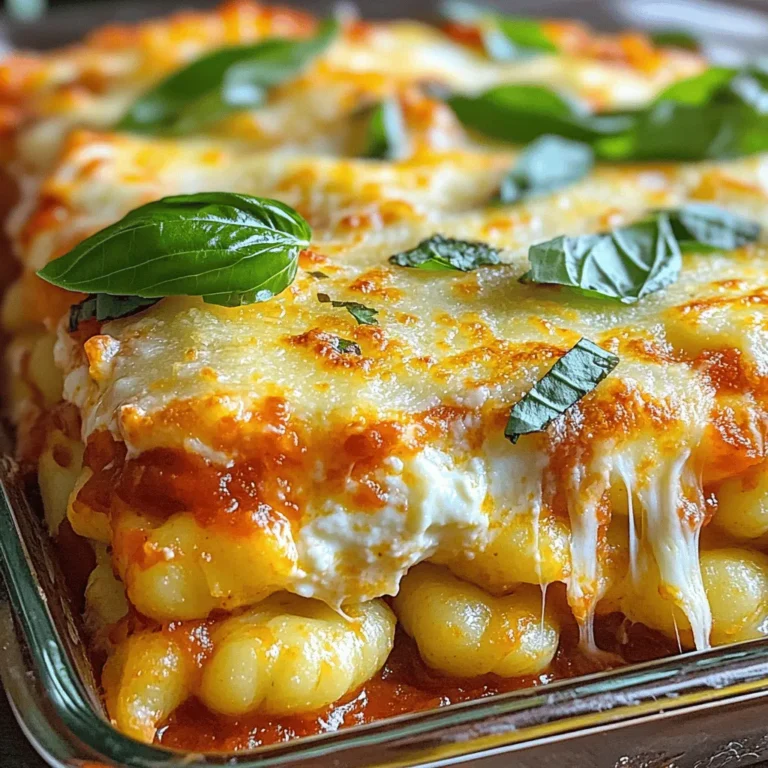
Cheesy Baked Gnocchi Comforting and Tasty Dish

- 20 jumbo pasta shells - 1 pound ground turkey - 2 cups fresh spinach, chopped - 1 cup ricotta cheese - 1 cup shredded mozzarella cheese (plus extra for topping) - 1/2 cup grated Parmesan cheese - 1 large egg, beaten - 1 teaspoon garlic powder - 1 teaspoon onion powder - 1 teaspoon Italian seasoning - Salt and pepper to taste - 2 cups marinara sauce To ensure freshness, choose bright green spinach. Look for pasta shells that are whole and unbroken. Check the cheese for a creamy texture. Use high-quality marinara sauce for rich flavor. When using ground turkey, opt for lean cuts for a lighter dish. For perfect results, measure your ingredients carefully. This helps keep the filling balanced. Store leftover ingredients in the fridge to maintain their quality. If you have leftovers, use them in other meals for added flavor. For the full recipe, check out Turkey Spinach Stuffed Shells Delight. 1. First, preheat your oven to 375°F (190°C). This helps cook the dish evenly. 2. Next, bring a large pot of salted water to a boil. Add 20 jumbo pasta shells and cook them according to package instructions. Aim for al dente, which means they should be firm but not hard. Once done, drain the shells and set them aside to cool. 1. In a large skillet, add 1 pound of ground turkey over medium heat. Cook it while breaking it apart for about 7-10 minutes. You want it browned and fully cooked. 2. After the turkey is cooked, stir in 2 cups of chopped fresh spinach. Sauté for another 2-3 minutes. The spinach will wilt down, mixing well with the turkey. 1. In a mixing bowl, combine the turkey-spinach mix with 1 cup of ricotta cheese, 1 cup of shredded mozzarella cheese, and 1/2 cup of grated Parmesan cheese. Add 1 beaten egg, 1 teaspoon of garlic powder, 1 teaspoon of onion powder, and 1 teaspoon of Italian seasoning. Season with salt and pepper to taste. Mix everything well until combined. 2. Spread a thin layer of marinara sauce on the bottom of a 9x13 inch baking dish. This helps prevent the shells from sticking. 3. Carefully stuff each cooked pasta shell with the turkey and spinach filling. Place them side by side in the baking dish with the open side up. 4. Pour the remaining marinara sauce evenly over the stuffed shells. This allows the sauce to seep into the gaps. Top with extra shredded mozzarella cheese for a nice, melty finish. 1. To keep the dish moist, cover the baking dish tightly with aluminum foil. Bake in the preheated oven for 25 minutes. 2. After 25 minutes, remove the foil. This lets the cheese brown nicely. Bake for another 10-15 minutes. Look for bubbly cheese that has turned a light golden brown. 3. Once done, take it out of the oven and let it cool for about 5 minutes. This allows the flavors to meld together. For the Full Recipe, check the recipe section above. To make the best Turkey Spinach Stuffed Shells, timing is key. Here are some tips: - Recommended cooking times: - Cook the jumbo pasta shells for about 9-11 minutes. They should be al dente, firm to the bite. - Bake the shells for 25 minutes covered, then uncover and bake for an extra 10-15 minutes. - Preventing overcooked pasta: - Use plenty of salted water when boiling. This helps keep the shells from sticking. - Drain and rinse the shells with cold water right after cooking. This stops the cooking process. Making your dish look good is fun! Here are some ideas: - Garnishing ideas: - Top with fresh herbs like basil or parsley. This adds color and flavor. - A sprinkle of extra cheese can make it look extra cheesy and inviting. - Serving suggestions: - Serve the stuffed shells warm on a large plate for a family-style meal. - Offer a small bowl of extra marinara sauce on the side for dipping. It adds flavor and makes it special. Understanding what’s in your food is important. Here’s a breakdown: - Health benefits of ingredients: - Ground turkey is lean and high in protein. It helps build muscle. - Spinach is packed with vitamins and minerals. It’s great for your health. - Caloric breakdown per serving: - Each serving has about 400-500 calories, depending on cheese and sauce used. This makes it filling but not too heavy. You can find the full recipe in the article to get started on this delicious dish! {{image_4}} You can switch ground turkey for ground beef or chicken. Both meats work well and change the taste slightly. If you like a richer flavor, beef does the trick. For a lighter option, choose chicken. For cheese, you can try different kinds. Cream cheese adds a nice creaminess. Goat cheese gives a tangy twist. You can even use a dairy-free cheese if you're avoiding dairy. To boost flavor, add spices or herbs. Red pepper flakes give a spicy kick. Fresh basil or parsley adds brightness. You can mix in Italian seasoning for extra depth. Incorporating more vegetables is a great idea. Chopped mushrooms or bell peppers add texture. Zucchini or carrots can sneak in more nutrients without changing the taste much. If you need gluten-free options, use gluten-free pasta. Many brands offer jumbo shells that fit well. Just follow the package instructions for cooking time. For vegan adaptations, swap turkey with lentils or mushrooms. Use plant-based cheese and skip the egg. These changes keep the dish tasty while meeting different diets. Check out the Full Recipe if you want to dive into the details! After you enjoy your Turkey Spinach Stuffed Shells, store any leftovers properly. - Best practices for refrigeration: Place the stuffed shells in an airtight container. Make sure the shells are covered with marinara sauce to keep them moist. They will last in the fridge for up to three days. - Freezing stuffed shells: If you want to save some for later, you can freeze them. Use a freezer-safe container or wrap each shell individually in plastic wrap. Label the container with the date. They can last for up to three months in the freezer. When ready to eat, let them thaw in the fridge overnight. When it's time to enjoy your leftovers, reheating them is simple. - Oven reheating tips: Preheat your oven to 350°F (175°C). Place the stuffed shells in a baking dish. Cover the dish with foil to keep the moisture in. Heat for about 20-25 minutes, or until they are hot throughout. - Microwave reheating tips: If you're short on time, you can use the microwave. Place a few stuffed shells on a microwave-safe plate. Add a splash of marinara sauce to keep them moist. Cover with a microwave-safe lid or wrap. Heat for 2-3 minutes, checking halfway to stir. How do I make Turkey Spinach Stuffed Shells ahead of time? You can prepare the stuffed shells in advance. After you stuff the shells, place them in the baking dish. Cover them with marinara sauce and wrap the dish tightly. Store it in the fridge for up to 24 hours. When you're ready to bake, just add a few extra minutes to the baking time. Can I use regular pasta shells instead of jumbo? Yes, you can use regular pasta shells. However, you will need to adjust the cooking time and amount of filling. Regular shells hold less filling, so you may have some mixture left over. What sides pair well with Turkey Spinach Stuffed Shells? Some great sides include a fresh garden salad, garlic bread, or steamed vegetables. These sides add freshness and balance the meal. You can even serve a light soup alongside for a cozy dinner. Can I make it vegetarian? Absolutely! To make this dish vegetarian, swap the ground turkey for a mix of mushrooms and chopped zucchini. You can also use a plant-based ricotta cheese for a creamy texture. What to do if the filling is too wet? If your filling is too wet, add some breadcrumbs. This helps absorb excess moisture and gives a better texture. You can also chill the filling for a bit to help it firm up. Fixing overcooked shells If your shells are overcooked, they might break when you stuff them. To fix this, gently press the shells into the filling. Use a spoon to help fill them without breaking. If they fall apart, just layer the pasta pieces in the baking dish. Ensuring the dish doesn’t dry out during baking To keep your dish moist, cover it tightly with aluminum foil while baking. This traps steam and helps the filling stay juicy. You can remove the foil in the last few minutes to brown the cheese on top. Turkey spinach stuffed shells offer a tasty and healthy meal option. We covered all the key ingredients, step-by-step cooking, and helpful tips to perfect your dish. You learned how to store leftovers and some creative variations. Remember, you can customize the recipe to fit your needs. Whether using different meats or making it vegetarian, there’s room for creativity. Enjoy making this dish, and share it with friends and family. Your kitchen can be a fun place filled with great flavors!

Turkey Spinach Stuffed Shells Flavorful and Easy Recipe

To make the best chocolate hazelnut crepes, gather these simple ingredients: - 1 cup all-purpose flour - 2 tablespoons unsweetened cocoa powder - 2 tablespoons granulated sugar - 1/4 teaspoon fine sea salt - 2 large eggs - 1 1/2 cups whole milk - 2 tablespoons unsalted butter, melted - 1/2 cup chocolate hazelnut spread - 1/4 cup hazelnuts, finely chopped - Fresh strawberries or raspberries - Whipped cream (optional) These ingredients come together to create a rich and delicious treat. The cocoa powder adds a deep chocolate flavor. The chocolate hazelnut spread melts beautifully inside the crepes, making each bite delightful. Fresh berries bring a burst of color and flavor. You can even add whipped cream for extra creaminess. This recipe is all about balance. The sweetness from the sugar and chocolate pairs well with hazelnuts' crunch. Plus, the fresh fruit adds a touch of brightness. You can find the full recipe for these chocolate hazelnut crepes in the article. Enjoy the process of making and sharing these crepes! - First, combine the dry ingredients in a bowl. Mix 1 cup of flour, 2 tablespoons of cocoa powder, 2 tablespoons of sugar, and 1/4 teaspoon of salt. Make sure there are no lumps. - Next, in a separate bowl, mix 2 large eggs, 1 1/2 cups of milk, and 2 tablespoons of melted butter. Whisk until smooth. - Now, blend the wet ingredients with the dry mix. Stir gently until you have a smooth batter. Cover it and let it rest for 30 minutes. This resting time helps the crepes turn out tender. - Heat a non-stick skillet over medium heat. Lightly grease it with extra melted butter. - Pour about 1/4 cup of batter into the center of the hot skillet. Quickly swirl the pan to spread the batter evenly. - Cook for 1-2 minutes. When the edges lift, it’s time to flip! Use a spatula to turn it and cook for another minute. - Take a cooked crepe and spread a generous layer of chocolate hazelnut spread on one half. - Fold the crepe in half over the spread. Then, fold it in half again to form a triangle. - Finally, garnish with chopped hazelnuts and fresh berries on top. For extra joy, add whipped cream if you like. Enjoy your delightful treat! To make the best chocolate hazelnut crepes, the batter needs to rest. Resting lets the flour absorb the liquid fully. This makes the crepes tender and smooth. Aim for at least 30 minutes, but longer is even better. Cooking temperature is key. Use medium heat for perfect results. If the heat is too high, the crepes burn. If it’s too low, they become tough. A good test is to sprinkle a drop of water on the pan. If it sizzles and dances, the pan is ready! Using the right pan matters too. A non-stick skillet works best. It helps the crepes slide out easily. If you have a crepe pan, that’s perfect! Just remember to grease it lightly with butter. Crepes are great on their own, but you can elevate them! Whipped cream makes a lovely pairing. It adds a light and sweet touch. You can also use fresh fruit like strawberries or raspberries. They add color and a burst of flavor. Drizzling chocolate or caramel sauce on top is a real treat. It adds richness and makes the crepes look fancy. Don’t hold back; make them as special as you like! To make perfect crepes, avoid overmixing the batter. Mixing too much can create tough crepes. Stir gently until everything is combined, then stop. Cooking at improper heat is another mistake. If the pan is too hot, the crepes will burn. If it's too cool, they won't cook properly. Adjust the heat as needed. Not greasing the pan enough leads to sticking. Use a small amount of butter to coat the skillet. This ensures the crepes come out easily and stay intact. {{image_4}} You can change up your crepes with different fillings. Here are some ideas: - Fruit options: Try bananas, peaches, or blueberries. These fresh fruits add sweetness and a nice texture. - Nut butters: Spread some almond or peanut butter. This adds a rich, nutty flavor to your crepes. - Ice cream or yogurt: Add a scoop of vanilla ice cream or a dollop of yogurt. This makes your crepes extra special. Toppings can enhance your crepes even more. Here are some tasty choices: - Different nuts and chocolate drizzles: Sprinkle chopped walnuts or almonds on top. Drizzle with extra chocolate sauce for a sweet touch. - Seasonal fruits: Use strawberries in spring or apples in fall. Seasonal fruits make the dish fresh and exciting. - Flavored whipped creams: Try adding vanilla or cinnamon whipped cream. This adds a lovely flavor boost. You can make crepes to fit your diet. Here are some options: - Gluten-free crepe recipe: Use gluten-free flour instead of regular flour. This way, everyone can enjoy them. - Vegan alternatives for eggs and milk: Use flaxseed meal mixed with water as an egg substitute. Almond or oat milk works great too. - Low-sugar variations using sweeteners: Replace sugar with stevia or monk fruit. This keeps the sweetness while reducing calories. These variations make chocolate hazelnut crepes fun and flexible! For the full recipe, check out the [Full Recipe]. To keep your crepes fresh, store them properly. If you have leftovers, place them in a stack, separated by pieces of parchment paper. This prevents sticking. Then, wrap them tightly in plastic wrap and store in the fridge. These crepes will stay fresh for about 2 to 3 days. For longer storage, you can freeze the crepes. Stack them with parchment paper between each crepe. Wrap the entire stack in plastic wrap, then place it in a freezer bag. Frozen crepes can last for 2 to 3 months. When ready to use, just thaw them in the fridge overnight. To reheat your crepes, a skillet works best. Heat the skillet over medium-low heat. Place the crepe in the pan for about 30 seconds on each side. This method keeps them soft and warm. You can also use the microwave. Place a crepe on a microwave-safe plate. Cover it with a damp paper towel and heat for about 15-20 seconds. This keeps the crepe moist. Avoid overheating, or the texture may become tough. When stored properly, crepes stay fresh for about 2 to 3 days in the fridge. If frozen, they can last for 2 to 3 months. Watch for signs of spoilage. If the crepes smell off or have a slimy texture, it’s best to toss them. Always check before eating to ensure they are safe. You can use a non-stick skillet instead. Just heat the skillet on medium heat. Lightly grease the surface with butter. Pour in the batter and swirl it around to spread evenly. This method works great and gives you tasty crepes. Yes, you can make the batter ahead of time. Store it in the fridge for up to 24 hours. Just remember to cover it well with plastic wrap. When you're ready to cook, give it a quick stir before pouring it into the skillet. Serve your crepes warm and filled with chocolate hazelnut spread. Fold them into quarters for a nice shape. Top with finely chopped hazelnuts for crunch. Add fresh berries like strawberries or raspberries for a pop of color. A dollop of whipped cream on the side makes it even better! For the full recipe, check the details above. In this guide, we explored making delicious chocolate hazelnut crepes. We went through the ingredients, step-by-step instructions, and tips to perfect your crepe-making skills. We also covered fun variations and storage ideas. Remember, practice makes perfect, so don’t be afraid to experiment. Enjoy these tasty crepes with your favorite toppings. You’ll impress your friends and family with your skills. Happy cooking!

Chocolate Hazelnut Crepes Deliciously Simple Recipe

- 1 lb ground chicken (or turkey) - 1/2 cup breadcrumbs (preferably panko) - 1/4 cup green onions, finely chopped - 2 tablespoons soy sauce - 1 tablespoon ginger, minced - 1 tablespoon garlic, minced - 1/4 teaspoon freshly ground black pepper - 1/4 teaspoon sesame oil - 1/2 cup teriyaki sauce - 1 tablespoon sesame seeds (for garnish) - Fresh cilantro leaves (for garnish) Gathering the right ingredients is key to making teriyaki glazed meatballs. You want to start with the main ingredients, which include ground chicken or turkey. Ground meat forms a soft base for your meatballs, making them tender and juicy. Next, we add breadcrumbs. Panko is a great choice here. It gives the meatballs a nice crunch. The green onions add fresh flavor and a bit of color. For flavor enhancers, soy sauce brings in umami. Ginger and garlic add warmth and depth. Together, they make your meatballs sing with flavor. When it comes to seasoning, you only need a touch of black pepper and sesame oil. These will elevate the taste without overpowering the dish. Finally, teriyaki sauce is the star. It coats the meatballs and adds that sweet, tangy glaze we love. Don't forget the sesame seeds and cilantro for garnish. They add a pop of color and freshness to your plate. For the full recipe, check out the details above. Enjoy creating these tasty bites! - Preheat your oven to 400°F (200°C). - In a large bowl, mix the ground chicken, breadcrumbs, and chopped green onions. - Add the beaten egg, soy sauce, ginger, garlic, black pepper, and sesame oil. - Use your hands or a spatula to mix until well blended. - Dampen your hands with water to prevent sticking. - Form the mixture into small meatballs, about 1 inch in size. - Place the meatballs on a baking sheet lined with parchment paper. - Bake them for 15-20 minutes until they turn golden brown and are fully cooked. - While the meatballs bake, heat the teriyaki sauce in a small saucepan. - Once warm and bubbly, take it off the heat. - After baking, transfer the meatballs to a bowl. - Pour the warm teriyaki sauce over the meatballs and toss gently. - Make sure each meatball is well-coated and glistening. For the full recipe, check the detailed ingredients and instructions above. Enjoy creating this tasty dish! To make great meatballs, you must mix the ingredients evenly. This ensures every bite has the same flavor. Use your hands or a spatula to mix well. This helps all the flavors blend together. To prevent sticking, dampen your hands with water. This simple trick makes shaping the meatballs much easier. Bake your meatballs at 400°F (200°C) for 15-20 minutes. This temperature gives them a nice golden color while keeping them juicy. For easy cleanup, line your baking sheet with parchment paper. This prevents sticking and saves you time on washing dishes later. Teriyaki glazed meatballs pair well with rice or steamed veggies. You can make a nice stir-fry on the side. For a fun twist, serve them in lettuce wraps or on skewers. They also taste great in a sub sandwich with fresh veggies. Check out the Full Recipe for more ideas on how to enjoy these delicious meatballs! {{image_4}} You can mix up the meat in teriyaki glazed meatballs. Ground turkey is a lean option. It keeps the meatballs moist and tender. You can also try ground beef for a richer taste. If you prefer plant-based options, use lentils or chickpeas. Mash them up and add spices. This makes a tasty vegetarian meatball. While store-bought teriyaki sauce works great, making your own can be fun. Combine soy sauce, sugar, and ginger in a pot. Heat until the sugar dissolves. You can also try other Asian-inspired sauces. Hoisin sauce adds a sweet kick. For a spicy touch, mix in some sriracha. Experiment with flavors to find your favorite. If you need low-sodium options, choose low-sodium soy sauce. This keeps the flavor without the extra salt. For a gluten-free version, use tamari instead of soy sauce. You can also use gluten-free breadcrumbs. These small changes make the dish fit your diet while keeping it delicious. To keep your teriyaki glazed meatballs fresh, place them in an airtight container. This helps seal in moisture and flavor. You can refrigerate the meatballs right after they cool down. They will stay good in the fridge for up to four days. If you want to enjoy them later, freezing is a great option. When freezing, allow the meatballs to cool completely first. Arrange them in a single layer on a baking sheet. Once frozen, transfer them to a freezer bag. This method prevents them from sticking together. Teriyaki glazed meatballs can be frozen for up to three months. To reheat, simply bake them in the oven at 350°F (175°C) for about 15-20 minutes. You can also microwave them for a quick meal. Incorporating teriyaki glazed meatballs into your meal prep is easy. You can pair them with rice or veggies for quick lunches. Use compartments in meal prep containers to keep everything fresh. Glass containers work best, as they are durable and microwave-safe. This way, you can enjoy a tasty meal anytime! For the full recipe, check back to see how it all comes together! You can add heat by mixing in red pepper flakes. Start with a small amount. You can also use sriracha or chili sauce in the teriyaki glaze. Just remember, spicy flavors can change the dish's taste. Adjust based on your heat tolerance. Yes, you can use ground chicken thighs instead of ground chicken. Ground thighs have more fat, adding flavor and juiciness. Just be mindful of the cooking time as it may differ slightly. Always ensure the meat is cooked through. Teriyaki glazed meatballs pair well with various sides. Here are some ideas: - Steamed rice or jasmine rice - Sesame noodles - Stir-fried vegetables - Cucumber salad - Miso soup These sides add balance and complement the sweet flavors of the meatballs. To check if meatballs are done, use a meat thermometer. The internal temperature should reach 165°F (75°C). If you don't have a thermometer, cut one open. The meat should be no longer pink inside, and juices should run clear. Yes, you can make teriyaki glazed meatballs ahead of time. Prepare and bake them, then store in the fridge. They will last for about three days. You can also freeze them for up to three months. Just reheat gently before serving. Check the Full Recipe for more tips! You learned how to make tasty teriyaki glazed meatballs. We covered key ingredients like ground chicken, breadcrumbs, and spices. Preparing, baking, and enhancing with sauce creates a delicious dish. With tips on variations and storage, you can adapt this recipe to your taste. Enjoy experimenting with different proteins and sauces. Whether for a meal prep or a quick dinner, these meatballs are sure to please.

Teriyaki Glazed Meatballs Perfect for Any Meal

For a tasty Cajun Shrimp and Sausage Skillet, gather these key ingredients: - 1 lb large shrimp, peeled and deveined - 1 lb smoked sausage, sliced (Andouille or your choice) - 1 medium bell pepper, diced (red or green) - 1 small onion, chopped - 3 cloves garlic, minced - 1 cup cherry tomatoes, halved - 2 cups fresh spinach, washed - 2 teaspoons Cajun seasoning - 1 teaspoon smoked paprika - 1/2 teaspoon cayenne pepper (adjust for heat) - 3 tablespoons olive oil - Salt and black pepper to taste - Fresh parsley, chopped for garnish When selecting shrimp, look for those that are firm and smell fresh. Avoid shrimp that look dull or have a strong odor. For sausage, choose a smoked variety for the best flavor. Andouille is a classic choice, but any good-quality smoked sausage works well. If you can’t find fresh shrimp, frozen shrimp can be a great option. Just thaw them in cold water before cooking. For a lighter dish, swap in turkey sausage. You can also mix in extra veggies like zucchini or corn for added color and flavor. For the full recipe, check the detailed instructions. To start, prepare your shrimp and sausage. Peel and devein the shrimp if needed. Slice your sausage into bite-sized pieces. I like using Andouille sausage for its smoky flavor. Next, heat 2 tablespoons of olive oil in a large skillet over medium heat. Once it shimmers, add the sausage slices. Cook for 4-5 minutes until they are browned and crispy. Remove the sausage and set it aside on a plate. In the same skillet, add 1 tablespoon of olive oil. Heat it up, then add the chopped onion and diced bell pepper. Sauté for 3-4 minutes until they soften. The aroma will fill your kitchen! Now, stir in 3 minced garlic cloves. Cook for 1 minute. You want the garlic to smell good but not burn. After that, add 1 cup of halved cherry tomatoes. Cook for another 2-3 minutes until they soften and juice up. Now we add flavor! Sprinkle 2 teaspoons of Cajun seasoning, 1 teaspoon of smoked paprika, and 1/2 teaspoon of cayenne pepper over the mixture. Stir well, so the spices coat all the veggies. It's time to combine everything! Add the cooked sausage back into the skillet. Now, toss in the shrimp. Cook for 3-4 minutes until the shrimp turns pink. It should not be translucent anymore. Next, gently fold in 2 cups of fresh spinach. Cook it just until it wilts, which takes about a minute. Taste your dish and adjust the salt and black pepper if you need to. Before serving, let the skillet cool slightly. This allows the flavors to meld together. For a fun twist, serve it bubbling hot straight from the skillet. Garnish with fresh parsley for a pop of color. You can find the full recipe for more details! To make Cajun Shrimp and Sausage Skillet shine, use bold spices. I recommend Cajun seasoning, smoked paprika, and cayenne pepper. These spices bring warmth and depth. You can adjust the cayenne to match your heat level. If you like it spicy, add more. If not, skip it. Cooking techniques matter too. Sautéing the sausage until it's crisp adds flavor. Use a hot skillet to get that nice sear. It helps lock in juices and flavors. When you add the garlic, stir it for just a minute. This way, it becomes fragrant but does not burn. Garnishing makes your dish look great. I love using fresh parsley. It adds a pop of color. Serve the dish hot from the skillet for a cozy feel. You can also sprinkle some extra Cajun seasoning on top for flair. For a full meal, pair it with crusty bread or a scoop of rice. Both options soak up the tasty juices. Enjoy the vibrant colors and flavors. This dish not only tastes good but looks amazing too. For the full recipe, check the detailed instructions. {{image_4}} You can switch shrimp for chicken or tofu. Chicken works well in this dish. Cut it into small pieces to cook evenly. Use boneless chicken thighs for more flavor. Tofu is a great choice for a plant-based meal. Press the tofu before cooking to remove excess water. This will help it absorb flavors better. For sausage, try different types to change the taste. Andouille adds a smoky kick. Italian sausage gives a milder flavor. You can even use turkey sausage for a leaner option. Each type brings its own unique flavor, so feel free to experiment. Adding vegetables can make this dish even better. You can include zucchini, mushrooms, or corn. These veggies add color and texture. Try seasonal veggies like asparagus in spring or squash in fall for a fresh twist. You can also add leafy greens such as kale or Swiss chard. They cook down nicely and boost nutrition. Mixing different vegetables can create a unique taste each time. Don't be afraid to try what you have on hand or what looks fresh at the store. To keep your Cajun shrimp and sausage skillet fresh, follow these steps: - Cool Down: Let the dish cool before storing. - Refrigerate: Place leftovers in an airtight container. Store in the fridge. - Label: Write the date on the container to track freshness. For freezing, do this: - Use Freezer Bags: Transfer the cooled dish into freezer bags. - Remove Air: Squeeze out as much air as possible to avoid freezer burn. - Freeze Quickly: Lay the bag flat in the freezer for easy stacking. In the fridge, the dish lasts about 3-4 days. After that, the flavors may fade. For frozen leftovers, expect about 2-3 months of good quality. Watch for these signs of spoilage: - Off Smell: A sour or strange odor indicates it's bad. - Color Changes: If the shrimp looks dull or gray, discard it. - Texture Issues: If it feels slimy or sticky, do not eat it. How spicy is Cajun Shrimp and Sausage Skillet? The spice level can vary. I use cayenne pepper to add heat. You can adjust it to your taste. If you prefer mild, use less cayenne. If you love heat, add more. The Cajun seasoning also brings spice, so taste as you cook. Can I make this recipe ahead of time? Yes, you can make this dish ahead. Cook it, let it cool, and store it in the fridge. It stays good for about three days. Reheat it gently on the stove or in the microwave. The flavors will blend even more over time. What can I serve with Cajun Shrimp and Sausage Skillet? This dish pairs well with many sides. You can serve it over rice or pasta. Crusty bread is also a great choice. A simple salad on the side adds freshness. Choose what you like best! Is this recipe suitable for meal prep? Absolutely! This dish works great for meal prep. Divide it into containers for easy lunches or dinners. It keeps well and reheat easily. Just remember to store it properly in the fridge. Can I use frozen shrimp instead of fresh? Yes, you can use frozen shrimp! Just thaw them before cooking. Rinse them under cold water to remove ice. Frozen shrimp can be just as tasty when cooked right. For the full cooking instructions, check the [Full Recipe](#). In this blog post, we explored the key ingredients for a Cajun Shrimp and Sausage Skillet. I shared tips for selecting the best shrimp and sausage, along with helpful alternatives. You learned step-by-step cooking methods and how to enhance flavors. I also covered variations to suit your taste and how to properly store leftovers. This dish is versatile and inviting, making it a great addition to your meals. Enjoy cooking and sharing this vibrant dish with others!

Cajun Shrimp and Sausage Skillet Flavorful Quick Fix

PREV 1 … 13 14 15 … 20 NEXT
homedishhaven

explore

DessertsDinnerAppetizersDrinks

Our Policies

  • Cookie Policy
  • Copyright Policy
  • Disclaimer
  • GDPR Policy
  • Terms Of Use
Back to Top
  • About
  • Contact Us
  • Privacy Policy
© 2025 homedishhaven