
Indulging in a perfectly made Vanilla Bean Crème Brûlée feels like a taste of heaven. This dish offers rich and creamy delight with its smooth custard and crispy sugar top. Whether for a special occasion or just because, you can master this classic dessert with my step-by-step guide. Let’s dive into the key ingredients, simple techniques, and tips to make your crème brûlée shine!

Ingredients
Key Ingredients for Vanilla Bean Crème Brûlée
– Heavy cream: This creamy base gives the dessert its rich and smooth texture. The fat content helps create that luxurious mouthfeel we love.
– Vanilla bean: Choose a fresh, high-quality vanilla bean. The flavor from a whole bean is much richer than extract. Look for beans that are plump and fragrant.
– Egg yolks: These are key for a silky custard. They provide richness and help thicken the mixture, creating the perfect texture.
Additional Ingredients for Garnishing
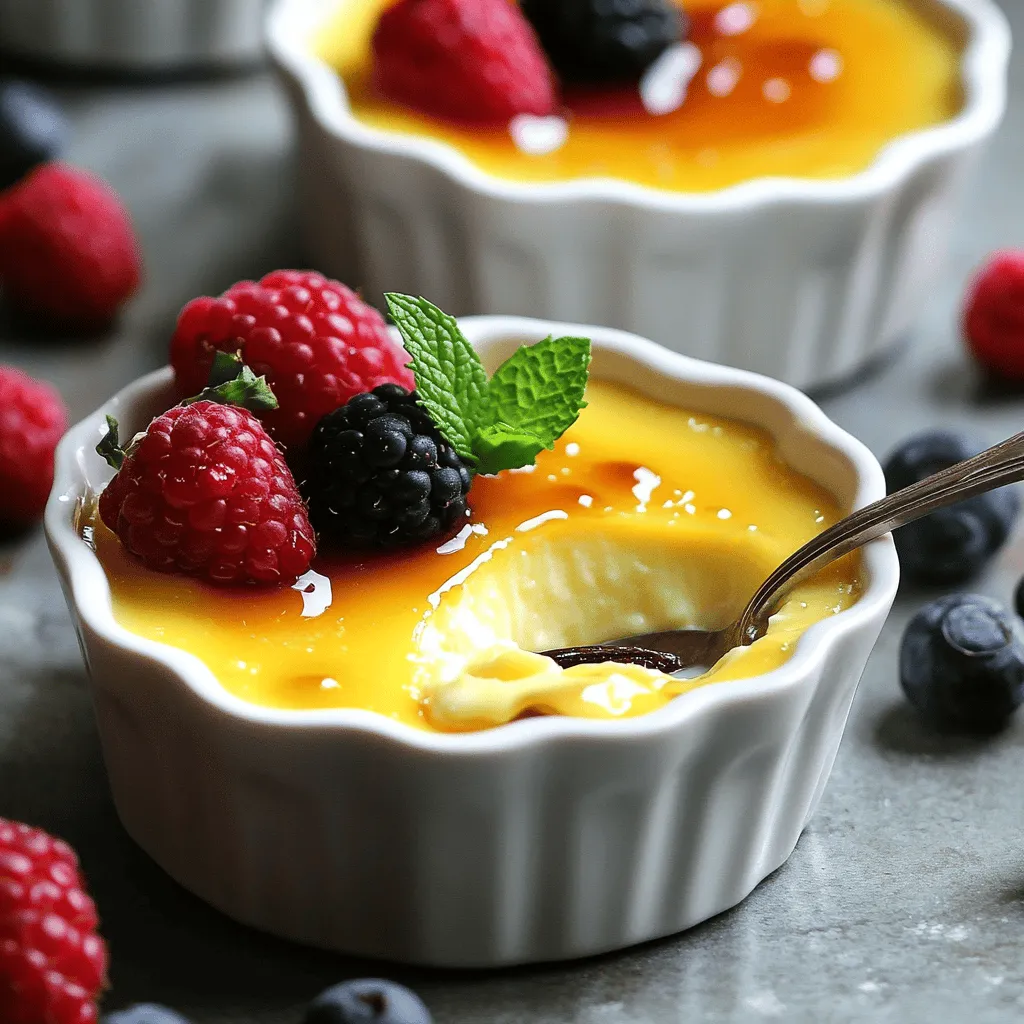
– Fresh berries: Raspberries and strawberries make great choices. They add a pop of color and a tart balance to the sweet custard.
– Mint leaves: A sprig of mint adds a fresh touch. It not only looks nice but also enhances the dessert’s flavor.
– Granulated sugar: Use this for caramelization. A thin, even layer on top forms the crunchy shell we crave. Make sure to sprinkle it evenly for the best results.
Step-by-Step Instructions
Step 1: Preparing the Cream Mixture
To start, you need to simmer the heavy cream. Combine 2 cups of heavy cream with a split vanilla bean. If you prefer, you may use 2 teaspoons of vanilla extract. Heat this mixture over medium flame. Watch for the cream to just start simmering. This is when you take it off the heat.
Let the mixture sit for 15 minutes. This step is very important. It allows the rich vanilla flavor to infuse into the cream. If you skip this, the flavor will be less strong.
Step 2: Making the Custard Base
Next, you will make the custard base. In a bowl, whisk together 5 egg yolks, 1/2 cup of sugar, and 1/4 teaspoon of salt. Whisk until the mixture is pale and creamy. This should take a few minutes.
Now, you will add the warm cream mixture to the egg yolks. Do this slowly while whisking. This keeps the eggs from scrambling. Once combined, strain the mixture through a fine sieve. This ensures a smooth custard that is free of lumps.
Step 3: Baking and Chilling
Now, it’s time to bake. Arrange four ramekins in a baking dish. Pour the custard into the ramekins evenly. Next, create a water bath. Pour hot water into the baking dish until it reaches halfway up the sides of the ramekins. This helps the custard bake evenly.
Bake in a preheated oven at 325°F for 30-35 minutes. The edges should be set, and the center should jiggle slightly. Once done, carefully take out the ramekins and let them cool for about 30 minutes at room temperature.
After cooling, cover each ramekin with plastic wrap. Place them in the refrigerator for at least 2 hours. This chilling time is key for the flavors to develop fully.
Tips & Tricks
Perfecting the Custard Consistency
To avoid a scrambled egg texture, always whisk the egg yolks and sugar until they are pale and creamy. This step makes your custard smooth. When mixing in the warm cream, do it slowly. This helps the eggs heat gently, preventing them from cooking too fast.
Straining the mixture is key for a silky finish. Use a fine sieve to catch any lumps or bits. Pour the custard slowly through the sieve into a jug. This ensures a smooth texture and removes any scrambled bits.
Caramelizing Sugar for the Perfect Crust
Using a kitchen torch gives you the best results. Hold the torch about two inches above the sugar. Move it in small circles until the sugar melts and turns golden brown. This creates a perfect crust.
If you don’t have a torch, you can use a broiler. Place the ramekins on a baking sheet. Set your oven to broil, and watch closely. This method can burn quickly, so stay nearby.
Suggested Pairings and Serving Tips
Crème brûlée pairs well with light drinks. A nice dessert wine or a cup of strong coffee works great. These drinks balance the rich flavors of the dish.
For serving, keep it simple yet elegant. Place fresh berries on top, like raspberries or strawberries. A sprig of mint adds color and flavor. Serve the ramekins directly for a lovely presentation. This makes the dessert look even more inviting.
Variations
Flavored Crème Brûlée Variations
You can easily change up your crème brûlée flavors. Chocolate is a great choice. Just melt some good chocolate and mix it in when you combine the cream and egg yolks. It gives a rich taste that chocolate lovers will adore. Coffee is another fun option. Brew a strong cup of coffee, and mix it with the cream. This adds a bold kick.
Citrus flavors can brighten up your dessert. Add some lemon or orange zest to the cream. This twist makes the dish fresh and zesty. You can also try using spices like cinnamon or nutmeg for a warm flavor. The possibilities are endless!
Dietary Modifications
For those who can’t have dairy, there are great options. You can use coconut cream instead of heavy cream. It gives a nice, creamy texture. Almond milk can work too, but it’s thinner.
If you want a vegan version, try aquafaba. This is the liquid from a can of chickpeas. Whip it up until it’s fluffy, and use it instead of egg yolks. Combine it with coconut cream for a rich flavor. You won’t miss the eggs at all!
Seasonal Inspirations
Seasonal ingredients can make your crème brûlée special. In the fall, you can add pumpkin puree and spices like cinnamon or ginger. This creates a cozy dessert perfect for cooler weather.
During the holidays, use peppermint extract for a festive touch. Top with crushed candy canes for extra fun. You can also make a berry version in summer. Blend fresh berries into the cream for a fruity flavor. These creative adaptations can make your crème brûlée stand out at any event!
Storage Info
How to Store Leftover Crème Brûlée
To store leftover crème brûlée, keep it in the fridge. Use plastic wrap to cover each ramekin tightly. This helps keep the custard fresh and prevents it from absorbing other smells. It’s best to refrigerate it within two hours after serving.
Freezing Recommendations
You can freeze crème brûlée, but do this before caramelizing the sugar. Place the ramekins in the freezer without the sugar crust. Once frozen, cover them with plastic wrap. When you want to enjoy it, thaw it overnight in the fridge. After thawing, add the sugar and caramelize it just before serving. This keeps the texture smooth.
Shelf Life Expectations
Crème brûlée stays fresh in the fridge for about three days. After that, it may lose its creamy texture. Look for signs that it’s time to toss it, like a sour smell or a watery layer on top. If you see any mold or separation, it’s best to discard it. Always trust your senses to keep your dessert safe!
FAQs
What is the best way to know when crème brûlée is done?
To check if your crème brûlée is done, use the jiggle test. Gently shake the ramekin. If the center has a slight jiggle, it is ready. The edges should be set, while the middle remains soft. Look for a custard that is not too wobbly. You want it to be firm but still creamy. This visual cue helps ensure you achieve that perfect texture.
Can I use vanilla extract instead of vanilla beans?
Yes, you can use vanilla extract instead of vanilla beans. If you do, use about 2 teaspoons of high-quality extract. While vanilla beans give a richer flavor and specks, extract still works well. It provides a nice vanilla taste, though it may lack the depth of the beans. If you have beans, I recommend using them for the best result.
How long does crème brûlée need to set before serving?
Crème brûlée needs to chill for at least 2 hours before serving. Chilling allows the custard to set properly. You can also refrigerate it overnight for deeper flavor. The longer it chills, the better the taste will be. Just make sure you cover each ramekin tightly with plastic wrap.
Can I make crème brûlée without a torch?
Yes, you can make crème brûlée without a torch. If you do not have one, use your oven’s broiler. After adding sugar on top, place the ramekins in the broiler for 1-2 minutes. Watch closely to avoid burning the sugar. This method creates a delicious caramelized crust, just like a torch would.
In this article, we explored the key ingredients needed for a creamy vanilla bean crème brûlée. We discussed how essential heavy cream, quality vanilla beans, and egg yolks create that perfect custard texture. I shared step-by-step instructions to guide you through the cooking process, plus tips for perfecting your dish.
You can get creative with flavors and presentations, too. Remember to store leftovers properly for the best taste. With this knowledge, you’re ready to impress with your delicious crème brûlée. Enjoy making this classic dessert!